If you can sew, you can sew stuffed toys!

Basic sewing skills are all that you’ll need. Whether you sew on machine or by hand, if you can follow written instructions you will be able to make professional-looking toys, which use very little fabric, and not too much time.
Most often it is the simplest advice that is the most helpful! I have put together some tips I have leant over the years, follow these stuffed toy making tips and it’ll be so easy and lots of fun!
OK, Let’s Go…
- Read the instructions BEFORE you begin, OR take it slowly step by step and keep track of where you are in the instructions.
- For good strong seams use quality thread, a new sharp needle and tightly spaced stitching.
- Use a SHARP needle for cotton/non-stretch fabrics, and use a BALL-POINT needle for stretch/knit fabrics like Fleece and jersey fabrics.
- Always start and finish off your sewing securely – on a sewing machine, sew back and forwards a few times to begin and end off and for hand sewing, tie double knots. For machine sewing use a ballpoint needle for fleece and a universal/normal needle for corduroy. Check with your sewing shop for the correct needle to use for other fabric types. For hand sewing I like to use Gutterman upholstery quality polyester thread, but most sewing shops will stock a brand of thick strong thread.
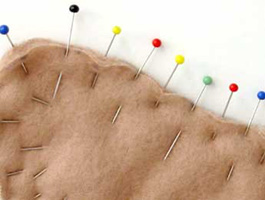
- Use lots of pins!!! A great trick is to pin one pin from the front, one pin from the back of your work as you go along. Always tack your pieces together when advised to do so – it is a real pain in the **** to have to unpick the pieces if they slip as you sew. I know, I’ve had to do it a few times and it’s very annoying. (Lop-sided ears aren’t always as cute as you’d think!) I KNOW that MOST people hate to waste time with pins – but if you do take the time to pin well – your toys turn out perfect – FIRST time, EVERY TIME! : )
- Cut off all your ‘starting and finishing’ threads as you go. This way you won’t end up getting them caught in your seams as you sew. The worst thing I did whilst cutting off threads was to nick a hole in the side of a rhino, which I was making as a gift for a colleague. I didn’t have time to make another one so I patched him with “Fray – Stop” but he didn’t look his best!
- Try and choose fabrics that stretch as well in both directions and don’t fray. A non-fray type of material is great because you can cut out your pieces and come back to sew them later if you cannot do it all in one sitting. It will also prevent the seams from coming apart once a child starts playing with the toy!
- Pre-washing your fabric is always ideal, but I never do! I would say; pre-washing is only necessary if you think your toy is going to get very dirty and need washing. When washing a soft toy, you will need to unpick your final seam of ladder stitches, remove the stuffing, wash gently in warm soapy water and dry thoroughly. You can then reuse the stuffing if you can fluff it out enough or use fresh new stuffing to reassemble your toy.
- If you are making your toy for a child, avoid small beads, ribbons and other embellishments that could become a choking hazard. Safety eyes are recommended for all children’s toys and better still would be to sew on facial features!
In this world of mass production, handmade stuffed toys make fantastic personalized gifts for all sorts of occasions (birthdays, Christmas, even Easter and Valentines day) and for all sorts of ages from welcoming a new baby, to toddlers, teens, grandparents and everyone in between!
If you are a beginner – you can get started with a FREE PATTERN!

When you sign up for the Funky Friends Factory newsletter you’ll receive my Honey Easy Teddy Bear pattern (for FREE) as a little thank you gift!
Follow the easy instructions and pretty soon you’ll have made your very first
(and I’m absolutely certain, not your last) stuffed toy friend!
Happy toy-making!
Bye for now,
Pauline
Please leave a comment here if you have a Handy Tip about Plush/Stuffed Toy/Soft Toy Making that you can share with everyone… !


0 Comments