
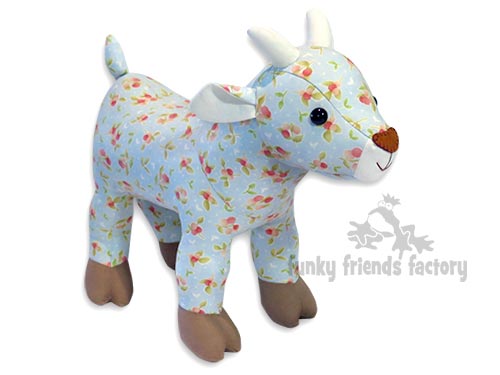
I made this photo tutorial so you can see how to sew my Goat Sewing Pattern ~> scroll down for step-by-step photos!
I created two little baby goats (Giddy and Gus) with variations for short or long ears and an option to add on some little baby goat horns so you can create a bunch of different kids!
.
*** PLEASE NOTE – this is ONLY a PHOTO TUTORIAL ***
The FULL PATTERN IS NOT included here.It is NOT A FREE PATTERN!
I have made this photo tutorial so people who have purchased my Giddy Goats Sewing Pattern can SEE how to sew a toy goat! (I wanted to explain this so you are not disappointed if you have found this page via a search engine and not from the link in my Giddy Goats Sewing Pattern)
Let’s get started!
STEP 1
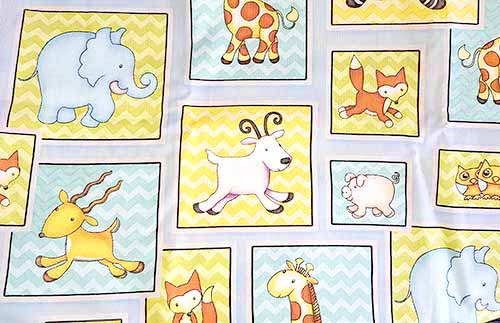
The Giddy Goats can be sewn with most fabrics. I sewed them out of quilting cottons but stretch fabrics like fleece or Cuddle would be nice and snuggly! If you’re lucky – you may even find some goat fabric to sew you goat! 😀
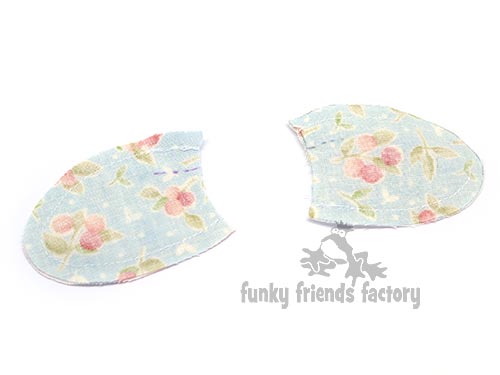
EARS:
STEP 2
Sew the EAR PIECES together in pairs. Sew one MAIN and one CONTRAST piece together for each ear, leaving the short edge open.
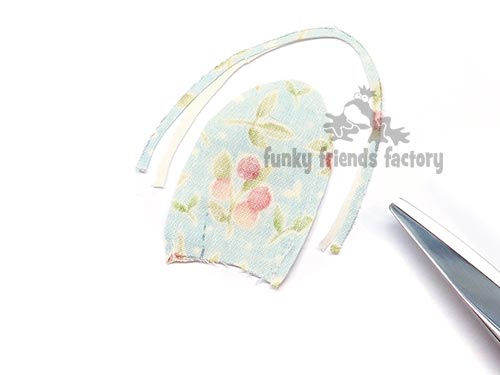
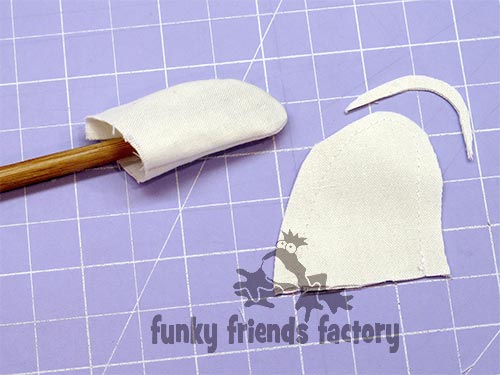
STEP 3
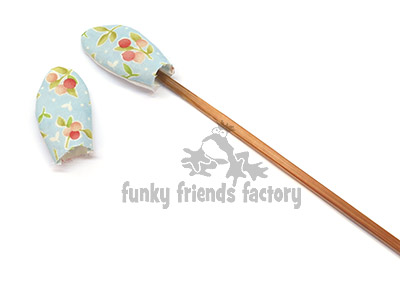
Trim the seam allowance of the EAR PIECES to 3mm (⅛ inch) and turn the EARS right sides out.
TIP: I like to use a wooden chopstick to help turn the seams nicely. Run the end of the stick back and forth along the stitching inside the EARS until the seam is nice and smooth.
*Do NOT stuff the EARS! *
STEP 4
Fold the EARS using the pattern markings to guide you. (The LONG EARS are folded in the middle but the SHORT EARS are not.)

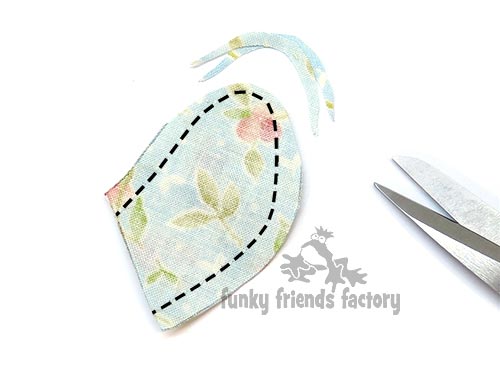
HEAD:
STEP 5
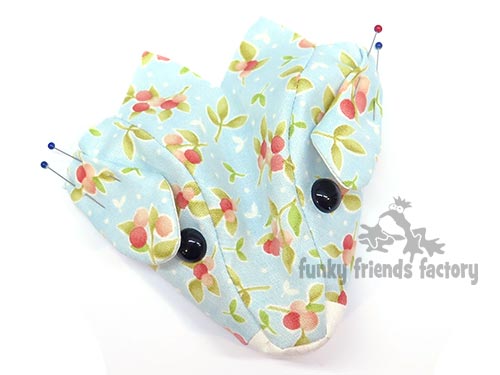
Sew the SNOUT PIECES together at the front from A – B.
STEP 6
Sew the FACE PIECES to the SNOUT PIECES from C – D.

STEP 7
If you are using the LONG EARS, pin them to the FACE PIECES using the pattern markings to guide you. (Ignore this step if using the SHORT EARS!)
TIP: The LONG EARS should be pinned with the fold to the front.

STEP 8a
Sew the FOREHEAD PIECE to the SNOUT & FACE PIECES from F – A – F, with the LONG EARS in between (only if you are doing the LONG EARS!)
TIP: I find it easiest to sew this seam with the FOREHEAD PIECE downwards.
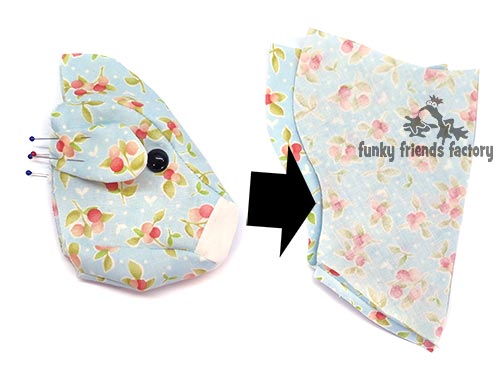
STEP 8b
Clip the seam around the SNOUT area very well so it turns nice and smoothly.
TIP: Don’t worry if you have some small wrinkles in the SNOUT PIECES – these are hard to avoid as the pieces are so small. If you REALLY don’t like the way your nose looks, you can unpick the seam and sew it by hand… BUT I don’t think it’s worth it? 🙂


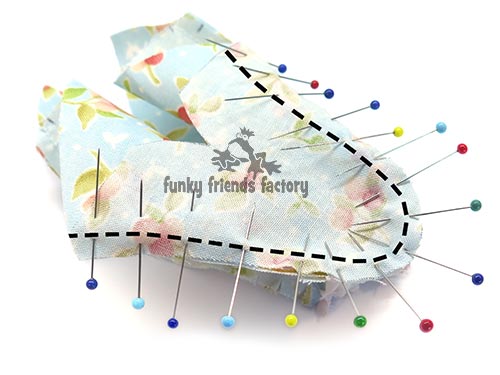
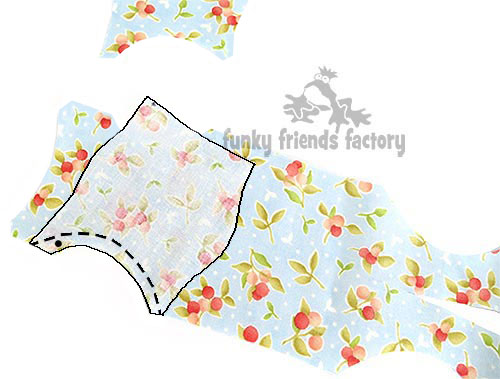
STEP 9
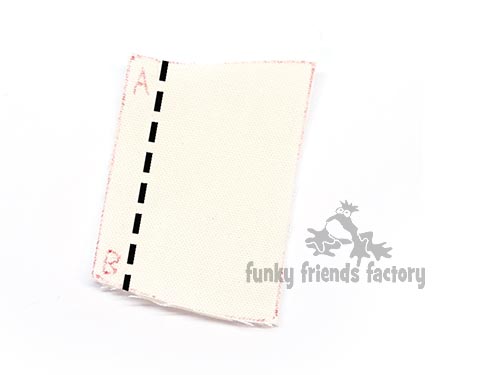
Sew the THROAT PIECE to the SNOUT & FACE PIECES from G – B- G.
I have added a black, dashed, line in the photo below for you to see where the THROAT PIECE is sewn.
TIP: Sew this seam with the THROAT PIECE downwards.

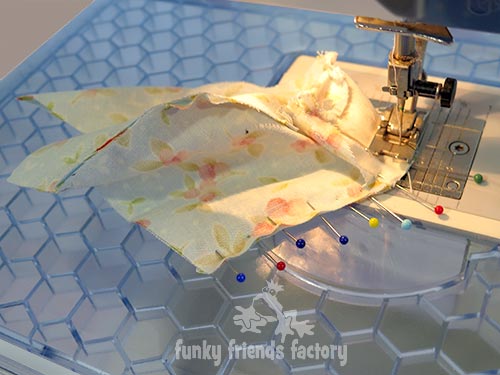
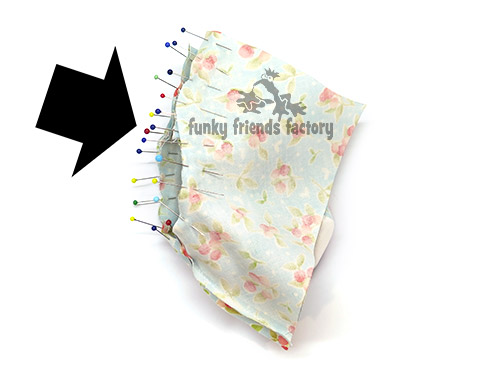
STEP 10
Fold the THROAT PIECE at the throat dart, fabric right sides together, and sew the throat dart closed at H.

EYES:
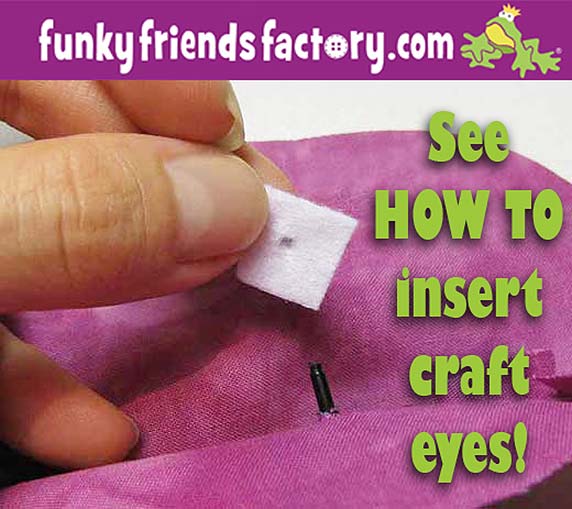
STEP 11
If you are using craft eyes, insert them now.
TIP: I have a tutorial to show you how to insert craft eyes on my blog.

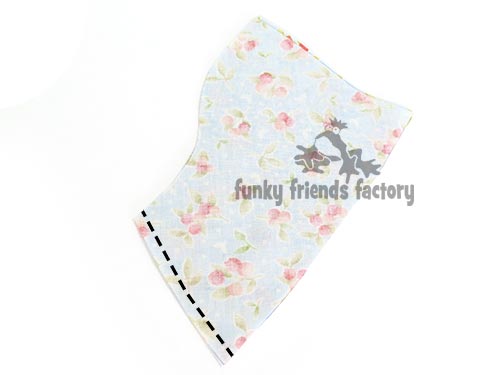
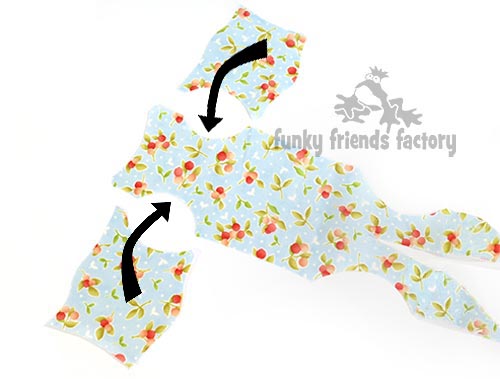
NECK:
STEP 12
Sew the NECK PIECES together, along the front seam, from H – K.
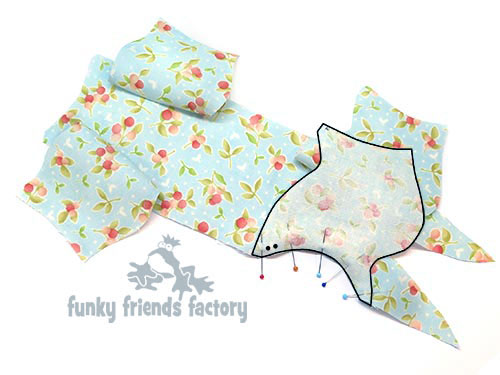
STEP 13
If you are using the SHORT EARS pin them to the FACE PIECES using the pattern markings to guide you.
TIP: The SHORT EARS should be pinned with the fold touching the FACE PIECES.
*** Double check that the EARS are facing the front.***

STEP 14a
Turn the head right sides out and position it ‘inside’ the NECK PIECES with the fabric right sides together so you can pin the NECK PIECES to the FACE, THROAT & FOREHEAD PIECES, with the SHORT EARS in between.
STEP 14b
Sew the NECK PIECES to the FACE, THROAT & FOREHEAD PIECES, with the SHORT EARS in between, from J – H – J.
TUMMY and LEGS:
STEP 15
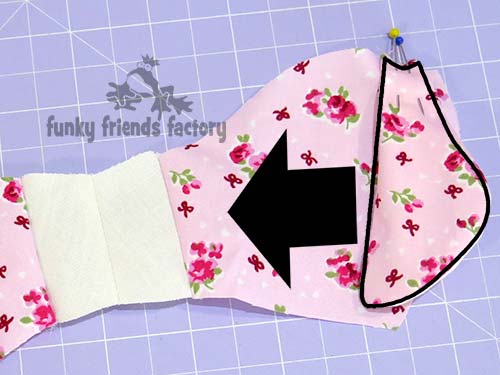
Sew the FRONT LEG PIECES to the TUMMY PIECE matching the single dot pattern markings.
TIP: I find it easiest to sew one LEG PIECE at a time. (I have outlined the FRONT LEG PIECE in black so it’s easier to see!)
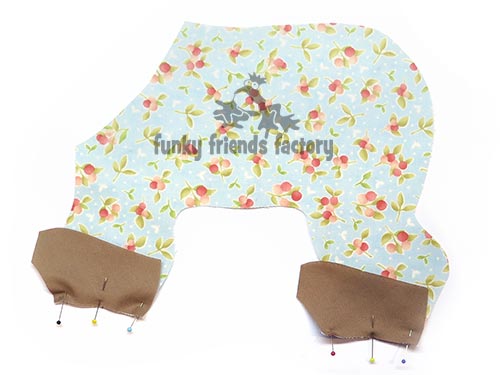
STEP 16
Sew the BACK LEG PIECES to the TUMMY PIECE matching the double dot pattern marking. (I have outlined one of the BACK LEG PIECES in black so it’s easier to see!)
STEP 17a
Sew 4 of the HOOF PIECES to the LEG PIECES matching the star pattern markings.
STEP 17b
Sew the other 4 HOOF PIECES to the BODY PIECES matching the star pattern markings.

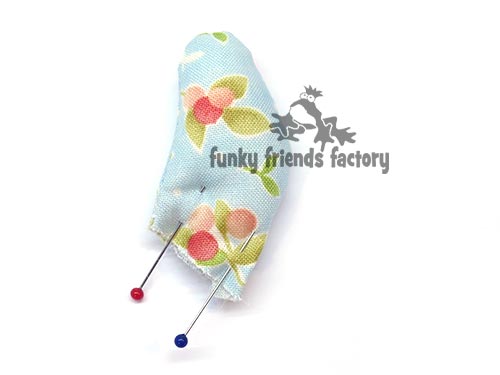
TAIL:
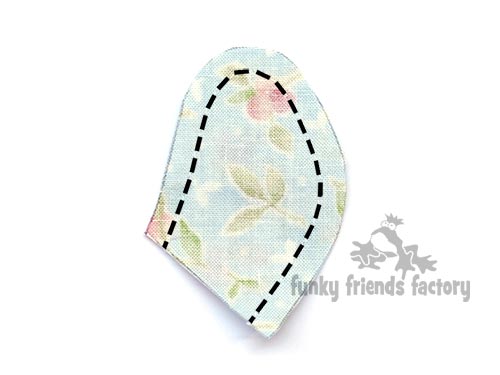
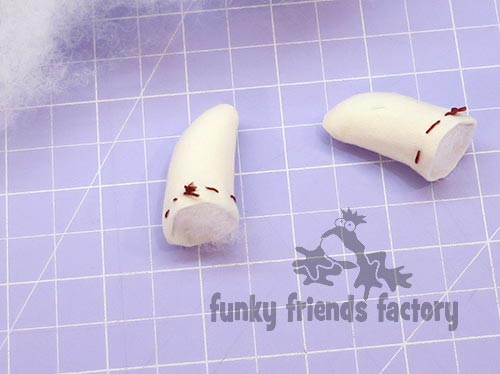
STEP 18a
Sew the TAIL PIECES together, leaving the straight edge open.
STEP 18b
Trim the seam to 3mm(⅛ inch) at the tip of the TAIL and turn the TAIL PIECES right sides out. Run the end of a chopstick along the seam like you did with the EARS.
STEP 18c
Stuff the TAIL with a little bit of toy stuffing and pin the TAIL closed at the straight edge.
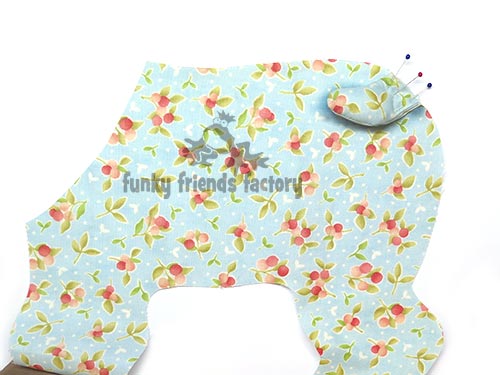
BODY:
STEP 19a
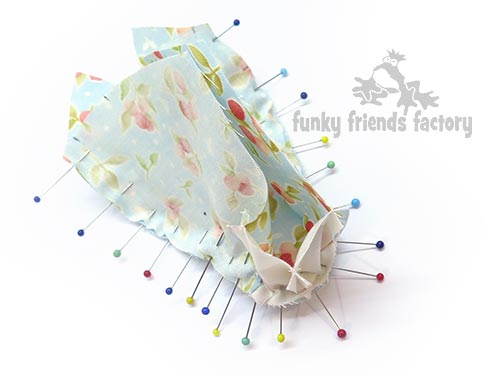
Pin the TAIL to one of the BODY PIECES, using the pattern markings to guide you with the position.
STEP 19b
Pin the BODY PIECES together and sew them together, along the top from M – N, with the TAIL in between.
*I have outlined the TAIL position with a black dashed line because you can’t see it between the BODY PIECES.*
TIP: Turn the pieces right sides out and check that the front of the TAIL (the straighter side) is towards the FRONT! 🙂
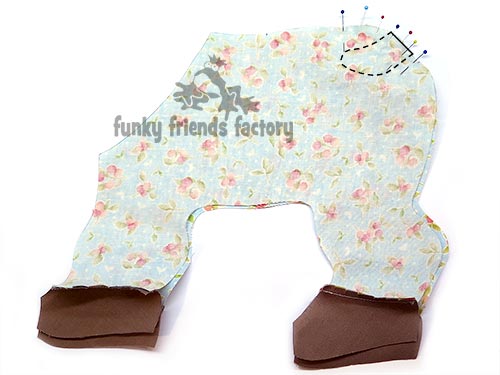
SEW THE SIDES:
STEP 20
The BODY & HOOF PIECES are sewn to the TUMMY, LEG & HOOF PIECES in 3 steps.
STEP 20 l
Pin the back legs closed one at a time. Pin the BODY & HOOF PIECES to the TUMMY, LEG & HOOF PIECES, along the back of the back legs. Sew from the bottom of the HOOF PIECE at Q up past R and stop at the dot pattern marking at S. Repeat on the other side.
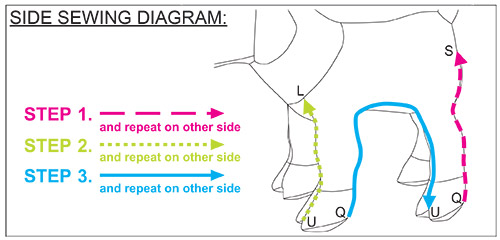

STEP 20 ~ Step 2
Pin the front legs closed one at a time. Pin the BODY & HOOF PIECES to the TUMMY, LEG & HOOF PIECES, along the front of the front legs. Sew from the bottom of the HOOF PIECE at U up past V – L. Repeat on the other side.
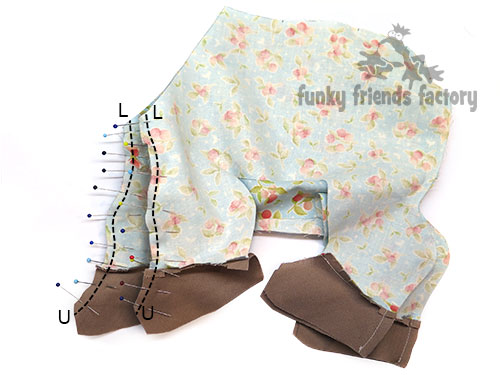
STEP 20 ~ Step 3
Pin the goat closed along the sides, one side at a time. Sew from the bottom of the HOOF PIECE at Q, up past W along the back of the front leg, along the side of the goat and down the front of the back leg to X and down to U on the HOOF PIECE. Repeat on the other side.

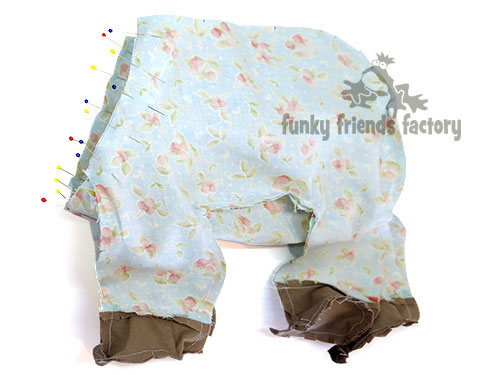
STEP 21
Sew the TUMMY PIECE and BODY PIECES closed from T – S – N.

STEP 22
Pin and sew the HOOF PADS to the bottom of the HOOF PIECES, matching point U and Q.
TIP: Clip the seams well around the HOOVES.


STEP 23
Pin the NECK PIECES to the TUMMY & BODY PIECES at the neck seam. Sew from O – K – O on the other side.
TIP: I find the best way to do this is to turn the head (and NECK PIECES) right sides out and position the goat’s head ‘inside the body’ so you can pin the pieces together at the neck seam, with the fabric right sides together.

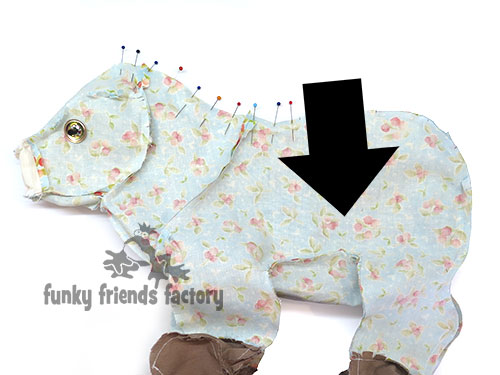
STEP 24a
Pull the head and neck, back out of the body so the pieces are wrong sides out again. Fold the FOREHEAD PIECE at E with the fabric right sides together, and pin the FOREHEAD PIECE together between E and J, and pin the NECK PIECES and BODY PIECES together at the top. Sew the goat closed along the top from E – J – O – P. (Remember to leave the gap open between P and M for turning and stuffing!)
ASSEMBLY:
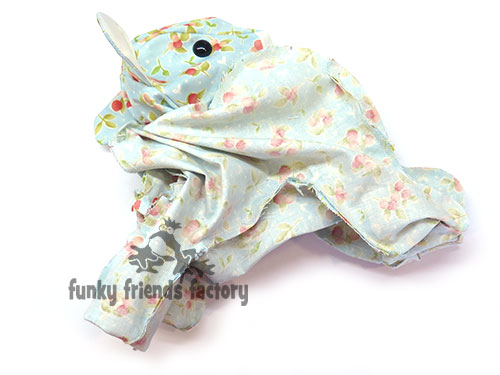
STEP 25
Turn your Goat right sides out through the turning gap on the BODY PIECES.
STEP 26
Stuff the snout area then the head area really well. Stuff the neck area firmly too. Stuff the legs and tail area next and finish stuffing the tummy area last.
TIP: Make sure the LEGS are stuffed well so that the Goat will stand up nicely.

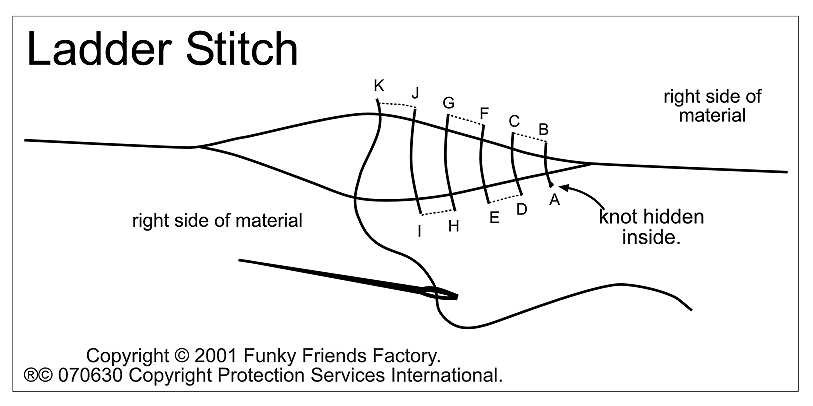
STEP 27
Sew the gap on the BODY PIECES closed with a ladder stitch.
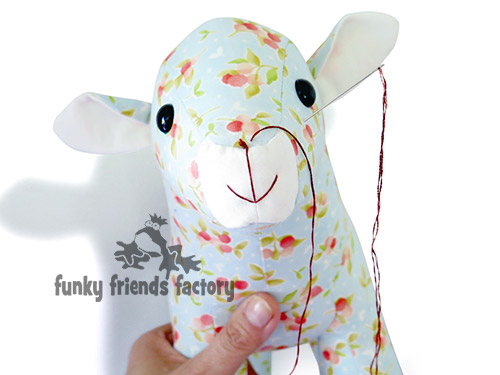
STEP 28
If you are embroidering the eyes do them now. Sew the mouth using black embroidery thread and sew a line to join the mouth to the nose.
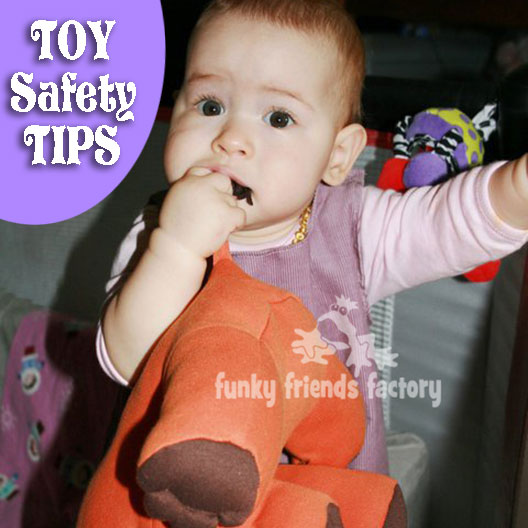
TIP: If the toy is for a young child use a felt circle, or embroider a circle, instead of a craft eye. I have a post about toy safety on my blog with more toy safety tips and guidelines.
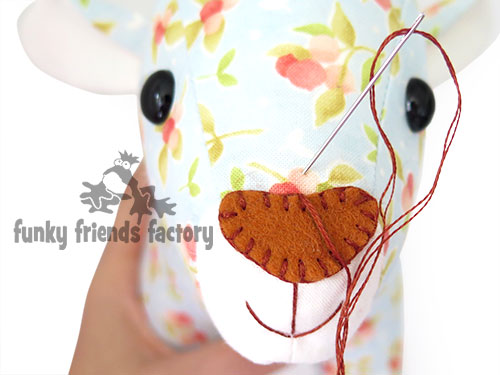
STEP 29
Cut the NOSE PIECE from felt and sew this in place on the FOREHEAD PIECE using embroidery thread and a blanket stitch.
HORNS:
STEP 30a
Sew the HORN PIECES together in pairs, leaving the straight edges open. Trim the seam allowance of the HORN PIECES at the tip of the horns to 3mm (⅛ inch) and turn the HORNS right sides out.
STEP 30b
Fold the HORN PIECES along the straight edge (with fabric wrong sides together) to form a 5mm(¼inch) ‘hem’ and tack (baste) this down.
STEP 30c
Stuff the HORNS with toy stuffing.
STEP 30d
Sew the HORNS onto the FOREHEAD PIECES using the pattern markings (and photo of the goat) to guide you.
TIP: Add a little bit of stuffing if you need to make sure the horns are stuffed firmly and stand up nicely! Don’t forget to remove your tacking (basting) stitches!


Your Goat is ready to LOVE!
Come join the fun on Facebook!
![]()
I LOVE to see how your Funky Friends toys turn out!
When you’ve made your own stuffed toy goats you can come show them off ~>
Post a photo on my Funky Friends Factory Facebook page for me to see and YOU could win a FREE PATTERN!

Till next time,
Happy Sewing,
Pauline
![]()
