
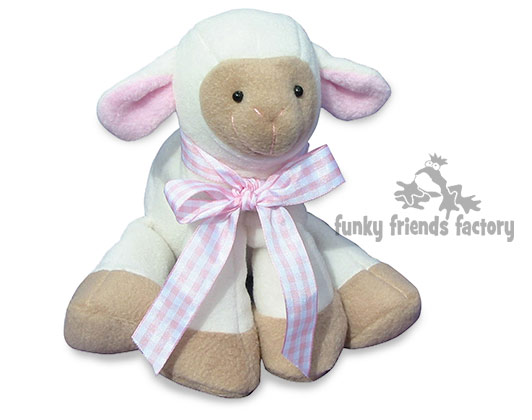
I made this photo tutorial so you can see how to sew my Lamkins Sewing Pattern ~> scroll down for step-by-step photos!
Now you can sew the cutest little Lamkins Lamb baby toy, using most knit/stretch fabrics (eg. Cuddle, minky, velour, chenille and flannelette, for the body). Add some cute highlights by adding any fabric scraps, including quilting scraps for the inner ear pieces, to personalize your toy.
.
*** PLEASE NOTE – this is ONLY a PHOTO TUTORIAL ***
The FULL PATTERN IS NOT included here.It is NOT A FREE PATTERN!
I have made this photo tutorial so people who have purchased my Lamkins Sewing Pattern can SEE how to sew a lamb baby toy! (I wanted to explain this so you are not disappointed if you have found this page via a search engine and not from the link in my Lamkins Lamb Sewing Pattern)
Let’s get started!
STEP 1
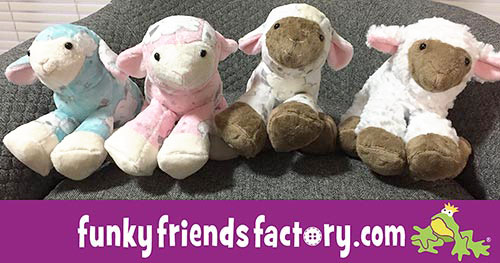
It’s important to choose some KNIT (stretchy)fabric for sewing your lamb. Lamkins looks great in fleece but he’s EXTRA cuddle in Cuddle! Add some cute highlights by adding any fabric scraps, including quilting scraps for the inner ear pieces, to personalize your toy.
* Here I have made Lamkins in Shannon’s Cuddle – prints and solids for the first 3 and the last one is made in super-fluffy Luxe Cuddle®.
HEAD:
STEP 2
Sew the dart in the FRONT of the CENTRE HEAD PIECE. (Do NOT cut and sew the back dart now).
TIP: I’m going to say this again (because I don’t want you to miss it!!!)
***Don’t cut and sew the back dart now!***
EARS:
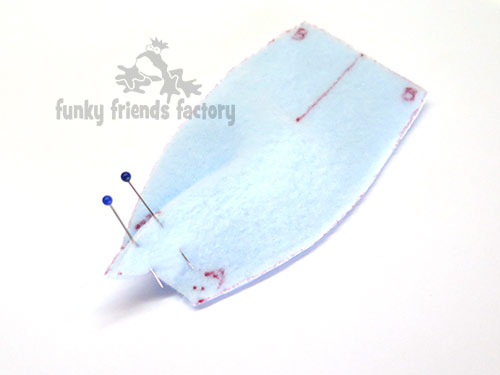
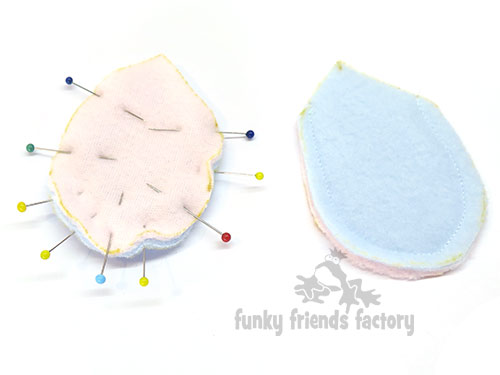
STEP 3a
Sew the EAR PIECES together, (leaving the straight edges open.)
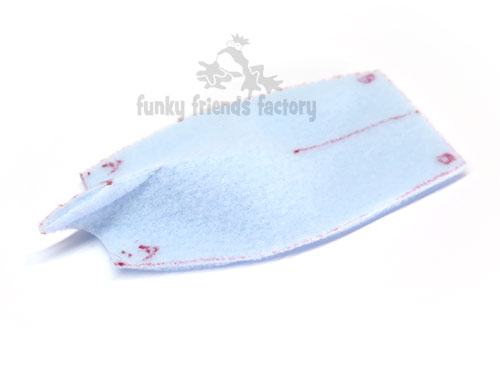
STEP 3b
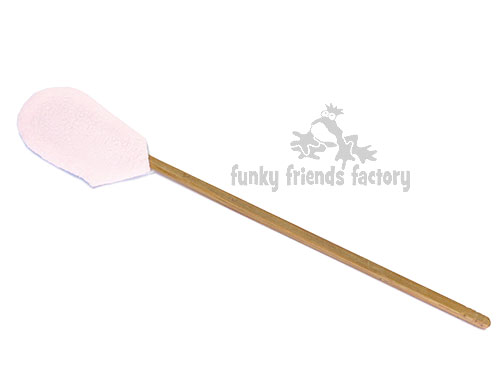
Turn the EAR PIECES right side out. I used a wooden chopstick to smooth out the seams.
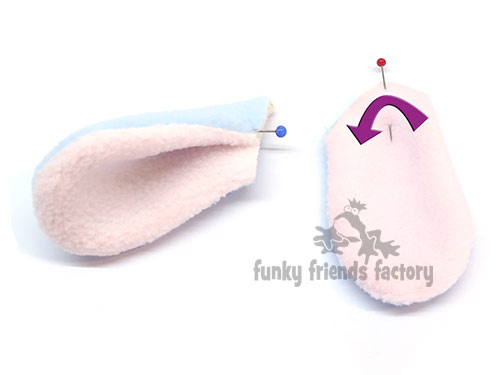
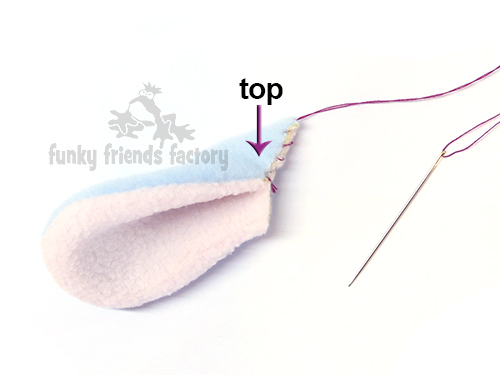
STEP 3c
Fold the top edge of each EAR inwards and pin them in this position.
STEP 3d
Sew the fold of the EAR with a tacking stitch(basting) to keep them in this position.
STEP 4
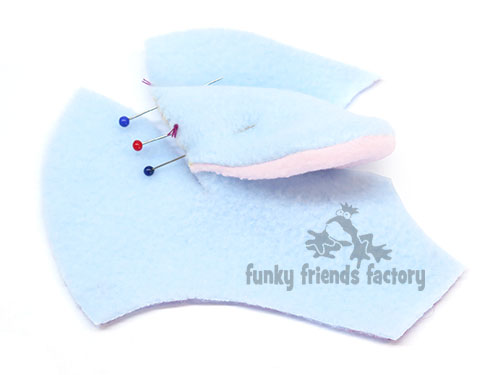
Pin the EARS in place ‘inside’ the dart of each SIDE HEAD PIECE, check that the fold of the EAR faces forwards by placing it on the fold mark on the SIDE HEAD PIECE.
TIP: I put a pin in at the ear fold pattern marking so I can see where to pin the EAR on the right side of the fabric.
STEP 5
Fold the SIDE HEAD PIECES at the ear dart, with the fabric right sides together. Pin the dart closed, with the EARS in between, and sew the EARS in place.
TIP: I like to check and make sure that the fold of the EARS is facing forward now so I can fix it NOW if it’s sewn in backwards!
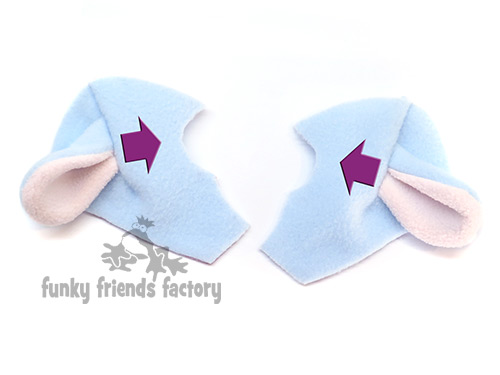
STEP 6
Sew the CENTRE HEAD PIECE to the SIDE HEAD PIECES, from A – B, on each side.
Here you can see these pieces pinned…
… and sewn together.
TIP: I think it would be easier to sew one seam at a time especially if you are a beginner!
FACE:
STEP 7
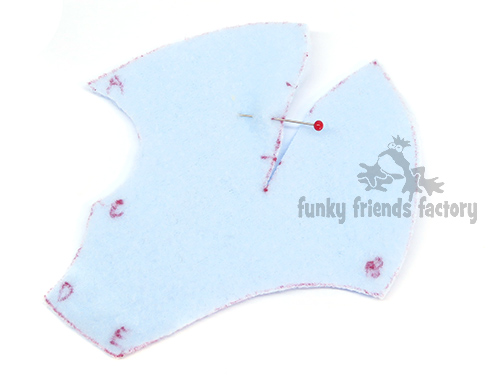
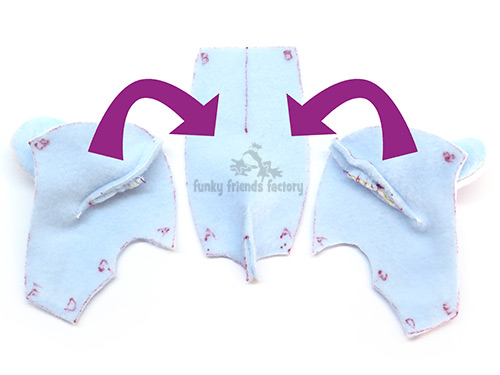
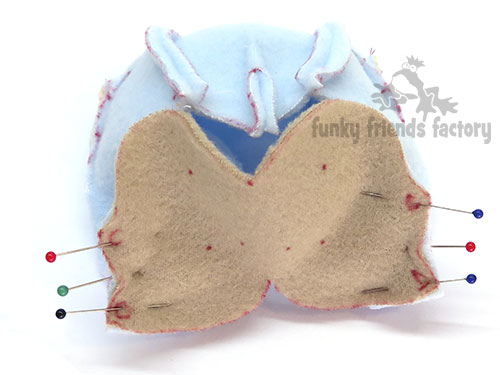
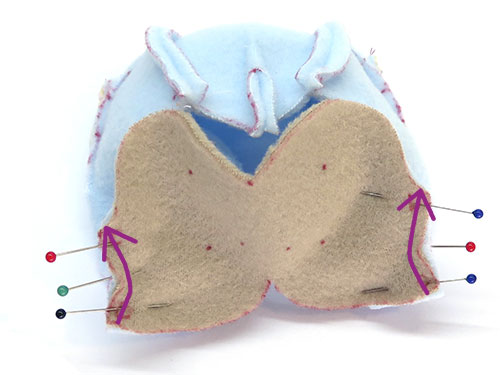
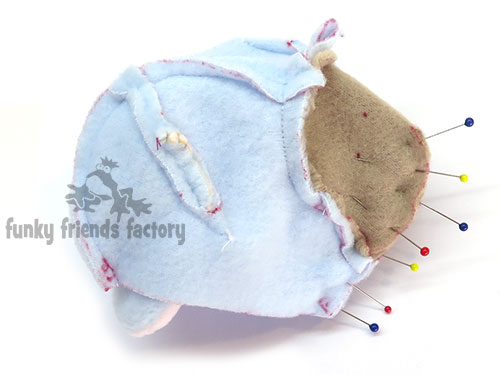
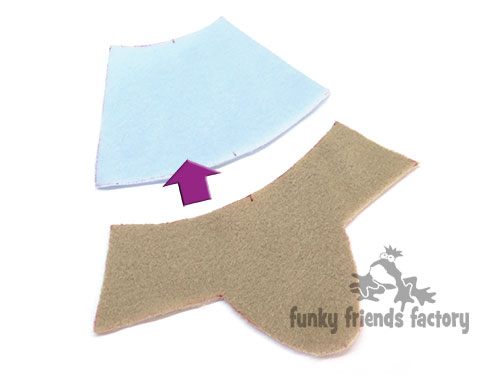
Sew the FACE PIECE to the HEAD PIECES from C – D on each side first.
Here you can see the PIECES pinned together.
And here I have added some purple arrows to show you where to sew on each side.
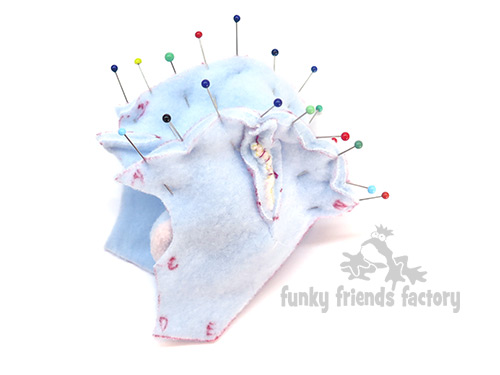
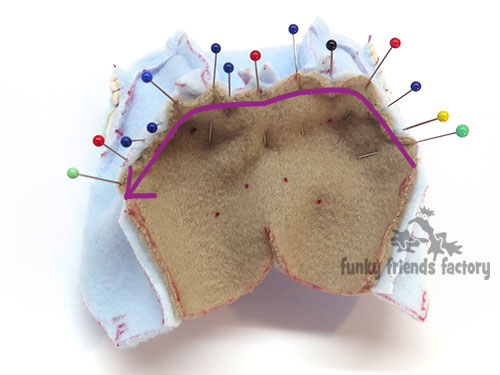
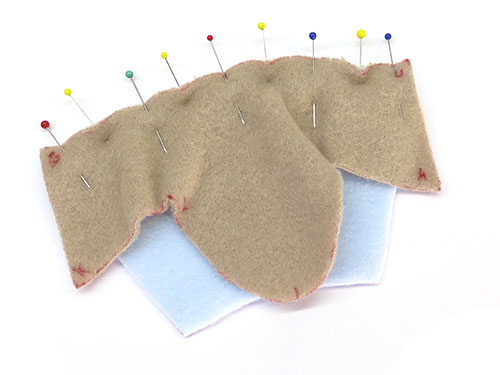
STEP 8
Sew the top face seam between the points marked C. (I have added a purple arrow, in the photo below, to show you where to sew.)
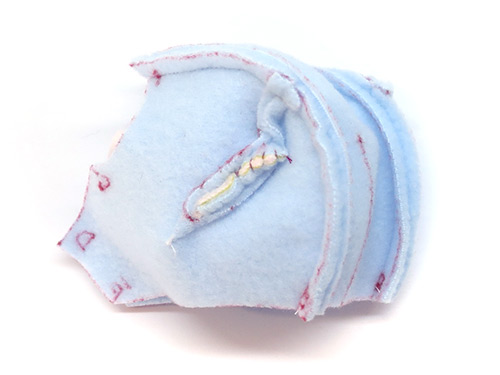
And here you can see the PIECES sewn together.
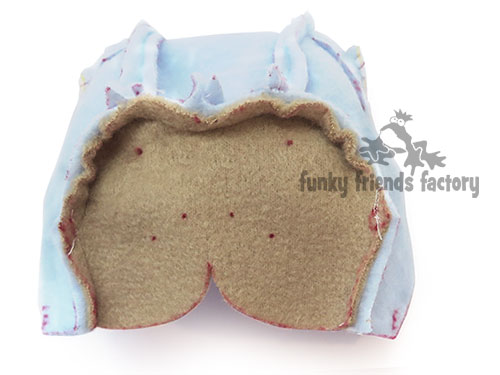
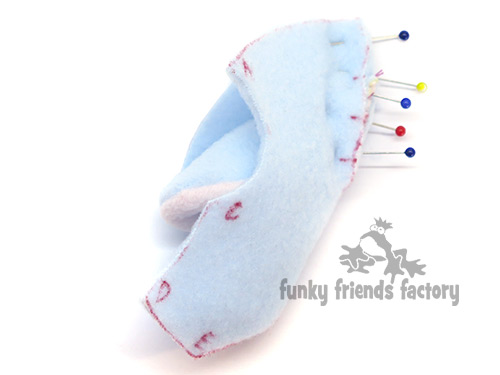
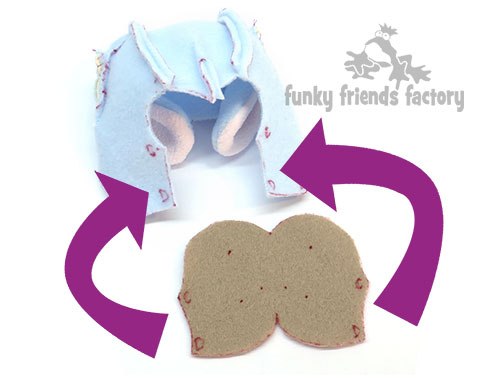
STEP 9
Sew Lamkin’s FACE and SIDE HEAD PIECES closed at the front. Sew from the tip of the nose (*) – D – E.
STEP 10
Turn the HEAD right sides out and check that you have caught all the fabric in the seams and that the FACE is nice and even on both sides.
LEGS:
STEP 11
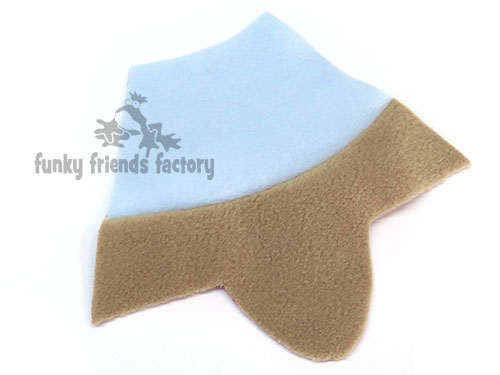
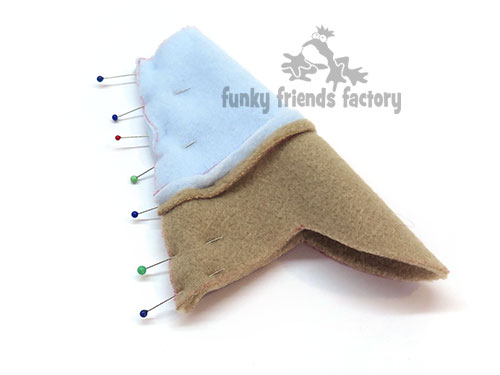
This photo is to show you the LEG and HOOF PIECES before they are pinned together.
… and here they are pinned.
… and sewn! (Repeat x4 of course!).
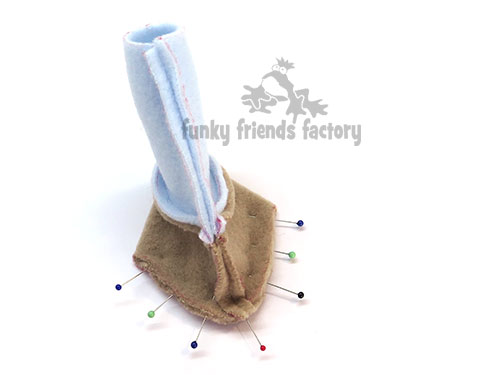
STEP 12
Fold each leg in half with right sides facing and sew down the front seam from J – K.
STEP 13a
Fold the BASE of the HOOF up and pin the side seams.
STEP 13b
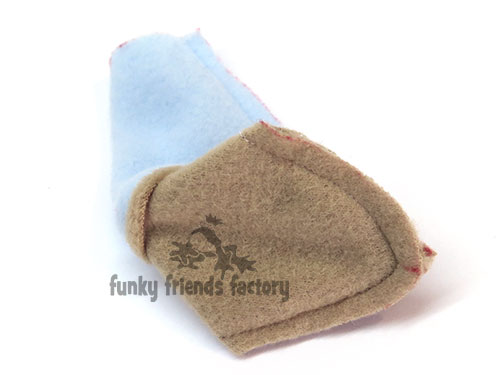
Sew around the front of the HOOF from L – M.
STEP 14
We have a video for you to see how to assemble Lamkins legs.
Click HERE to see the LEGS (Video 1)
STEP 15
We have a video for you to see how to sew Lamkins FACE.
Click HERE to see the FACE (Video 2)
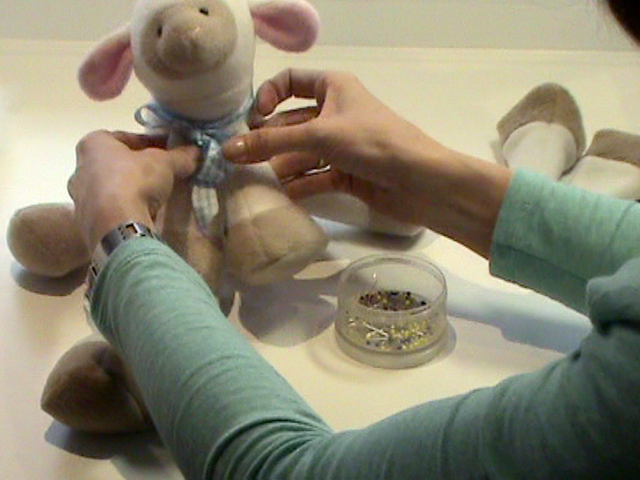
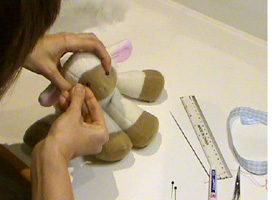
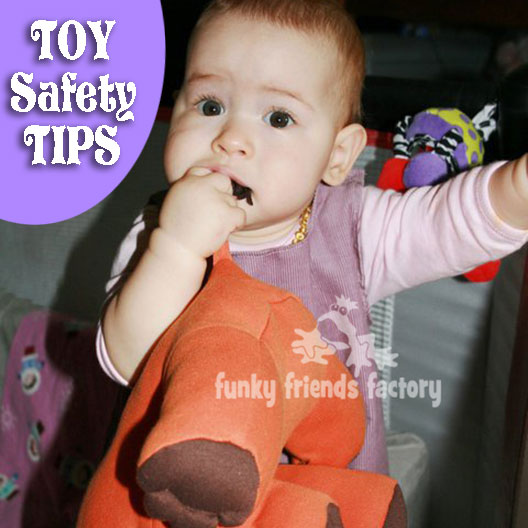
TIP: If the toy is for a young child use embroidery thread to sew a French knot instead of a bead for the EYES. I have a post about toy safety on my blog with more toy safety tips and guidelines.
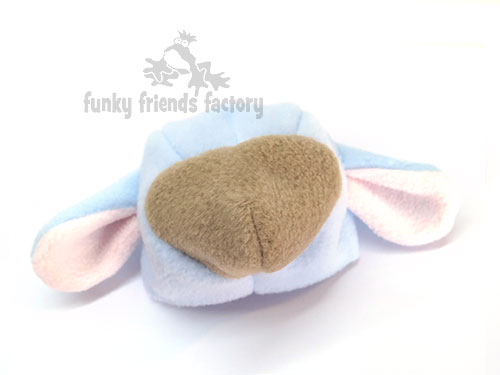
Your Lamb is ready to LOVE!
Come join the fun on Facebook!
![]()
I LOVE to see how your Funky Friends toys turn out!
When you’ve made your own stuffed toy lambs you can come show them off ~>
Post a photo on my Funky Friends Factory Facebook page for me to see and YOU could win a FREE PATTERN!

Till next time,
Happy Sewing,
Pauline
![]()
