
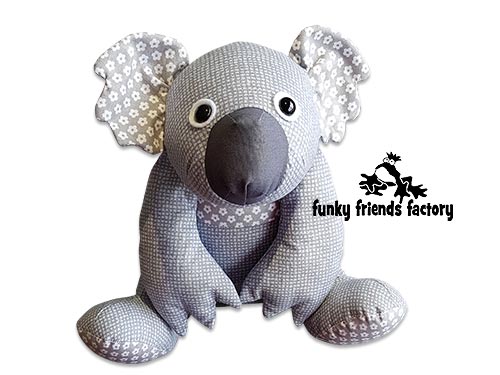
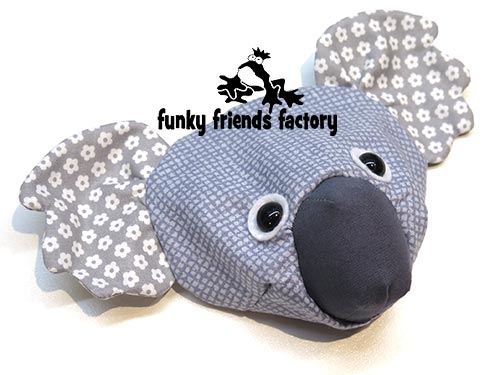
I made this photo tutorial so you can see how to sew my Koala Sewing Pattern ~> scroll down for step-by-step photos!
Kiki Koala is one of my older toy sewing patterns but she is still one of the more popular patterns. Of course Australians LOVE koalas but I think the world has become more aware of how endangered koalas are because of the terrible bushfires we have had lately! If you want to find out how you can help to save the koalas I have some links in this blog post. 🙂
.
*** PLEASE NOTE – this is ONLY a PHOTO TUTORIAL ***
The FULL PATTERN IS NOT included here.It is NOT A FREE PATTERN!
I have made this photo tutorial so people who have purchased my koala sewing pattern can SEE how to sew a koala toy! (I wanted to explain this so you are not disappointed if you have found this page via a search engine and not from the link in my Kiki Koala Sewing Pattern)
Let’s get started!
STEP 1
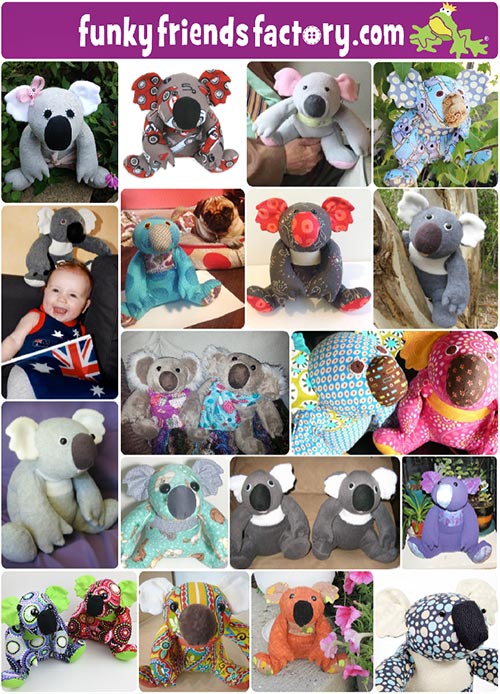
Choose some fabric for your koala toy! This is the fun part! Look how great Kiki Koala looks in ALL SORTS of colours and fabrics! 🙂 Kiki can be sewn in most fabrics. I sewed her out of quilting cottons but stretch fabrics like fleece or cuddle would be nice and snuggly!
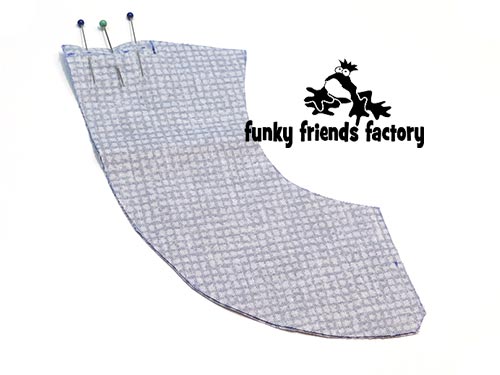
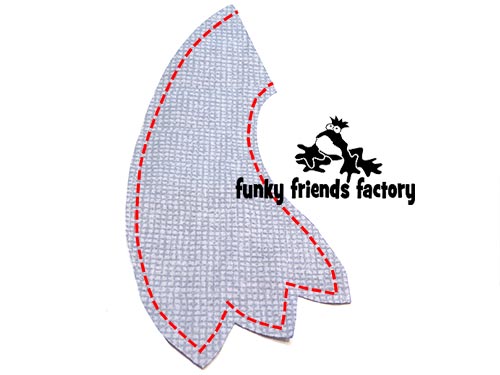
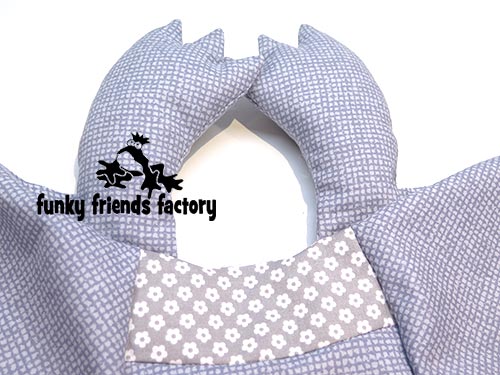
EARS:
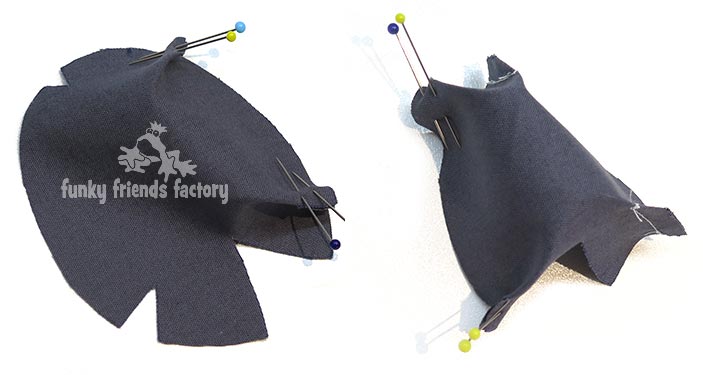
STEP 2
Place the fabric for the EAR PIECES, right sides together, and sew along the sewing line you traced, for both ears.
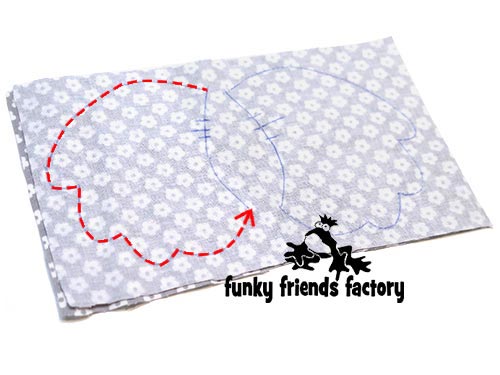
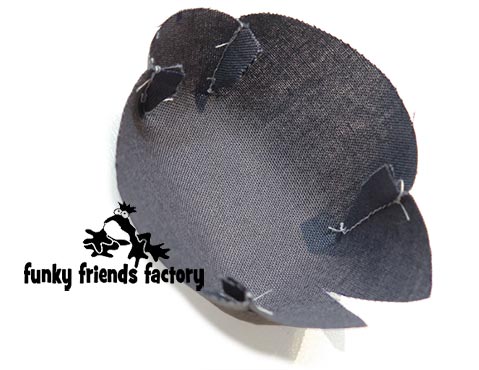
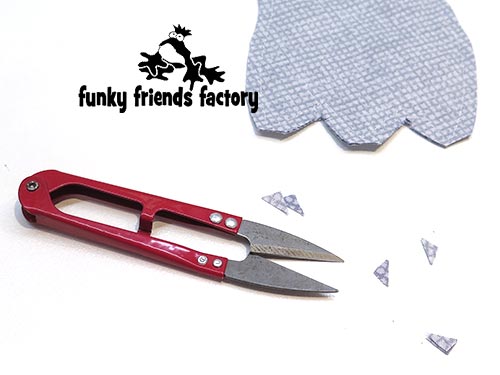
STEP 3a
Cut the ears out with a 3mm(⅛inch) seam allowance. Clip the seams and turn the ears right side out.
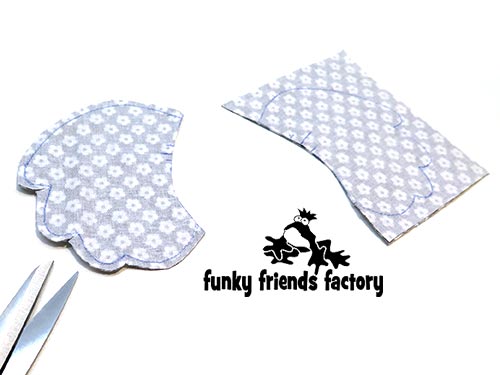
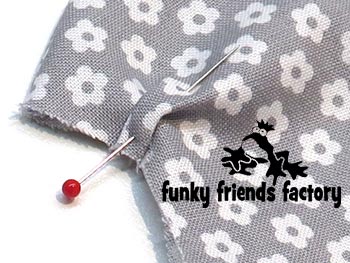
STEP 3b
Fold the ears along the fold line as shown on the pattern piece. Sew the fold closed about 5mm/¼inch from the fold.
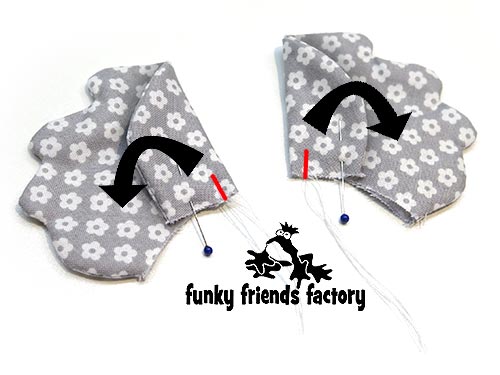
STEP 3c
‘OPEN’ the ear fold and pin the fold of fabric flat. This is at the back of the ear.
TIP: Here is a diagram to help you.

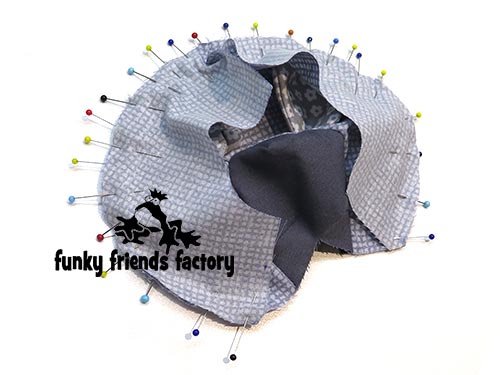
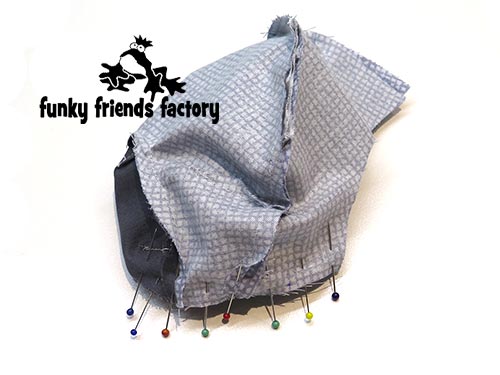
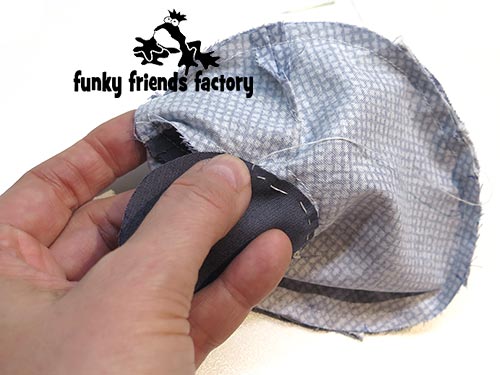
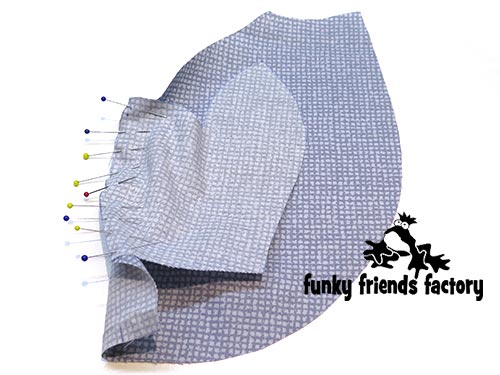
SNOUT:
STEP 4
Fold the SNOUT PIECE as indicated on the pattern markings, with the fabric right sides together, and sew the darts closed. (There are 4 darts.)
TIP: I like to sew the darts 2 at a time.
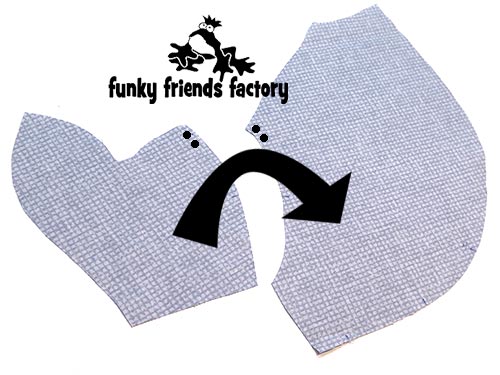
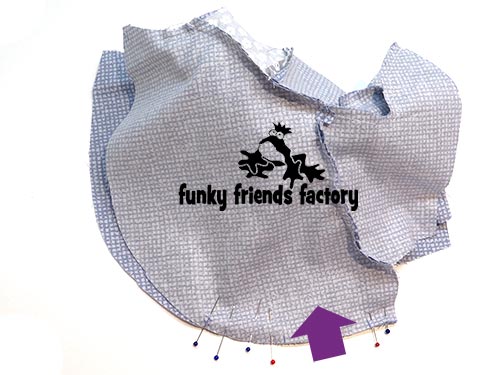
HEAD:
STEP 5
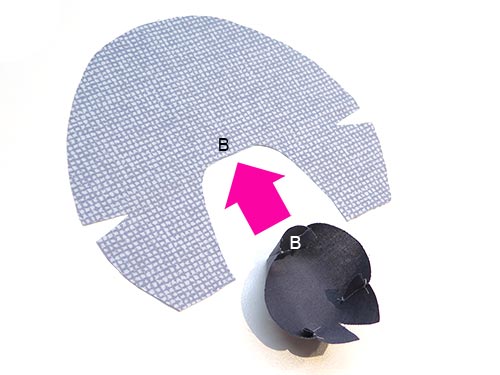
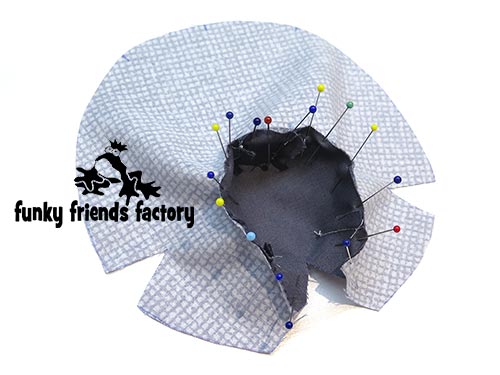
Sew the SNOUT PIECE to the FRONT HEAD PIECE from A – B – A.
TIP: This is a hard seam to sew, take it slow and use LOTS of pins!
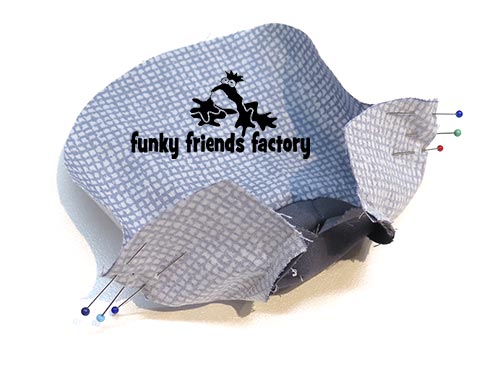
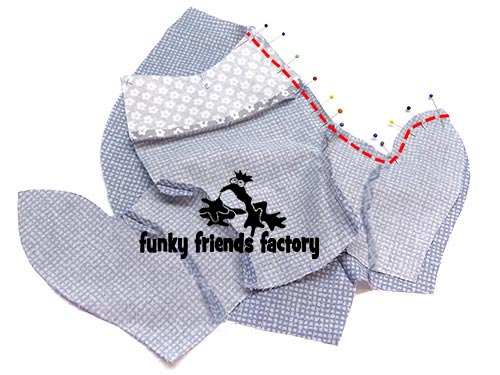
STEP 6
Fold the FRONT HEAD PIECE as indicated on the pattern markings, with the fabric right sides together, and sew the darts closed. (There are 2 darts.)
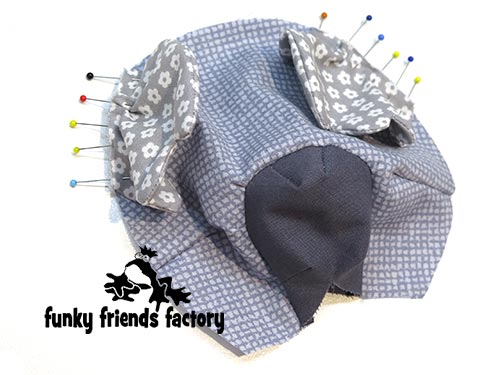
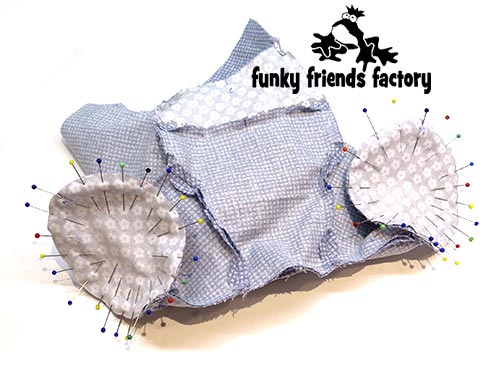
STEP 7
Pin the EARS in place on the FRONT HEAD PIECES and sew them in position with a 3mm(⅛inch) seam allowance.
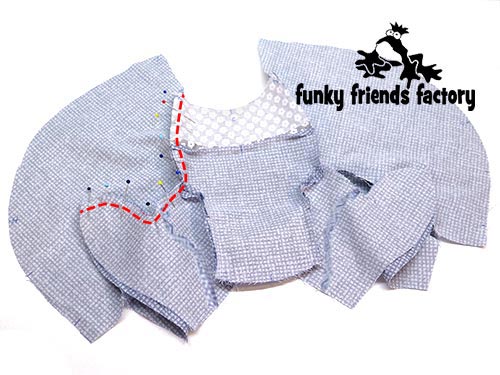
STEP 8
Sew the BACK HEAD PIECES together, as indicated on the pattern markings. Sew from C – D.
STEP 9
Sew the BACK HEAD PIECES to the FRONT HEAD PIECE at the side seam, with the EARS in between. Sew from E – D – E.
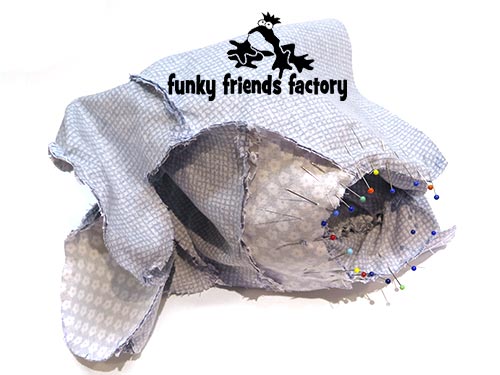
STEP 10
Fold the snout at F so you can sew the SNOUT, FRONT HEAD PIECE and BACK HEAD PIECES closed from F – A – E – G.
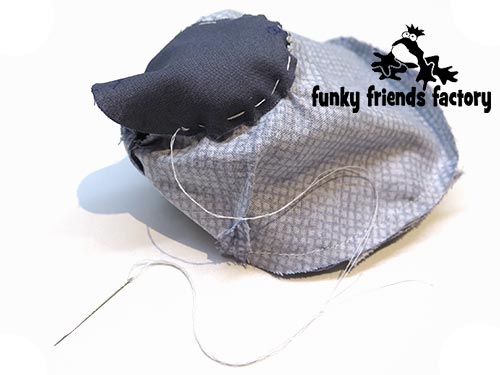
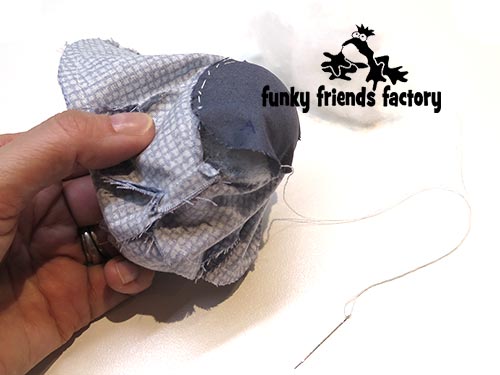
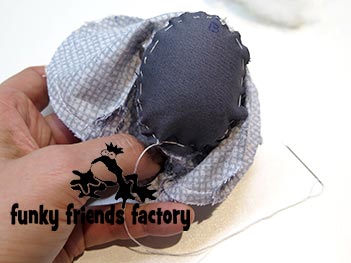
TIP: Now for a clever trick! With the head still inside out, sew the SNOUT BACKING PIECE, by hand, over the opening to the snout (very roughly – no need to be neat!)
I sew from the top, at B, down one side and then I sew down the other side, to keep things even.
Leave just a small opening an push toy stuffing into the snout area. This holds the stuffing inside the snout so you can make it nice and firm.
Stitch the opening closed when you have finished stuffing the snout really well. Turn the head right sides out and admire your koala!
EYES:
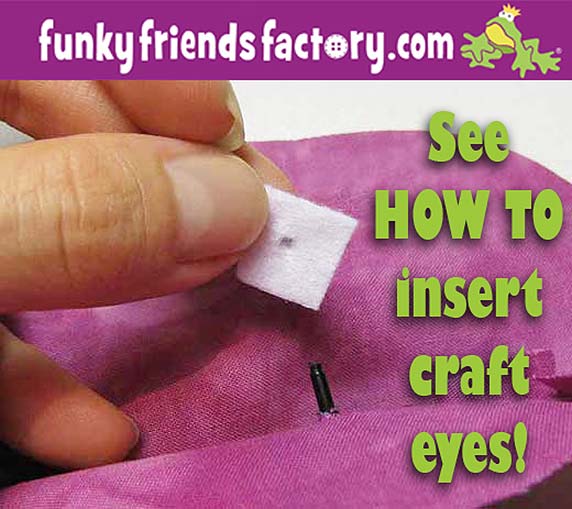
STEP 11
If you are using CRAFT EYES insert them now. If you are using felt for the eyes do this when you add the mouth, after you have stuffed the head.
TIP: I have a tutorial to show you how to insert craft eyes on my blog.
TUMMY and CHEST:
STEP 12
Sew the TUMMY PIECE to the CHEST PIECE, matching the 3 dots of the pattern markings.
LEGS:
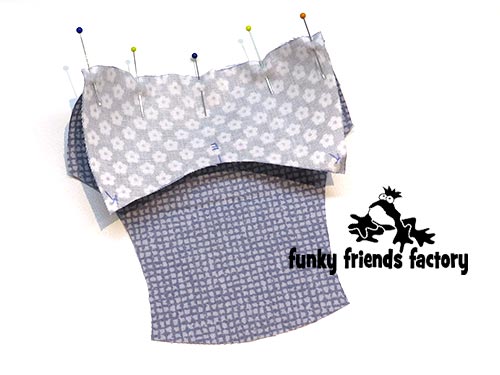
STEP 13a
Sew the INNER LEG PIECES to the TUMMY PIECE, matching the single dot pattern markings.
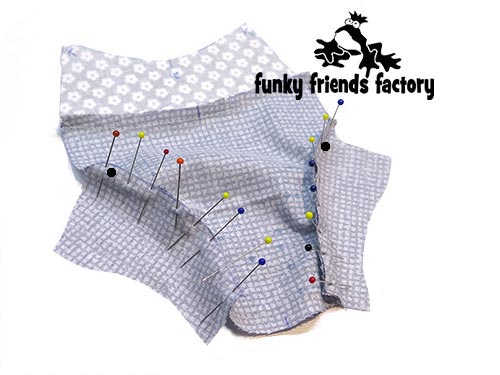
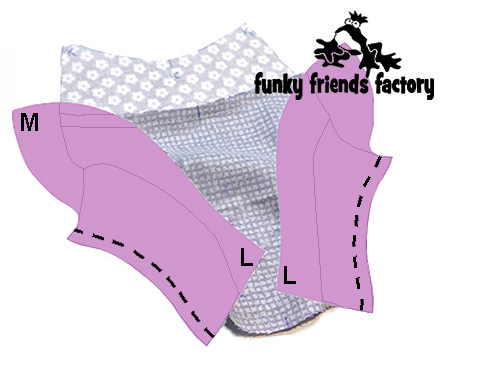
STEP 13b
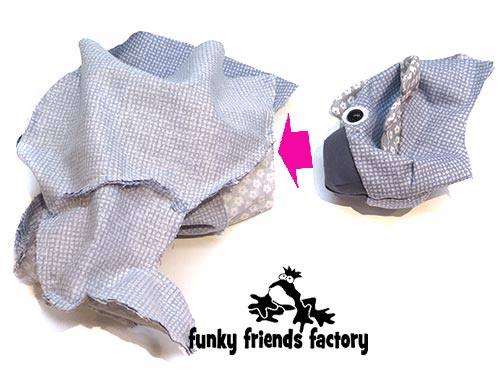
Sew the INNER FOOT PIECES to the INNER LEG PIECES, using the pattern markings to guide you….
*** I FORGOT to take this photo
and I have no more of this grey, check fabric
so I have made a diagram of this step!*** The purple pieces in the photo below are the INNER FOOT PIECES – you can’t actually see the INNER LEG PIECES in this photo so I have outlined them so you can picture where they are underneath the INNER FOOT PIECES.
STEP 14a
Match the double dots of the pattern markings on the OUTER LEG PIECES and the BACK PIECES.
STEP 14b
Pin and sew the OUTER LEG PIECES to the BACK PIECES.
STEP 15a
Sew along the top of one LEG from M, up the sides to K, sewing the INNER LEG & FOOT PIECES to the OUTER LEG PIECES and the TUMMY & CHEST PIECE to the BACK PIECES.
STEP 15b
Repeat for the other side.
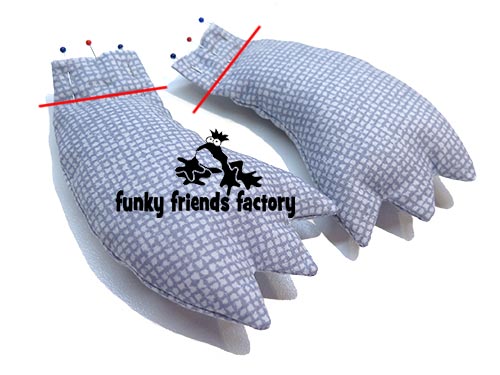
ARMS:
STEP 16a
Sew the ARM PIECES together in pairs, leaving them open at the top for stuffing.
STEP 16b
Trim the extra fabric off at the tip of each ‘finger’ and clip/snip the seams between each of the ‘fingers’ so that they will turn more easily. Turn the ARMS right sides out.
STEP 17
Stuff the ARMS with toy stuffing leaving the top 2cm(about an inch) free of stuffing.
*** THIS IS VERY IMPORTANT:***
Do not stuff the ARMS too much
or it will be hard to turn your toy!
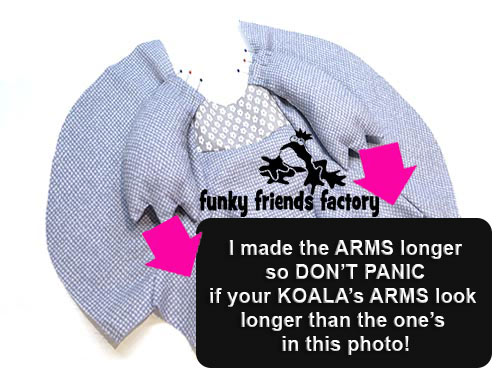
STEP 18
Pin the ARMS to the CHEST and BACK PIECES, matching point K and the star pattern markings on the CHEST PIECE and sew them in position with a 3mm(⅛inch) seam allowance.
TIP: Check that the ‘fingers’ and facing the front! It’s easier to unpick NOW than once you have sewn the head in place!
BACK:
STEP 19
Sew the BACK PIECES together from H- J, leaving the gap to turn and stuff your Koala.
BASE SEAM:
STEP 20
Pin the Koala closed at the base seam, matching points J and L. Sew from L – J – L, along the base of one LEG, across the base of the TUMMY and BACK PIECES and sew along the back of the other LEG.

FOOT PADS:
STEP 21
Pin and sew the FOOT PAD PIECES to the LEG PIECES, matching point L and M.
NECK SEAM:
STEP 22
Pin the head to the body at the neck seam. Sew the neck seam from N – K – G – K – N. This is a hard seam to sew, use lots of pins and take it slow!
TIP: I find the easiest way to do this, is to turn the head right sides out and position it ‘inside the body cavity”.
STEP 23
Pull the head back out of the body and pin the Koala closed at the back. Sew the back closed from C (on the BACK HEAD PIECES) – N – H (on the BACK PIECES).

ASSEMBLY:
STEP 24a
Turn the Koala right sides out, pull the ARMS out first then the HEAD.
*** IF you are finding it hard to pull the ARMS out ~> DON’T WORRY!
Just squeeze the ‘hands’ and pull them out gently.👍😁
STEP 24b
Stuff the LEGS firmly with toy stuffing. Fill the head nice and firmly, then stuff the rest of the body with toy stuffing.

STEP 25
Sew the stuffing gap on the koala’s back closed with a ladder stitch.

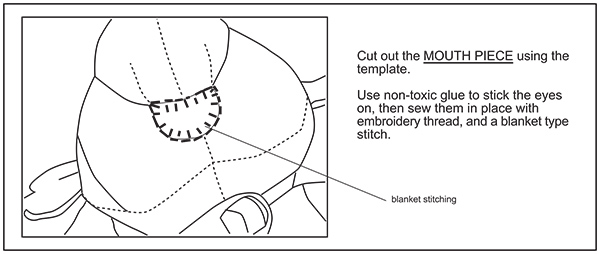
FACE:
STEP 26
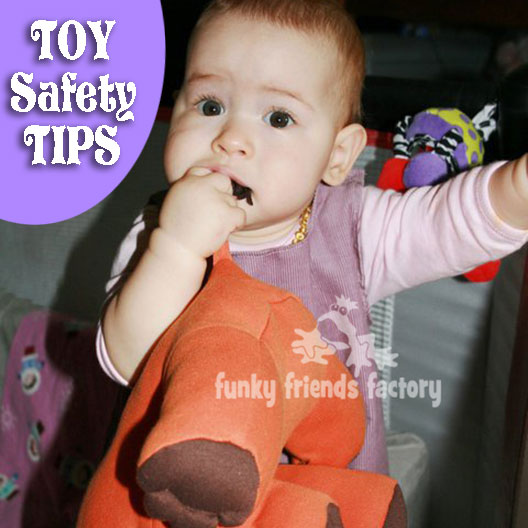
If you are making a toy for a child under the age of 3 years it is safer embroider eyes or to use felt for the eyes.
TIP: I have a post about toy safety on my blog with more toy safety tips and guidelines.
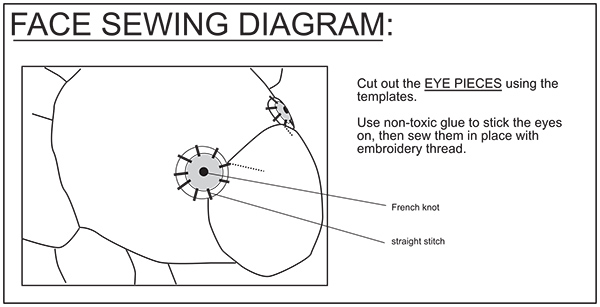
Use the templates to cut pieces of felt for the EYES and NOSE. Using the Face Sewing Diagrams as a guide, sew or glue these in place.
Diagram 1
Diagram 2
Your Koala is ready to LOVE!
Come join the fun on Facebook!
![]()
I LOVE to see how your Funky Friends toys turn out!
When you’ve made your own stuffed toy koalas you can come show them off ~>
Post a photo on my Funky Friends Factory Facebook page for me to see and YOU could win a FREE PATTERN!

Till next time,
Happy Sewing,
Pauline
![]()
