
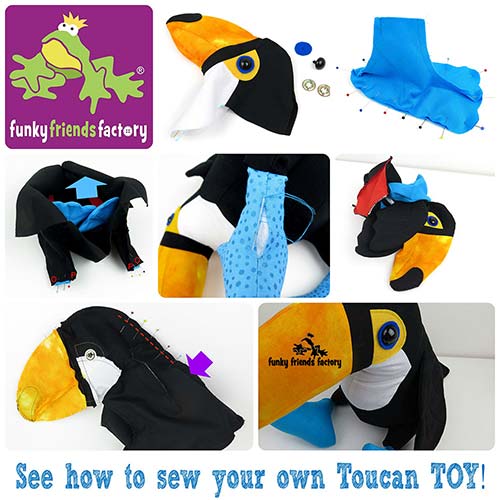
I made this photo tutorial so you can see how to sew my Toucan Sewing Pattern ~> scroll down for step-by-step photos!
The first Tegan Toucan toy I sewed was with fabric covered in bright, big, bold, flowers…
and I LOVED it!
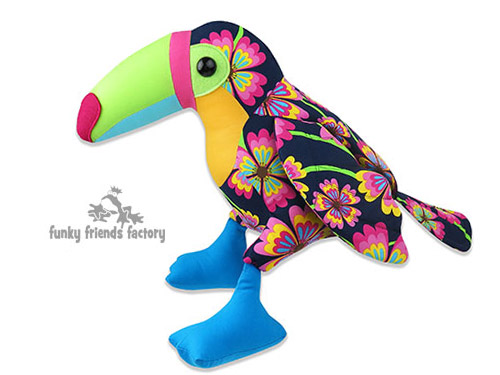
For this photo tutorial I decided to sew a simple black toucan to make it easier to show you how the pieces fit together. He’s a LOT plainer…
BUT I love him too!!!!!
.
*** PLEASE NOTE – this is ONLY a PHOTO TUTORIAL ***
The FULL PATTERN IS NOT included here.It is NOT A FREE PATTERN!
I have made this photo tutorial so people who have purchased my Toucan Sewing Pattern can SEE how to sew a toucan soft toy! (I wanted to explain this so you are not disappointed if you have found this page via a search engine and not from the link in Tegan TOUCAN sewing pattern)
First you need to choose some toucan fabric!
Toucans come in all sorts of bright colours so you can choose to use bright funky fabrics instead of black and white!
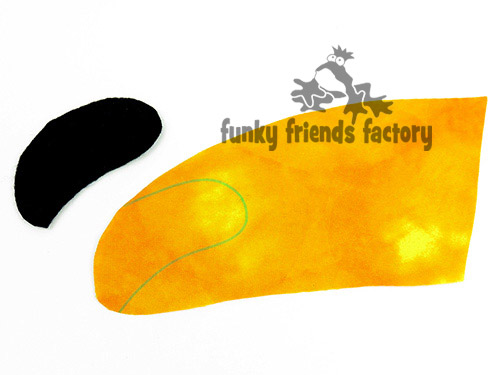
Let’s start with the BEAK:
STEP 1a
Cut the BEAK PATCH PIECE from felt.
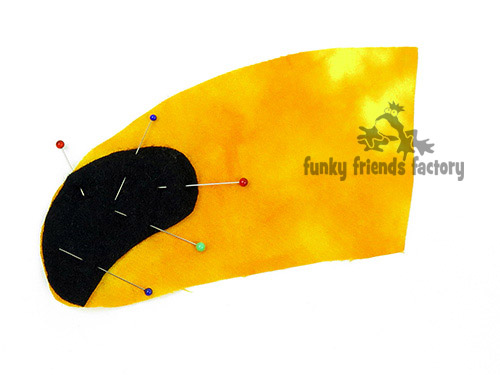
STEP 1b
Pin and sew it to the right side of the fabric of the BEAK TOP PIECE. Use the pattern marking to guide you.
TIP: Use a thread to match the felt so you don’t see your stitching.
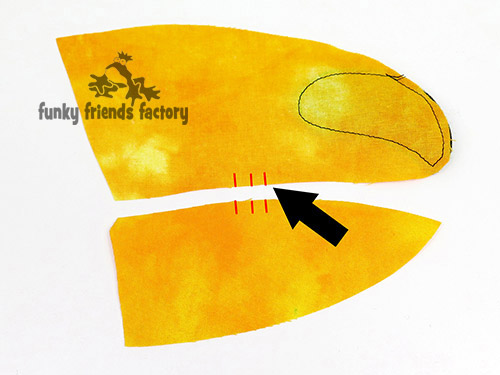
STEP 2
Sew a BEAK TOP PIECE to a BEAK BASE PIECE (right sides together) matching the 3 lines of the pattern markings.
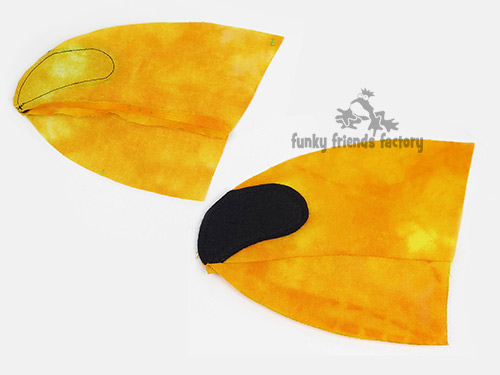
STEP 3a
Finger press the seam open. Repeat for the other 2 BEAK PIECES.
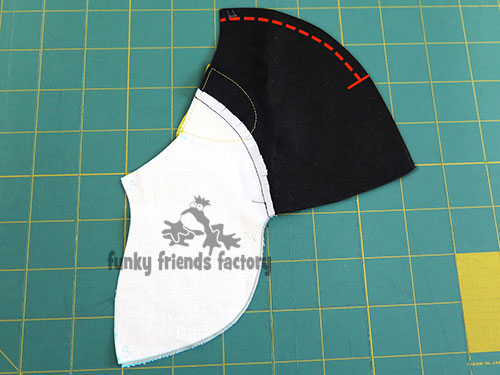
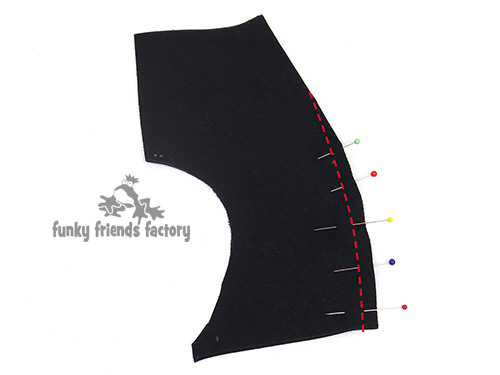
STEP 3b
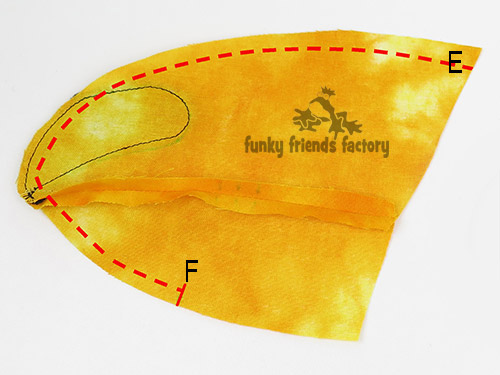
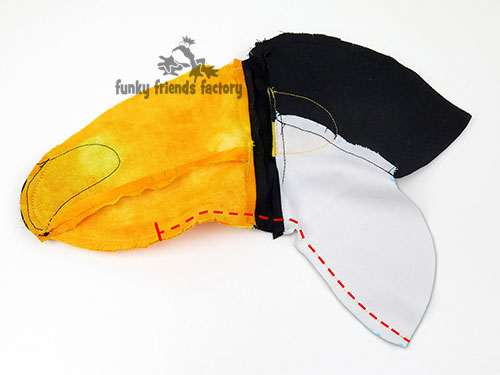
Pin the first BEAK TOP & BEAK BASE PIECE to the other BEAK TOP & BEAK BASE PIECE (right sides together!) Sew them together from E on the BEAK TOP PIECES, around the front of the beak, to F on the BEAK BASE PIECES.
* I’ve shown this with the dashed red line in the photo below.
HEAD:
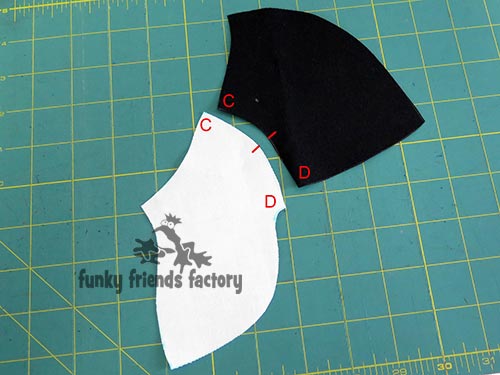
STEP 4a
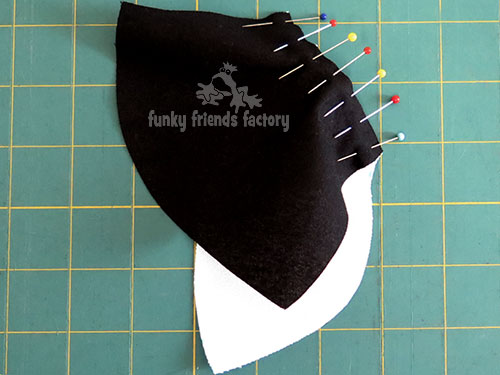
Sew the HEAD PIECES to the BIB PIECES from C – D.
TIP: It can be hard to get these pieces to line up nicely as they are opposite shaped curves. Use lots of pins to smooth out any wrinkles!
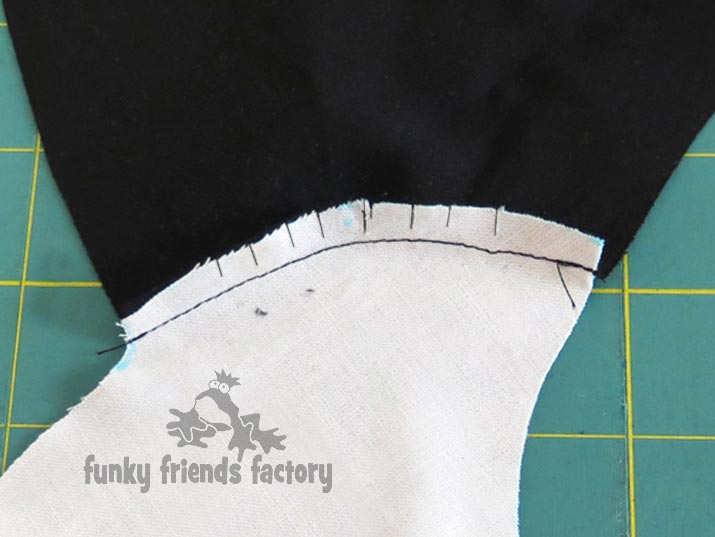
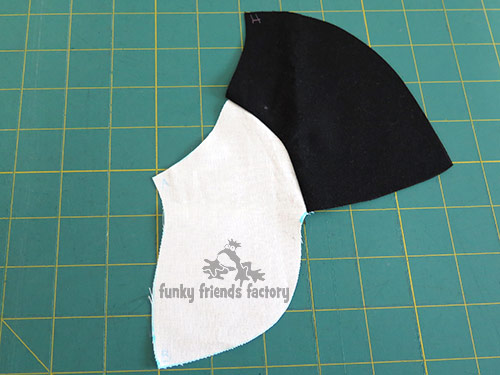
STEP 4b
Clip the seam and finger press it towards the HEAD PIECE.
* This is so that you won’t see the black fabric through the white fabric when your toucan is stuffed.
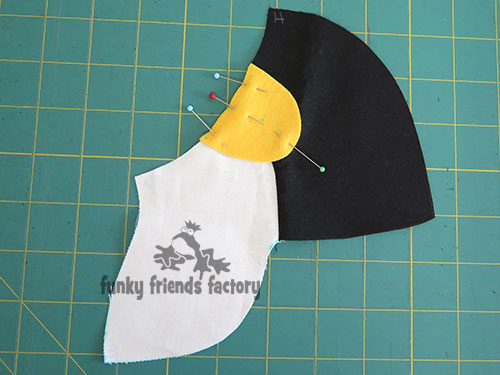
STEP 5a
Cut the EYE PATCH PIECES from felt and pin them onto the right side of the fabric of the HEAD & BIB PIECES. Use the pattern markings to guide you with the exact placement.
STEP 5b
Sew the EYE PATCH PIECES in place. You can do this by machine or by hand.

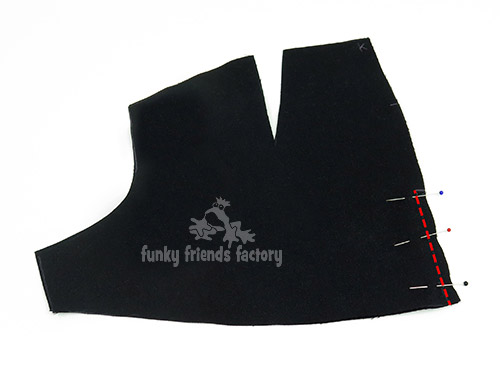
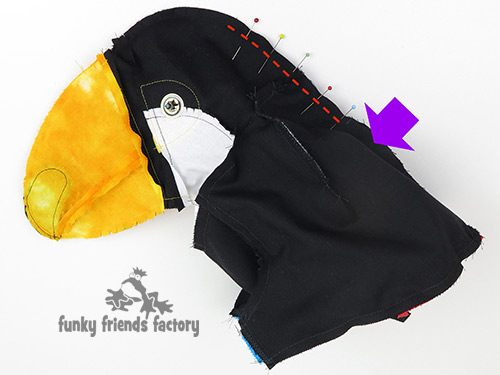
STEP 6
Sew the HEAD PIECES together from H – N.
*I have shown this with the dashed red line in the photo below.
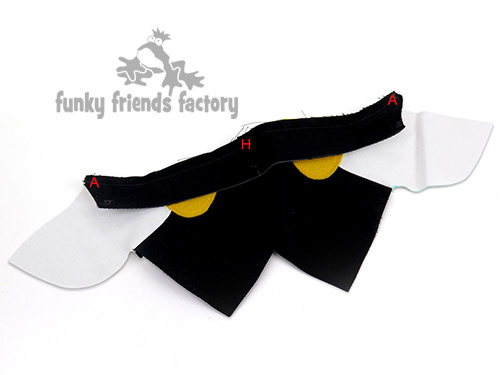
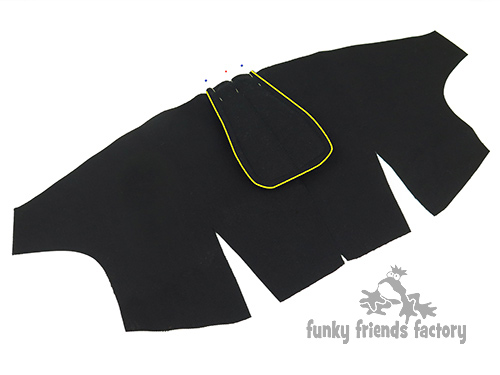
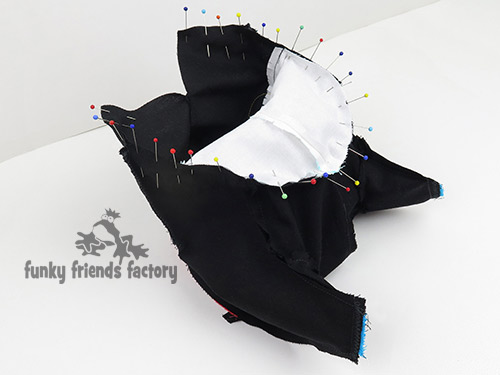
STEP 7a
Sew the STRIPE PIECE to the HEAD, BIB & PATCH PIECES from A – H – A.
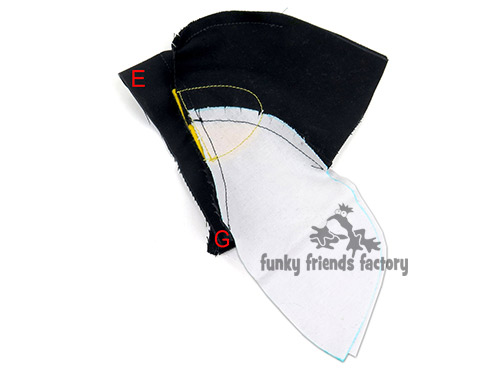
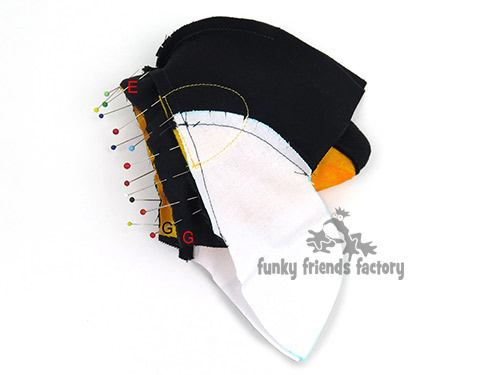
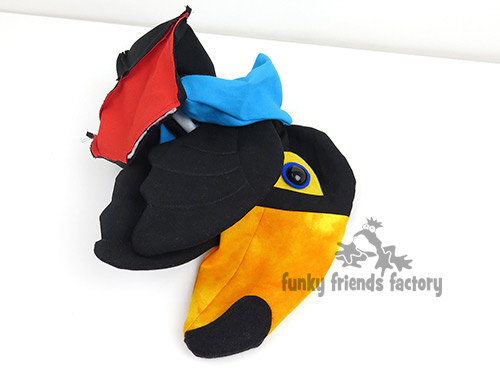
STEP 7b
Fold the STRIPE PIECE at E…
and pin this to the BEAK PIECES. Sew the STRIPE PIECE to the BEAK PIECES, from G – E – G.
TIP: I find the easiest way to do this is to fold the STRIPE PIECE (right sides together) at E and turn the beak right sides out and place it facing back ‘inside the head’ before you pin them together.
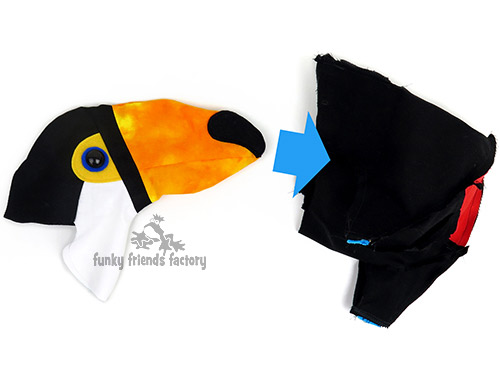
STEP 8
Turn the BEAK PIECES wrong side out again so you can pin the head closed at the front under the beak. Pin and sew the BEAK BASE PIECES and BIB PIECES together from F – B. Turn the head right sides out and put it aside while you sew the TAIL, WINGS and FEET.
TAIL:
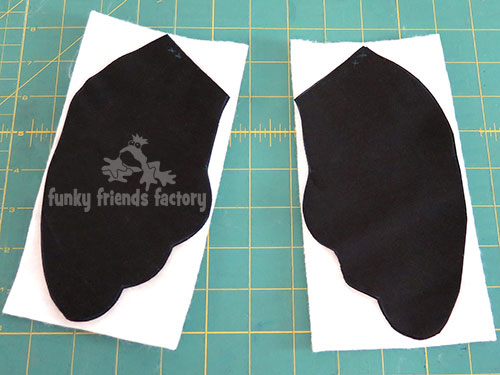
STEP 9a
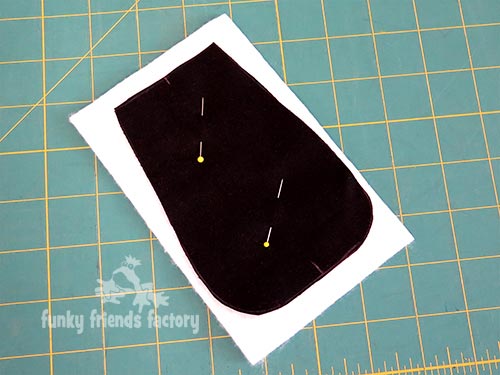
Place the TAIL PIECES, right sides together, on top of a piece of batting.
STEP 9b
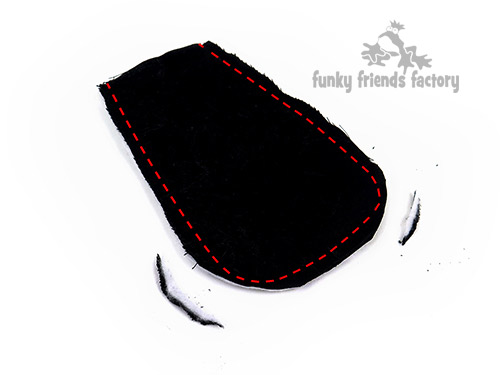
Pin and sew through all 3 layers and remember to leave the straight edge open for turning.
Trim the batting to 5mm/¼inch. Trim all the layers at the ‘rounded corners’ of the TAIL to approximately 3mm (1/8inch) so they turn easily.
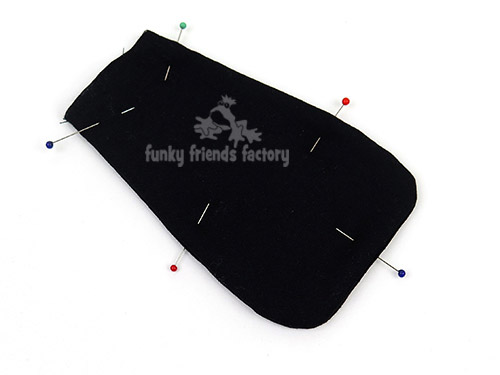
STEP 10a
Turn the TAIL right sides out. Pin the TAIL so that the edges are flat.
***Do not stuff the tail!***
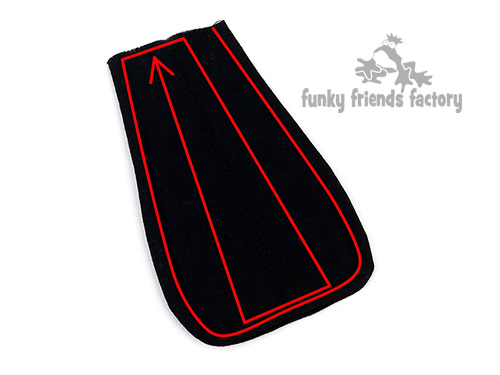
STEP 10b
Sew around the edge using a 5mm/¼inch seam allowance. Using the pattern markings to guide you, sew the top stitching lines on the TAIL.
WINGS:
STEP 11a
Pin and sew the WING PIECES together in pairs, with right sides facing on a rectangle of batting, like you did for the TAIL PIECES. Clip the seams and turn them right sides out.
STEP 11b
Pin the WINGS so that the edges are flat then sew the top stitching lines, as shown on the pattern markings.

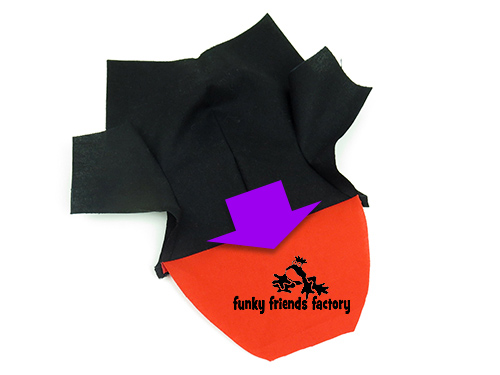
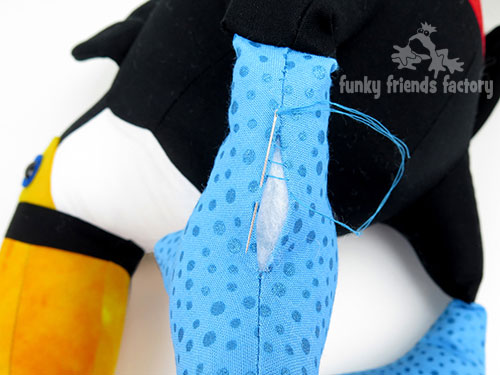
FEET:
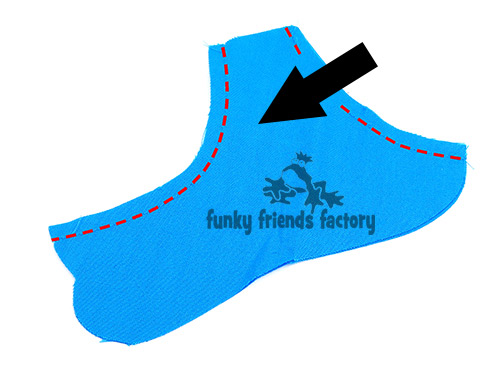
STEP 12a
Sew the LEG PIECES together in pairs using the pattern markings to guide you. DON’T FORGET to leave a gap for stuffing them later!
*I have shown this with the black arrow in the photo below.
STEP 12b
Pin and sew the FOOT PAD PIECES to the LEG PIECES. (Sew right around without a gap.)
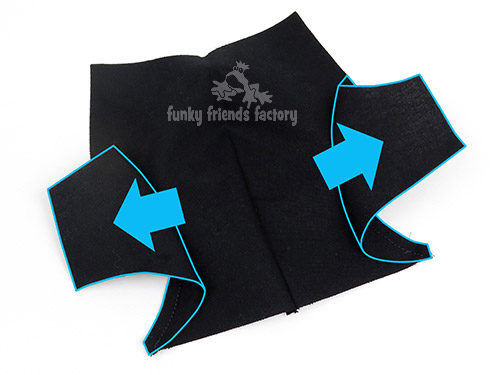
STEP 12c
Clip the seams then turn the feet right sides out.
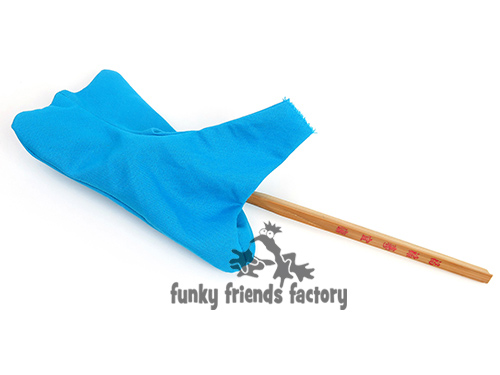
STEP 12d
Use a wooden chopstick to make sure the seams are turned nicely, especially the ‘toes’. Pin the LEG PIECES closed at the top and put the legs aside.


TUMMY, BASE & LEG GUSSET PIECES:
STEP 13
Fold the TUMMY PIECE right sides together and sew the dart closed.
STEP 14a
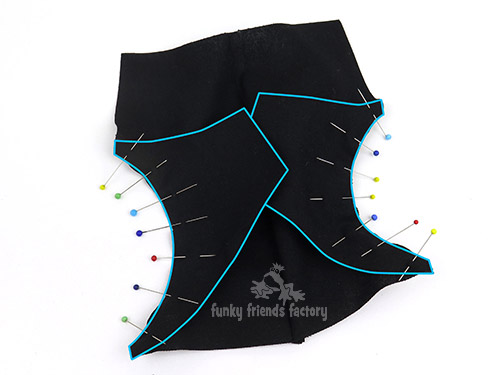
Sew the LEG GUSSET PIECES to the TUMMY PIECE matching the dots of the pattern markings.
STEP 14b
Finger press the seam you just sewed so the LEG GUSSET PIECES lie open (out to the sides).
STEP 15a
Pin and sew the BASE PIECE to the TUMMY PIECE matching point J.
TIP: Note, these pieces do not match up at the sides – the BASE PIECE is a bit shorter and does not reach to the edge of the TUMMY PIECE.
STEP 15b
Finger press the seam open.

BODY and TAIL:
STEP 16
Sew the BODY PIECES together from M – L and finger press this seam open.
STEP 17
Pin the TAIL to the BODY PIECES matching point L.
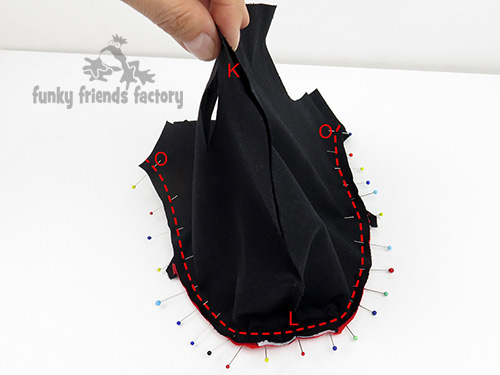
STEP 18
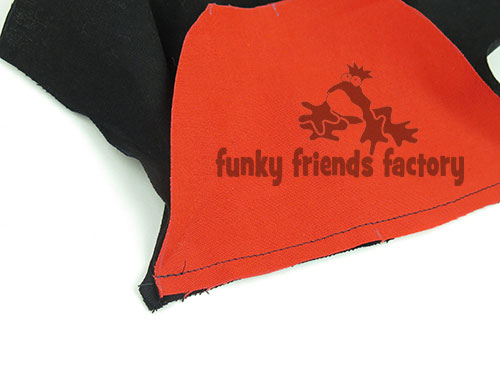
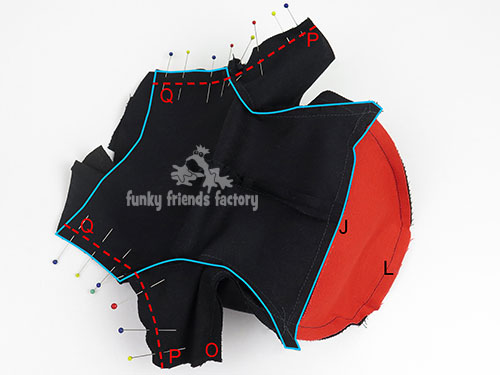
Pin and sew the TUMMY, BASE & LEG GUSSET PIECE to the BODY & TAIL PIECE.
*I have taken 2 photos of this step,
one from the top…
…and one with the pieces turned over
so it’s easier for you to picture where to sew. We are basically sewing the toucan together along the bottom of the legs and body.
TIP: You are sewing a lot of pieces together so use lots of pins so they do not slip as you sew. It would be a nasty seam to unpick if it slipped!

STEP 19
Sew the toucan closed at the front. Pin and sew the TUMMY and LEG GUSSET PIECES to the BODY PIECES from P – Q.
ASSEMBLY:
STEP 20
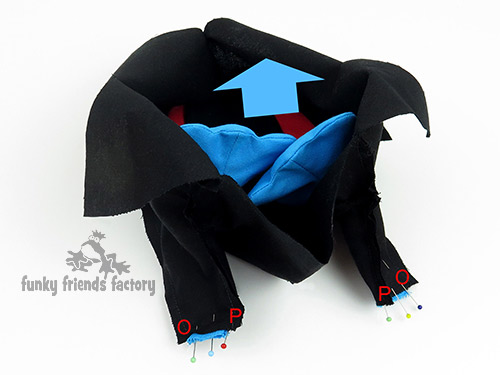
With the body wrong sides out, push the top of the LEGS into place through the body cavity so you can pin and sew the LEGS to the BODY and LEG GUSSET PIECES matching point P and O.
TIP: Make sure the ‘toes’ and peeping out at the top of the TUMMY PIECE. If you cannot see the ‘toes’ then the LEGS are pinned upside down.
Sew a row of zig-zag stitches from P – O to make this seam extra strong.
STEP 21
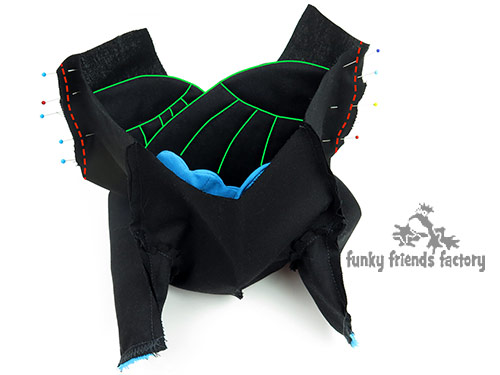
Pin the wings in position on the BODY PIECES using the pattern markings to guide you. Fold and pin the BODY PIECES at the wing dart and sew the WINGS in place (inside the dart!).
EYES:
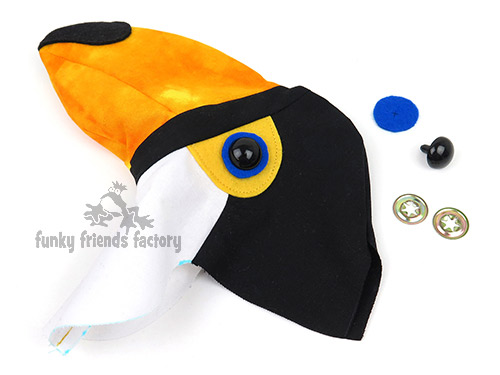
STEP 22
If you are using craft eyes, insert these now. I used a piece of blue felt behind black eyes for my toucan. You could also use buttons.
TIP: Embroider the eyes if the toy is for a child under the age of 3.
Sew the HEAD to the BODY:
STEP 23a
Sew the HEAD & BIB PIECES to the BODY & TUMMY PIECES.
TIP: I find the easiest way to do this is to turn the HEAD right side out and place this ‘inside’ the BODY.
STEP 23b
Use lots of pins so the pieces do not slip as you sew.
STEP 24
Pull the HEAD back out of the BODY. Pin and sew the toucan closed at the back. N.B.* DON’T FORGET to leave the gap open on the BODY PIECES for turning and stuffing.
Stuffing and Finishing:
STEP 25
Turn the toucan right sides out. Pull the wings, feet out gently first then the beak. Stuff the toucan’s BEAK first, then the HEAD and neck area. Stuff the BASE area then finally finish the rest of the BODY. Stuff the LEGS firmly, especially the ‘toes’.
STEP 26
Sew the stuffing gaps on the BODY and LEGS closed with a ladder stitch.

Step 27
Add a bit of detail to the BEAK. Sew a line of straight stitches along the seam between the BEAK TOP PIECE and BEAK BASE PIECES, using black embroidery thread, to give your toucan a smile!
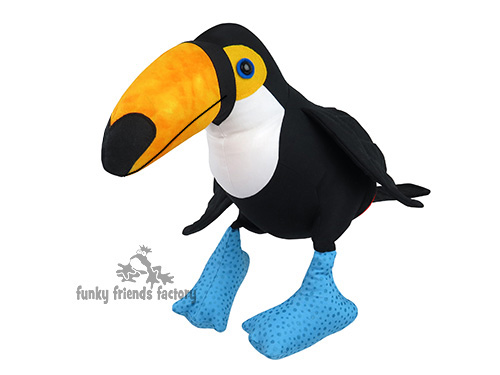
Your TOUCAN is ready to LOVE!
Come join the fun on Facebook!
![]()
I LOVE to see how your Funky Friends toys turn out!
When you’ve made your own stuffed toy Toucans you can come show them off ~>
Post a photo on my Funky Friends Factory Facebook page for me to see and YOU could win a FREE PATTERN!

Till next time,
Happy Sewing,
Pauline
