
I made this photo tutorial so you can see how to sew my Sloth Sewing Pattern ~> scroll down for step-by-step photos!
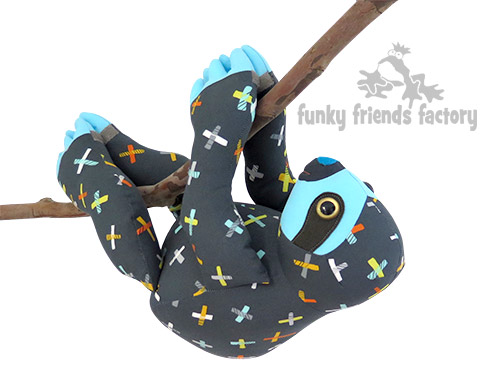
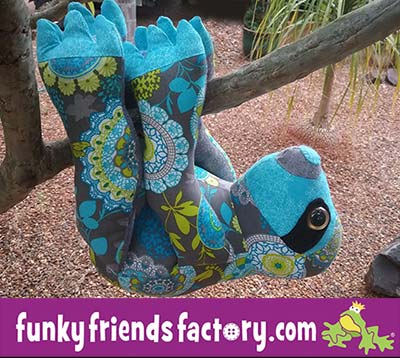
Slowpoke is a seriously cute, three-toed Sloth who loves snoozing, sleeping and hanging around, chilling out. He can hang just about anywhere as he has Velcro claws to attach himself to the nearest siesta spot for a bit of shut-eye.
.
*** PLEASE NOTE – this is ONLY a PHOTO TUTORIAL ***
The FULL PATTERN IS NOT included here.It is NOT A FREE PATTERN!
I have made this photo tutorial so people who have purchased my Sloth Sewing Pattern can SEE how to sew a sloth toy! (I wanted to explain this so you are not disappointed if you have found this page via a search engine and not from the link in my Slowpoke Sloth Toy Pattern)
OK, let’s get started!
STEP 1
Choose some fabric. I used a cute geometric fabric called Jax designed by Erin McMorris which is grey BUT totally funky!!! A soft toy Sloth doesn’t have to be ‘natural’ colours.
ARMS:
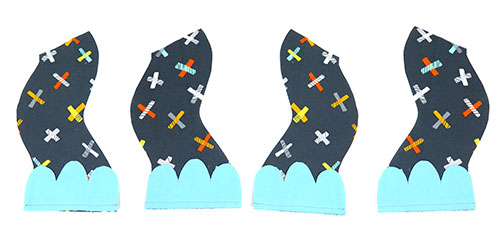
STEP 2
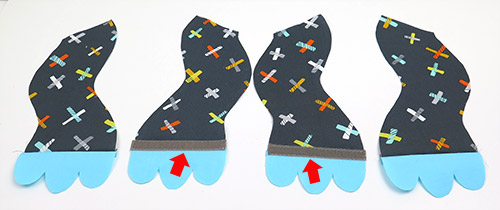
Sew 4 of the CLAW PIECES to the ARM PIECES, from A – B, matching the single dot pattern markings.
TIP: I like to finger-press these seams open so they are nice and flat.
STEP 3a
Pin a piece of Velcro onto 2 of the ARM PIECES. Make sure you are pining the Velcro to opposite ARM PIECES – a ‘right’ ARM PIECE and a ‘left’ (reversed) ARM PIECE. Position the Velcro so that it covers the seam between the ARM PIECE and the CLAW PIECE.
TIP: Check that the 2 pieces of Velcro will stick together and you haven’t muddled up the ‘hook’ and ‘eye’ Velcro pieces. It is a very easy mistake to make and this would be a pain to unpick.
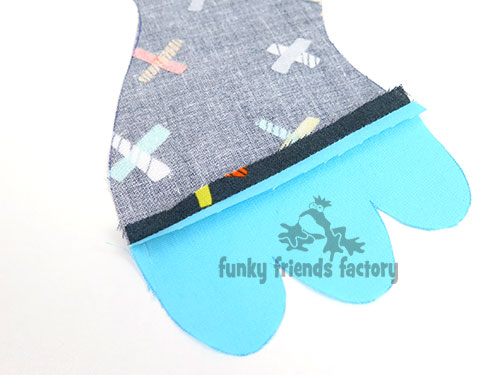
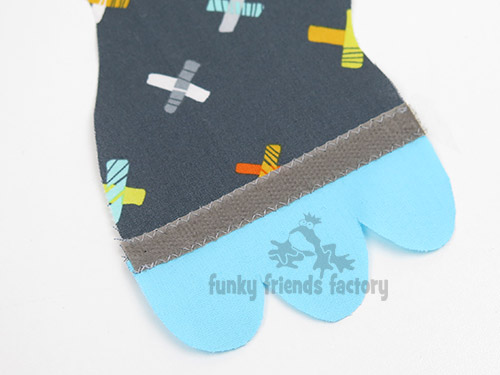
STEP 3b
Sew the Velcro pieces in place with a zig-zag stitch so they are firmly secured.
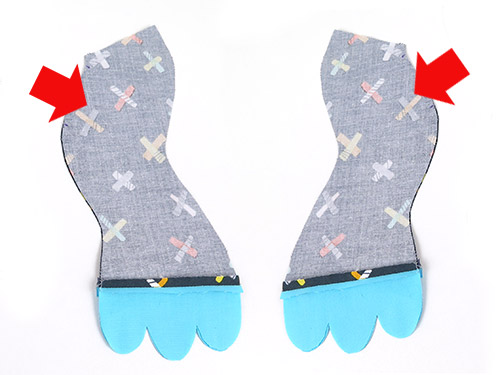
STEP 4
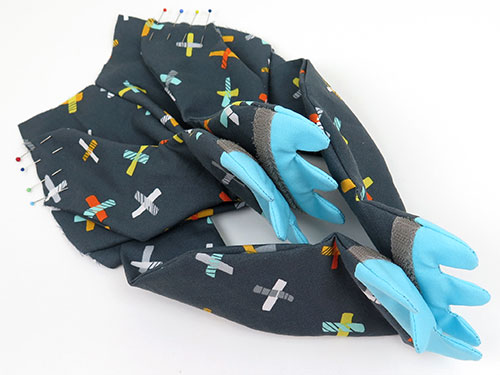
Pin the other 2 ARM PIECES (with no Velcro) on top of the first 2 ARM PIECES and sew the pairs of ARMS together with the Velcro sandwiched between them. Remember to leave them open at the top and to leave a gap for turning and stuffing the ARMS.
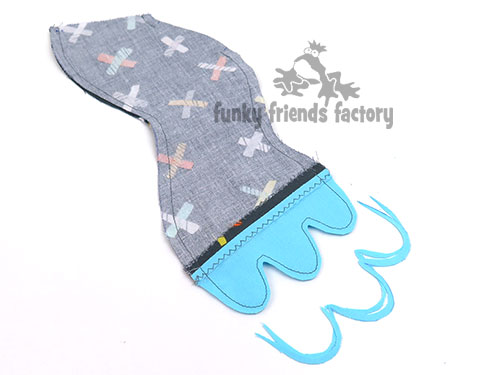
STEP 5
Trim the seam allowance around the tips of the CLAWS and clip the seam allowance between each CLAW. This is important because it will help the CLAWS to turn more easily and smoothly.
LEGS:
STEP 6
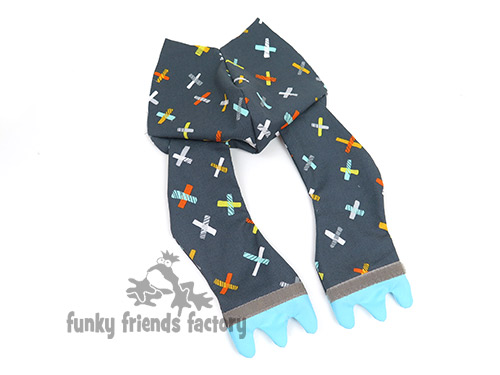
Repeat the steps above for the LEG PIECES, they are sewn exactly the same as the ARMS.

FACE:
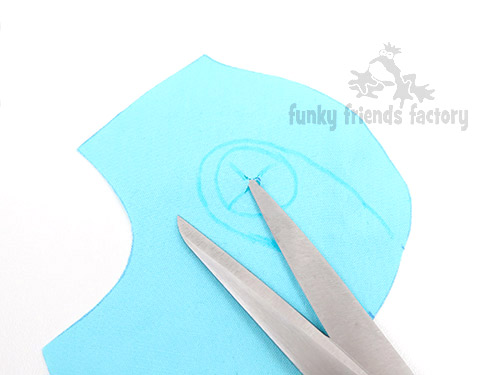
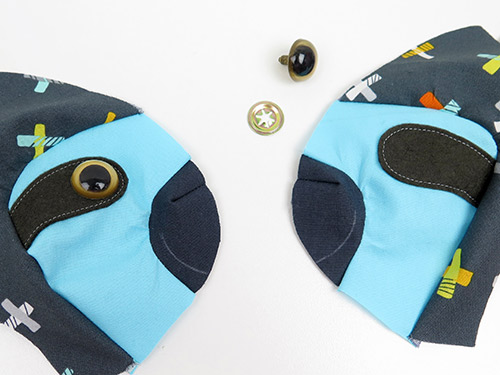
STEP 7
If you are using craft eyes, cut a hole in the FACE PIECES and also in the felt EYE PATCH PIECES for the craft eyes. (See the black dot in the eye pattern markings).
* I didn’t add a photo of the hole cut in the felt as you can’t see the hole against the dark grey felt – so don’t forget to cut the holes in the EYE PATCH PIECES too!
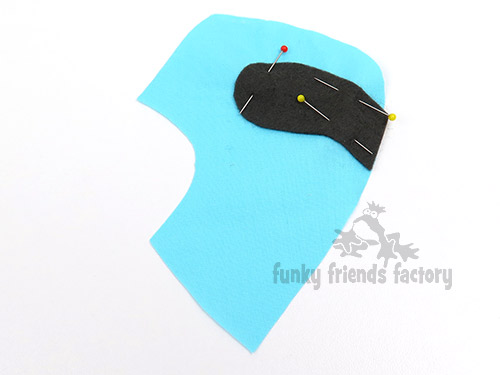
STEP 8
Pin and sew the felt EYE PATCH PIECES to the FACE PIECES.
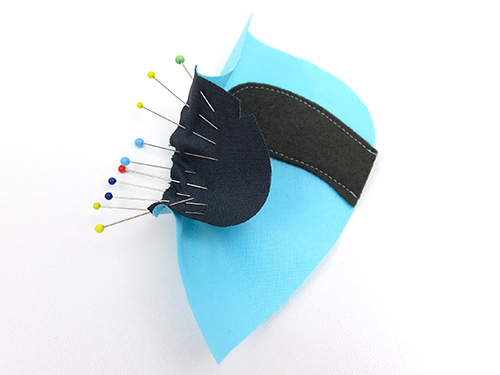
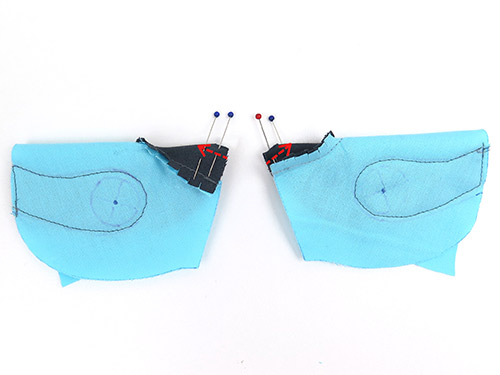
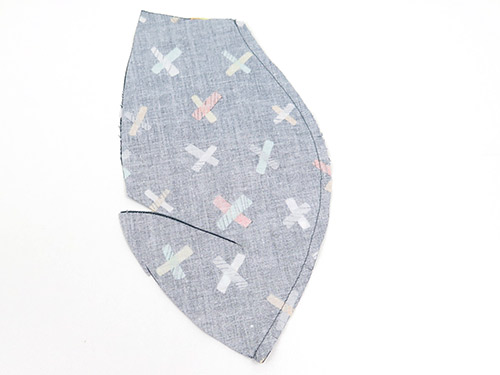
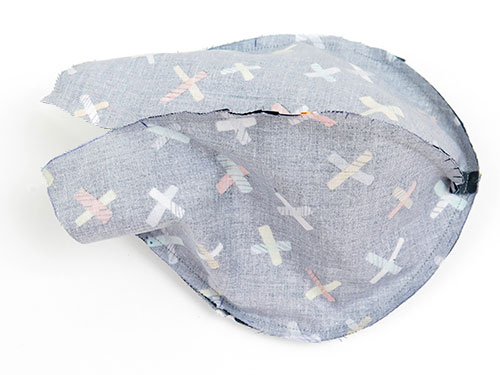
STEP 9
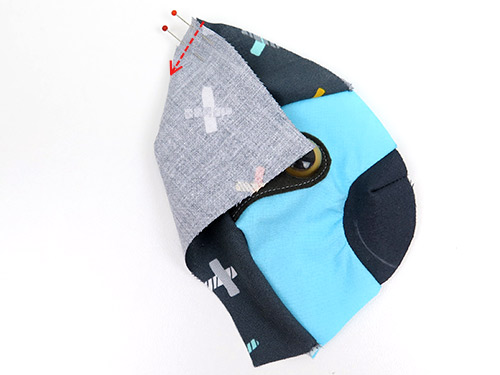
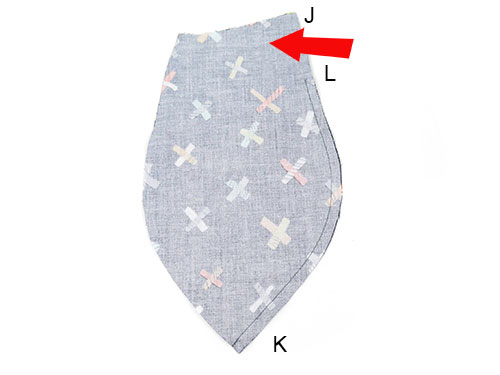
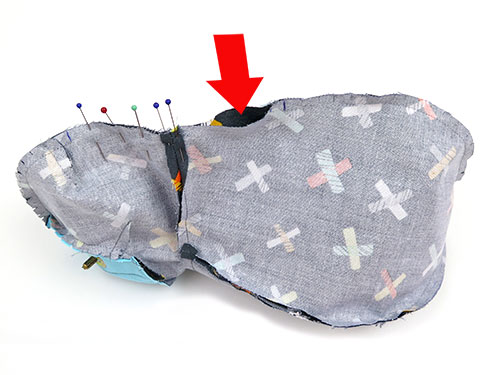
Pin and sew the SNOUT PIECES to a FACE PIECES from C – D. Clip the curved seams very well and finger-press them so they lie smooth and flat.
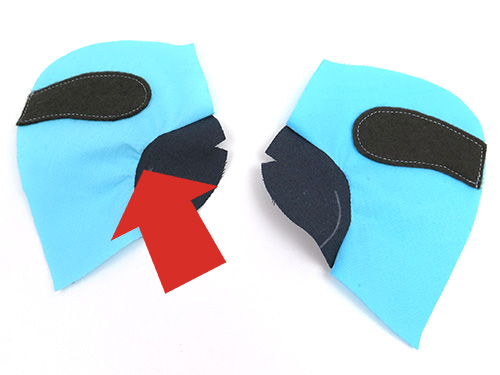
TIP: Use lots of pins to help ease these 2 opposite curved pieces together. This is an hard seam to sew and you may get a few wrinkles like I did (see the red arrow in the photo below). It’s ok, do your best! Sew this seam with the FACE PIECES upwards so you can finger-press out any wrinkles as you go!
STEP 10
Fold the SNOUT PIECES (with fabric right side together) so you can pin and sew the snout darts closed.
HEAD:
STEP 11
Fold the HEAD PIECES (with fabric right side together) pin and sew the head dart 1 closed on each of them.
*Check to make sure you sew head dart 1 and NOT head dart 2.
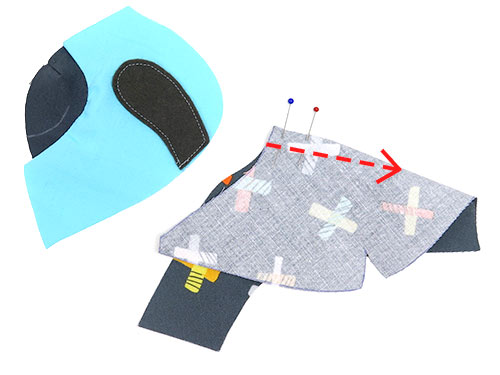
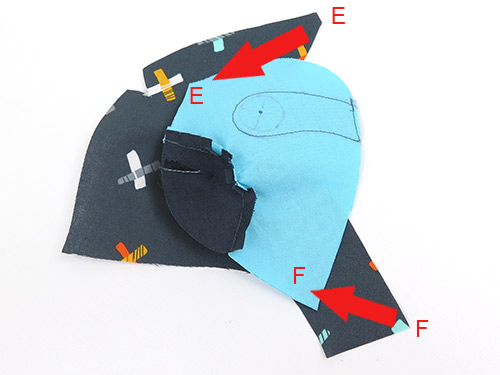
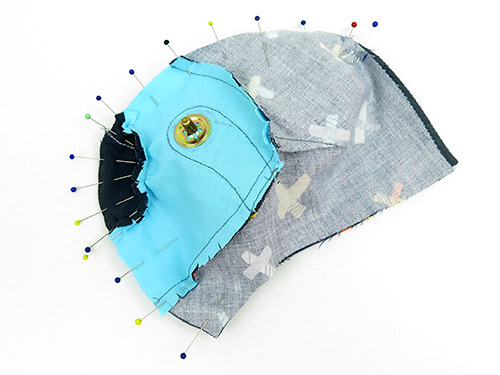
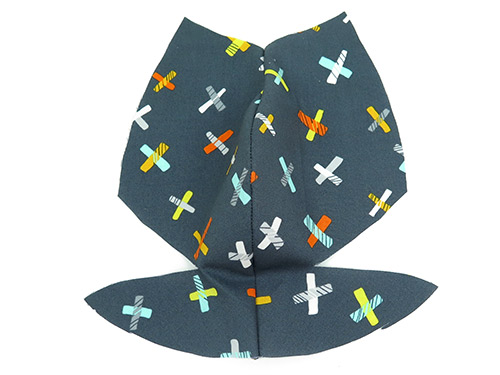
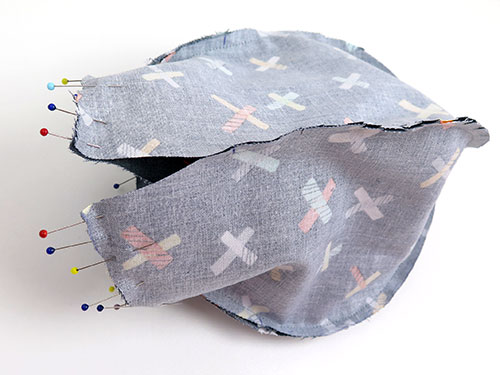
STEP 12
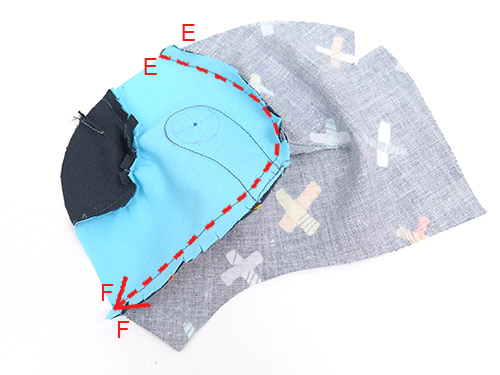
Pin and sew the FACE PIECES to the HEAD PIECES from E – F. (Use lots of pins to ease out any wrinkles and clip the seam allowance very well)
TIP: Here is the seam sewn, so you can see what it looks like.
EYES:
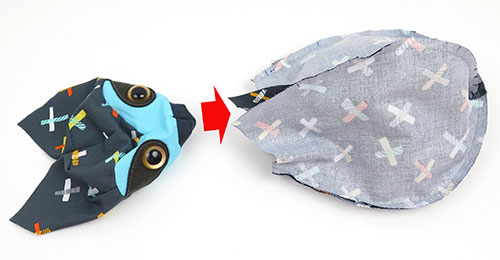
STEP 13
If you are using craft eyes, insert them now. You could also sew on some buttons instead of craft eyes.
TIP: I used 21mm (0.8inch) gold eyes. If you don’t have big craft eyes you can cut a circle of bright felt to put behind the eyes.
STEP 14
Fold the HEAD PIECES (with fabric right side together) pin and sew the head dart 2 closed on each of them.
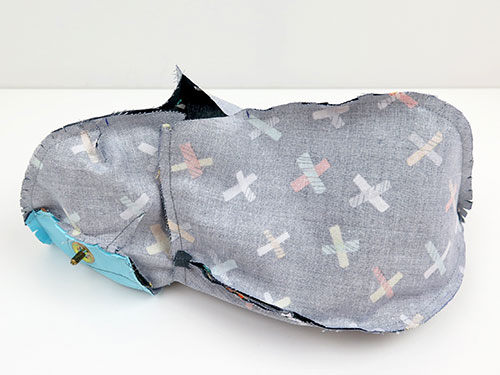
STEP 15
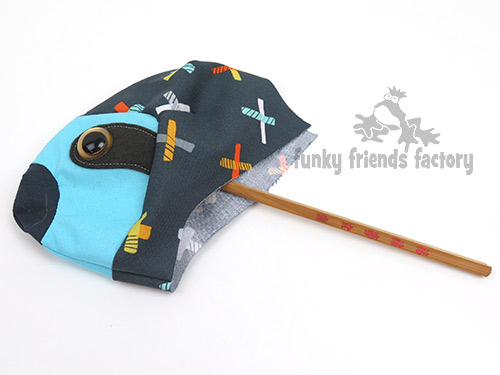
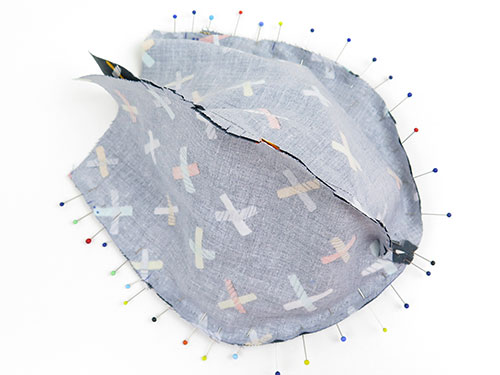
Pin and sew ‘both sides of the head’ together, from G – F – D around the nose – C – E – H, leaving the HEAD PIECES open at the back between H and J.
TIP: Clip the seams well and turn the head right sides out. Use a wooden chopstick or other turning tool to turn the head seams nicely so they are nice and smooth.
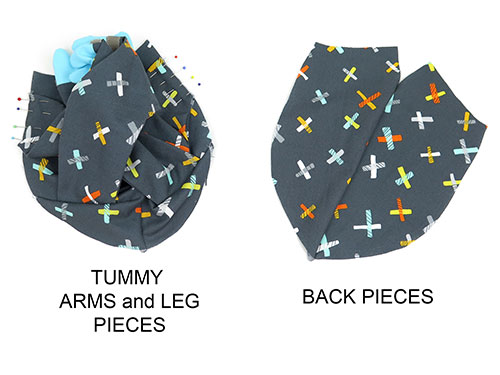
TUMMY:
STEP 16
Sew the TUMMY PIECES together along the front from G – K.
STEP 17
Clip this seam well. Lay the TUMMY PIECES right sides up.
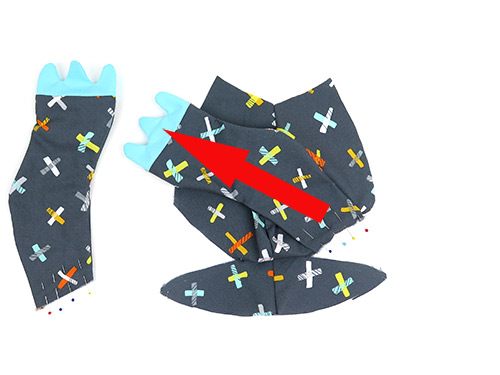
STEP 18
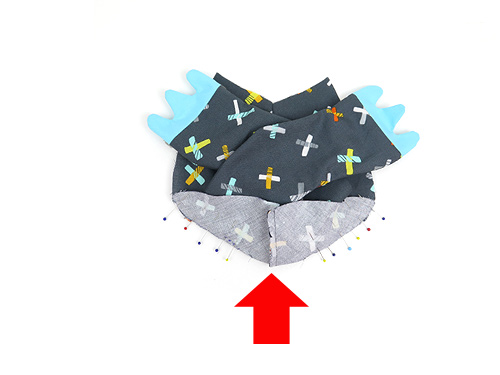
Pin the LEGS to the TUMMY PIECES at the leg darts, matching the 3 dot pattern markings. Here you can see I have pinned one leg first…
…then the other!
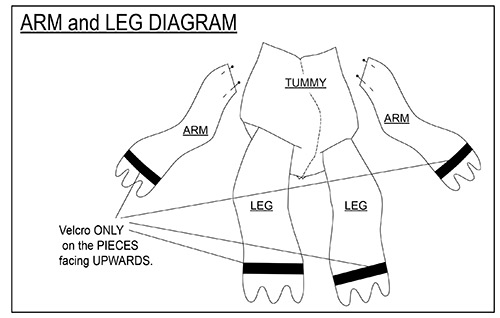
TIP: Use the ARM-LEG DIAGRAM to guide you so the Velcro ends up on the right sides of the arms and legs!
STEP 19
Fold the TUMMY PIECES with the fabric right sides together at the leg dart. Pin and sew the leg darts closed with the top of the LEG PIECES in between them.
TIP: Flop the LEGS down. The Velcro should be on the LEG PIECES that are facing up.
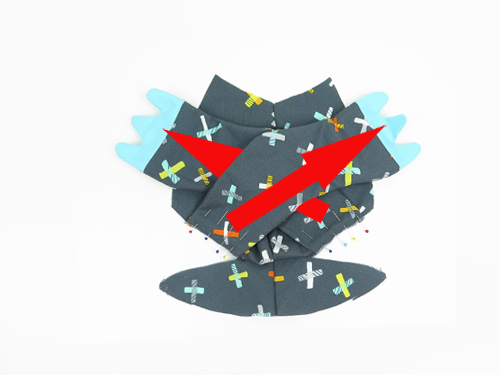
STEP 20
Pin the ARMS to the TUMMY PIECES, matching the 2 dot pattern markings, using the ARM-LEG DIAGRAM again.
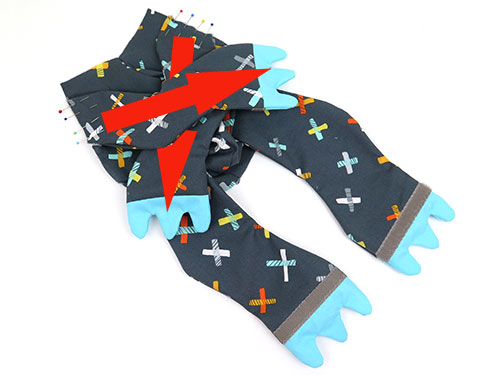
TIP: STOP NOW and check that you have the Velcro sewn correctly by ‘sticking’ the 2 ARMS together and the 2 LEGS together. This looks very cute!
BACK:
STEP 21
Sew the BACK PIECES together from L – K, leaving the BACK PIECES open at the top between J and L.
STEP 22a
Fold/roll up the ARMS and LEGS so they fit on top of the TUMMY PIECES.
STEP 22b
Place the BACK PIECES on top of the TUMMY PIECES with the ARMS and LEGS in between them and pin them together.
STEP 22c
Sew the BACK PIECES to the TUMMY PIECES and sew them together, from M – K – M, with the ARMS and LEGS in between them.
SEW THE HEAD TO THE BODY:
STEP 23
Pin and sew the HEAD PIECES to the BACK & TUMMY PIECES at the neck seam, matching the points J and G.
TIP:I find the best way to do this is to turn the head right sides out and push it nose first ‘inside the body’ so you can pin the pieces together at the neck seam, with the fabric right sides together.
STEP 24a
Pull the HEAD back out of the body so the HEAD PIECES are wrong sides out again.
STEP 24b
Pin the HEAD PIECES and BACK PIECES together at the back and sew the sloth closed, from H – J, leaving the gap for turning and stuffing open between J and L.
ASSEMBLY:
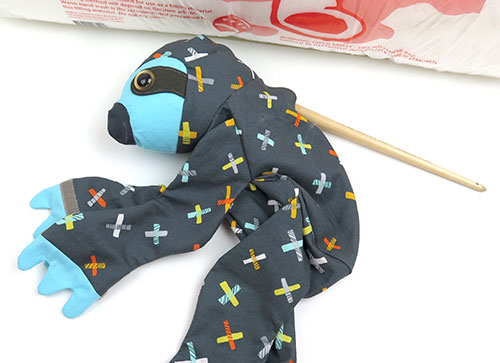
STEP 25
Turn the Sloth right sides out. Stuff the head making sure that the snout is very firmly stuffed. Stuff the body and stuff the neck very well. Stuff the ARMS and LEGS.
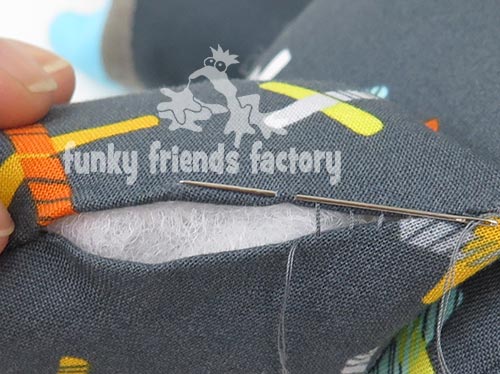
STEP 26
Sew the stuffing gaps closed on the ARMS, LEGS and BACK PIECES with a ladder stitch

STEP 27a
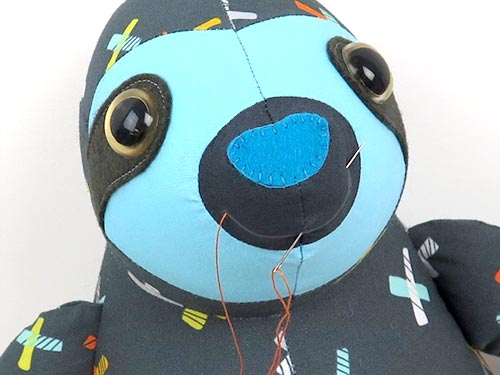
Cut the NOSE PIECE from felt and sew this onto the SNOUT PIECE, with embroidery thread and a blanket stitch. I like to use a felt that will match the fabric used for the FACE PIECE. (If you are embroidering the eyes do them now. Use embroidery thread and a satin stitch.)
TIP: I like to trace my felt pieces with a fabric marker. If you don’t have one ~ go to my blog for other methods for cutting out felt.
https://www.funkyfriendsfactory.com/blog/how-to-cut-out-felt/
STEP 27b
Sew the mouth with embroidery thread, using the pattern markings to guide you.
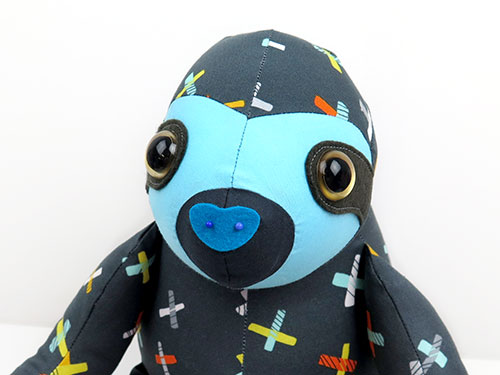

Your Sloth is ready to LOVE!
Come join the fun on Facebook!
![]()
I LOVE to see how your Funky Friends toys turn out!
When you’ve made your own stuffed toy sloth you can come show them off ~>
Post a photo on my Funky Friends Factory Facebook page for me to see and YOU could win a FREE PATTERN!

Till next time,
Happy Sewing,
Pauline
