
I made this photo tutorial so you can see how to sew my cow pattern ~> scroll down for step-by-step photos!

*** PLEASE NOTE – this in ONLY a PHOTO TUTORIAL ***
The FULL PATTERN IS NOT included here.
It is NOT A FREE PATTERN.I have made this photo tutorial so people who have purchased the pattern can SEE how to sew the toy. (I wanted to explain this so you are not disappointed if you have found this page via a search engine and not from the link in my sewing pattern!)
* This Cow Pattern is available to buy, from the Funky Friends Factory website as an Instant Download e-Pattern.
First choose some fabric
You can use most fabrics, non-stretch fabrics (like cotton, corduroy and quilting fabrics) as well as stretchy/knit fabrics (like fleece, velour, chenille, minky and similar fabrics).
You can use ANY colour!
Right, let’s get sewing!
We start with the EARS:
STEP 1
Sew the EAR PIECES in pairs (one main and one contrasting piece).
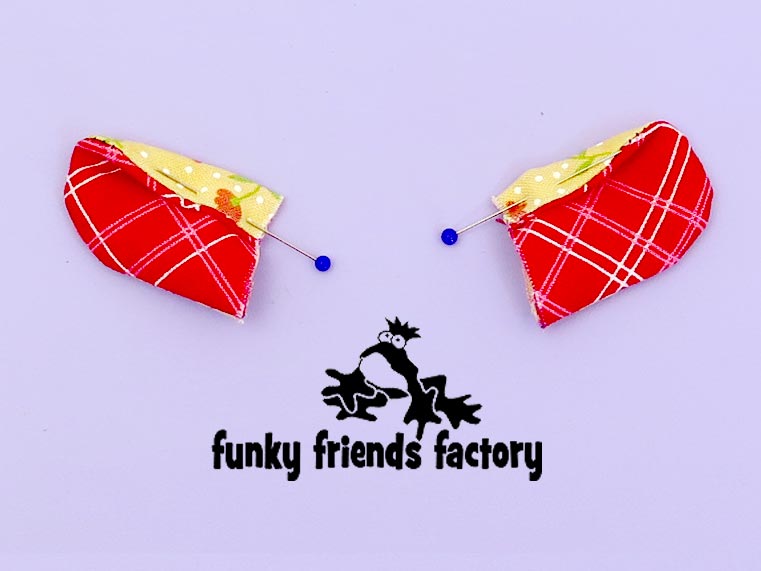
STEP 2
Clip the seams well at the ‘tips’ and turn the EAR PIECES right side out. Fold the inner edge of each EAR inwards to the middle and pin them in this position.
TIP: Make sure you have a right and a left ear!
HEAD & SNOUT:
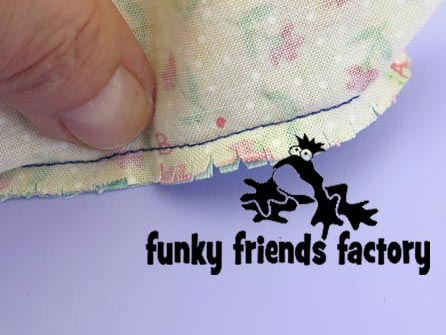
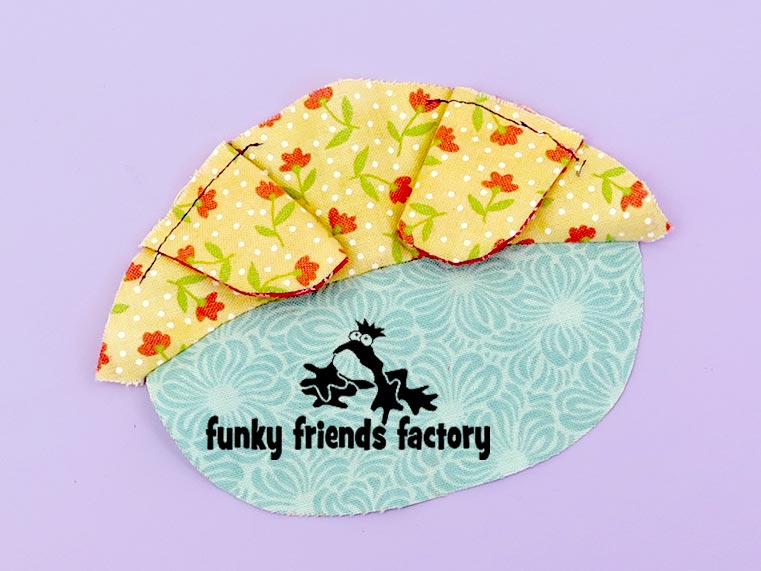
STEP 3
**PLEASE NOTE** Clip the seams of the HEAD & SNOUT very well especially if you are using woven(non-stretchy) fabrics!
Sew the FRONT HEAD PIECE to the SNOUT TOP PIECE from A – B – A.
TIP: *Clip the seams of the HEAD & SNOUT very well, especially if you are using a woven(non-stretchy) fabrics!

STEP 4
Using the pattern markings as a guide, pin the EARS on the right side of the FRONT HEAD PIECE. (The fold of the ears must be towards the middle of the head at D.)
TIP: Sew the EARS to the FRONT HEAD PIECE with a 3mm( ¼ inch) seam allowance to hold them in place – crooked ears will make your toy look wonky.
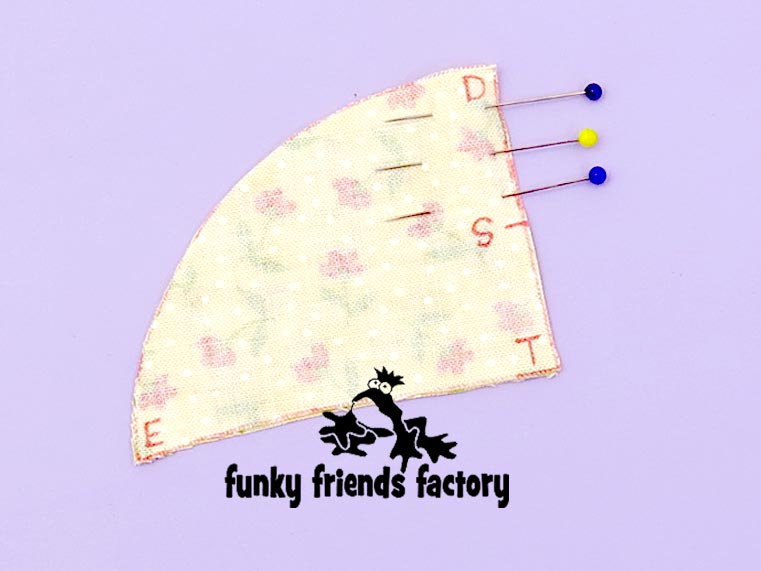
STEP 5
Sew the BACK HEAD PIECES together at the centre seam as shown on the pattern markings, from D – S.
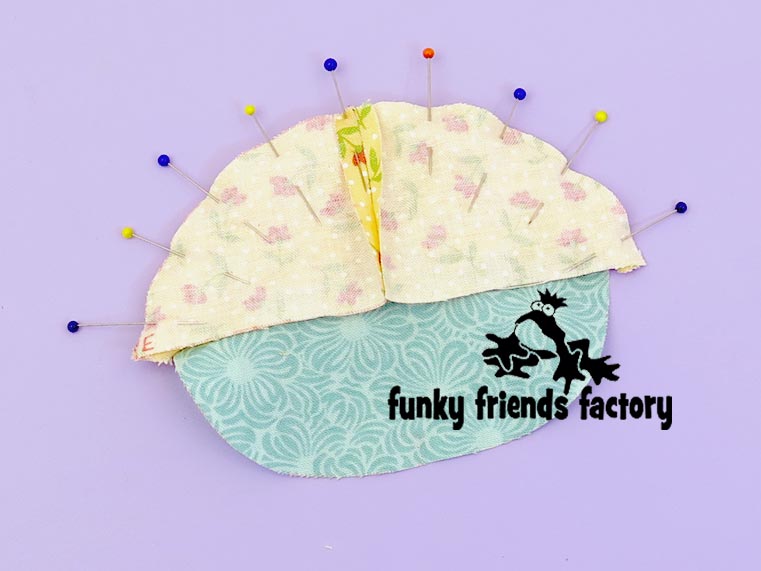
STEP 6
Pin the BACK HEAD PIECES to the FRONT HEAD PIECE (with the EARS in between).
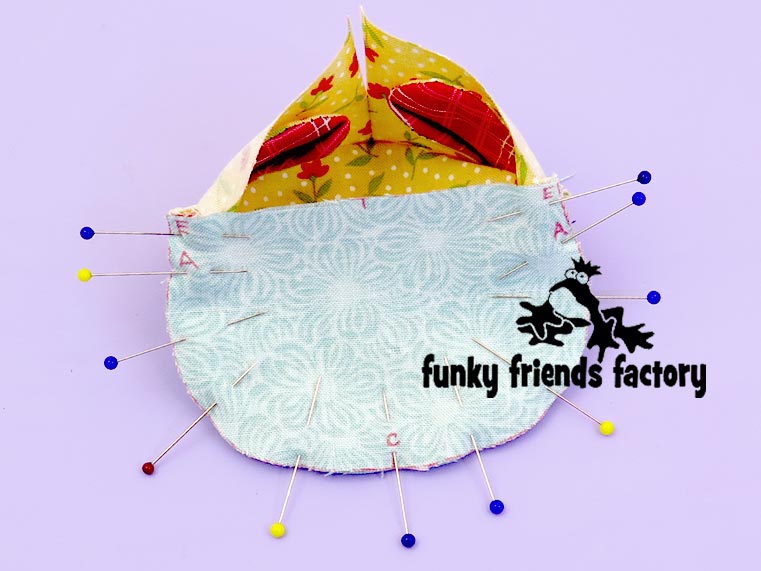
STEP 7a
Sew the SNOUT BASE PIECE to the BACK HEAD PIECES, FRONT HEAD PIECE & SNOUT TOP PIECE, from E – C – E.
TIP: I have a tutorial to show you how to insert CRAFT EYES on my blog.
STEP 7b
Turn the head right side out.
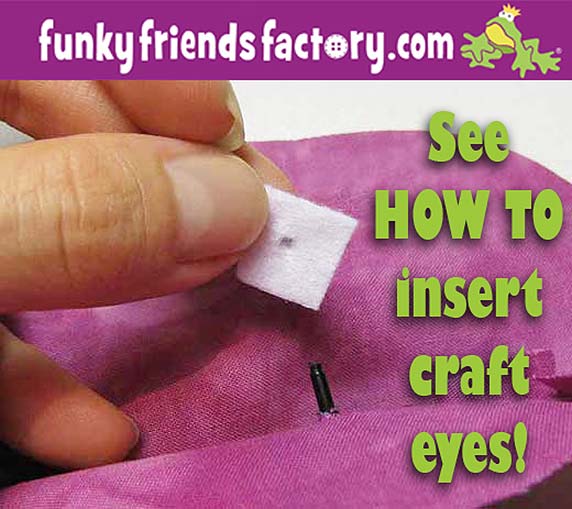

CRAFT EYES:
STEP 8
I used beads for this Patty so I added these later on (AFTER the head was stuffed) BUT – if you are using CRAFT EYES – insert them now.
***THIS photo is for people who are using CRAFT EYES.
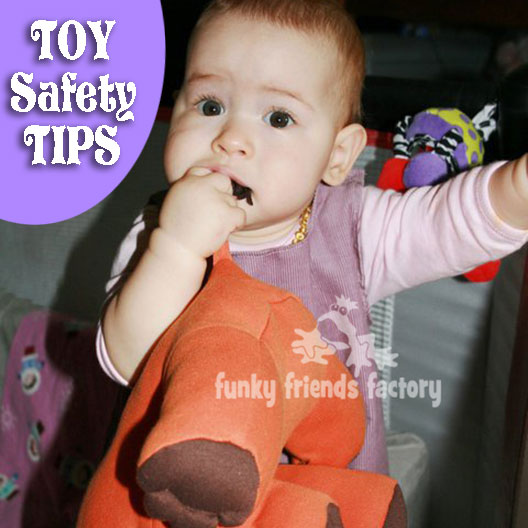
TIP: If you are sewing Patty as a baby toy it is best to use felt circles for the eyes or to embroider the eyes. I have a blog post with more tips on toy safety.

LEGS:
STEP 9a
Sew the HOOF PIECES to the LEG PIECES from F – G – F.
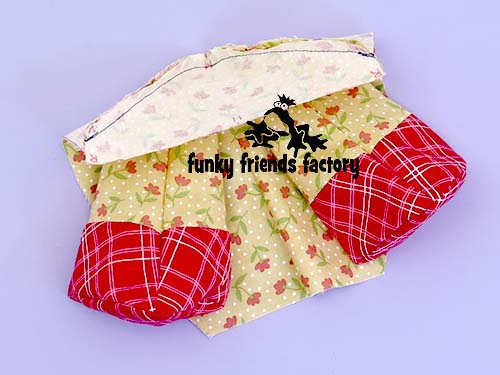
STEP 9b
Fold each LEG in half, with right sides facing, and sew down the front seam from J – F- K, remembering to leave the gap for stuffing.
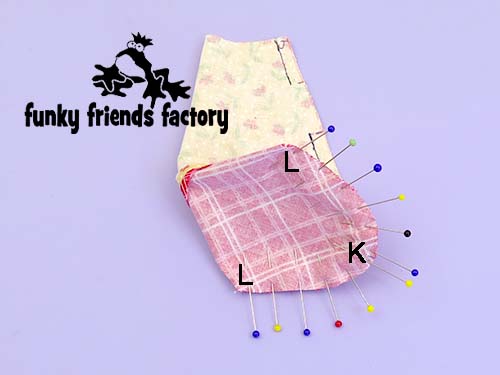
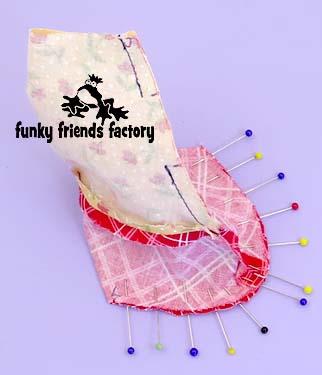
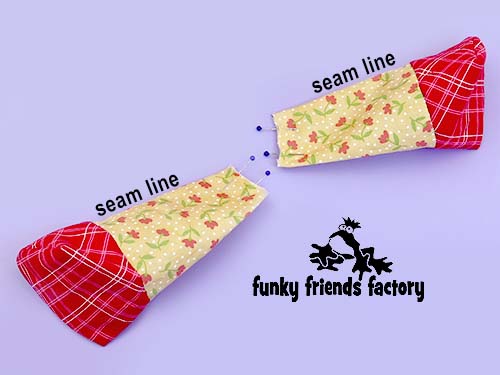
STEP 9c
Fold the base part of the HOOF PIECES up and pin the side seams. Sew around the front of the hoof from L – K – L. Turn the LEGS right sides out but DON’T stuff the LEGS NOW!
TIP: I find it’s easiest to sew this seam with the LEG in a “standing up position” and the “base” part of the HOOF PIECES facing down.
BODY:
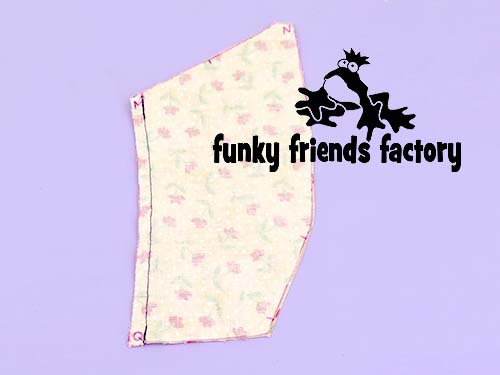
STEP 10
Sew the FRONT PIECES down the centre seam from M – Q.
FRONT LEGS:
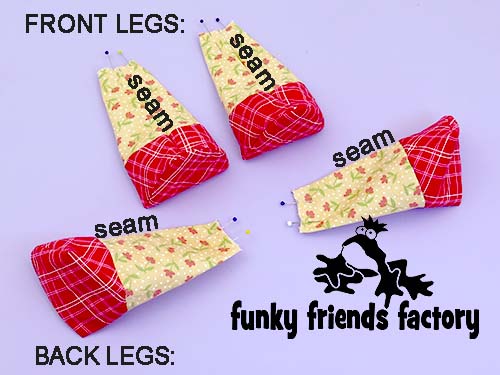
STEP 11a
Fold two LEG PIECES (for the FRONT LEGS) so that the seam of each LEG runs down the middle of each LEG.
STEP 11b
Pin these FRONT LEGS to the FRONT PIECES as shown on the pattern markings, with the seams of the LEGS facing the front – sew/baste them in place with a 3mm seam allowance.

STEP 12
Pin and sew the CHEST PIECE to the FRONT PIECES from N – M – N (with the tops of the FRONT LEG PIECES in between).
BACK LEGS:
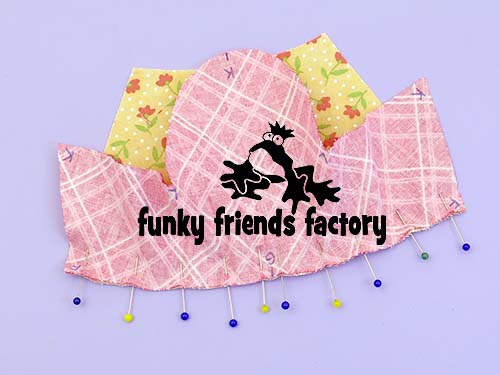
STEP 13
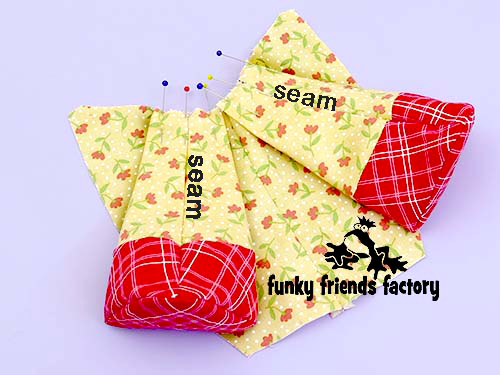
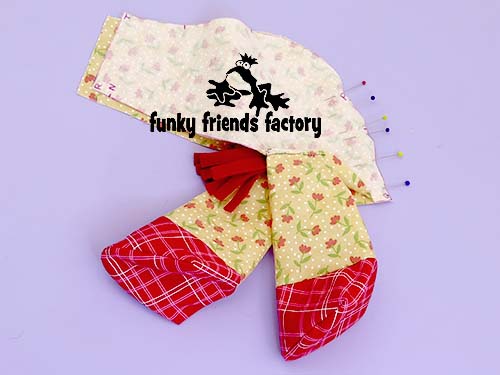
Fold the other two LEG PIECES, (for the BACK LEGS) so that the seam of each LEG runs along the side of each LEG.
TIP: Here’s a picture to show you more clearly – the difference between how the (FRONT)and (BACK LEGS) are folded!!!!
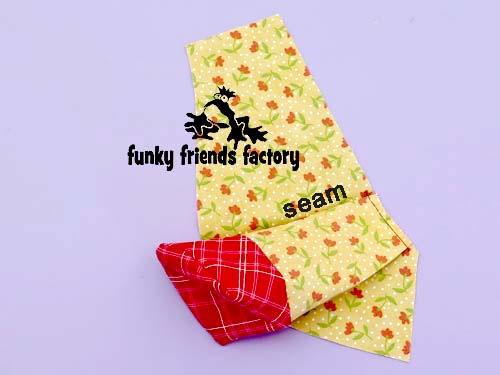
STEP 14
Sew these BACK LEGS to the BACK PIECES , with a 3mm seam allowance,as shown on the pattern markings, be careful to make sure that the side of the leg where the seam is, is closest to (facing towards) the head – this is so that the hooves will point up not down!
TAIL:
STEP 15a
Sew the TAIL PIECE and the TAIL TIP PIECE together.
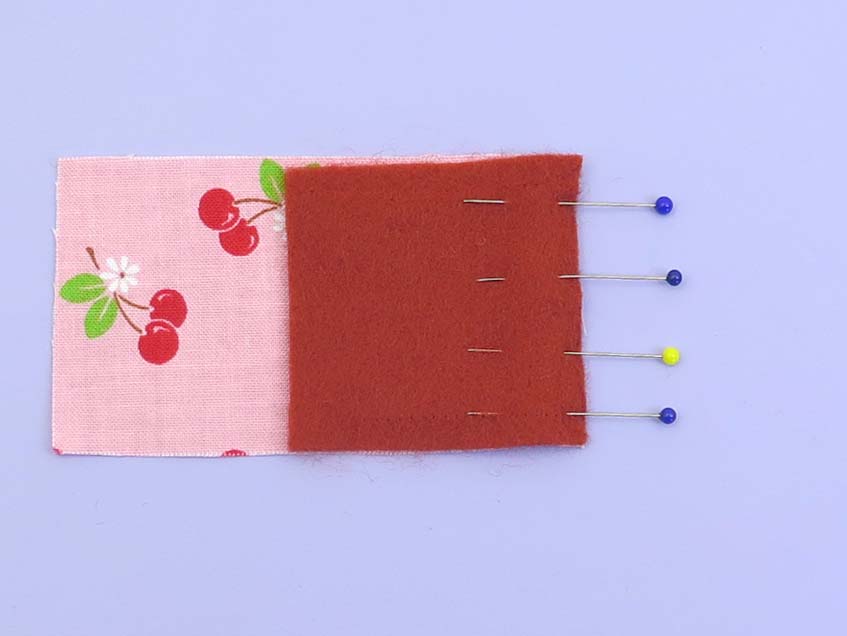
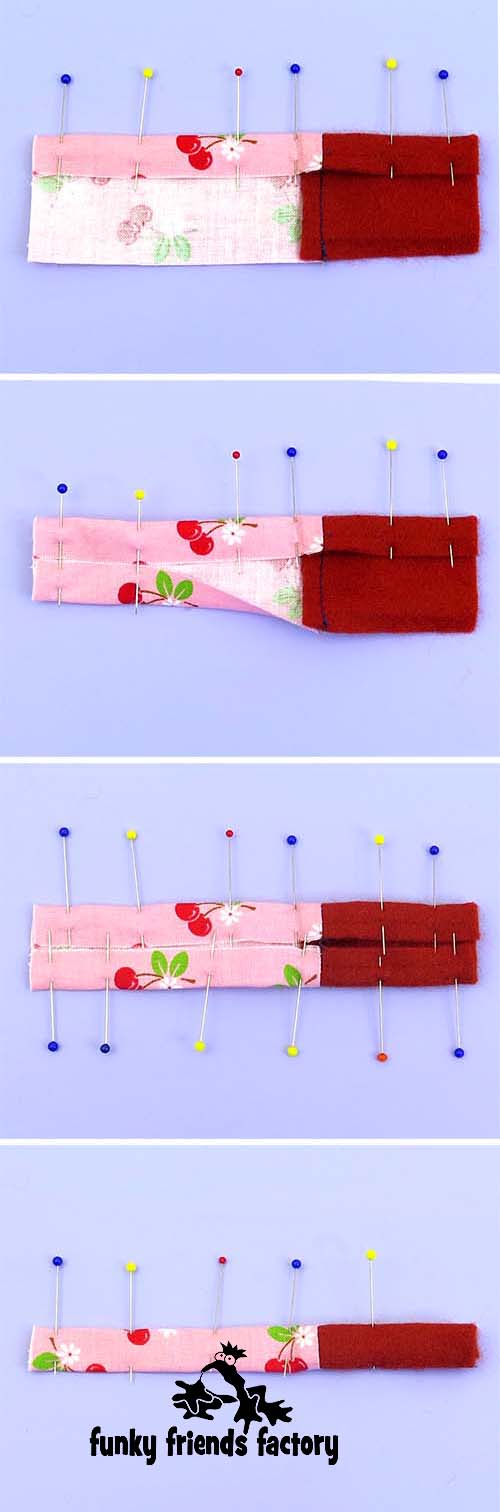
STEP 15b
Fold the long edges of the TAIL to the middle, with the WRONG sides of the fabric together, then fold the tail in half (lengthwise again) so you have 4 layers.
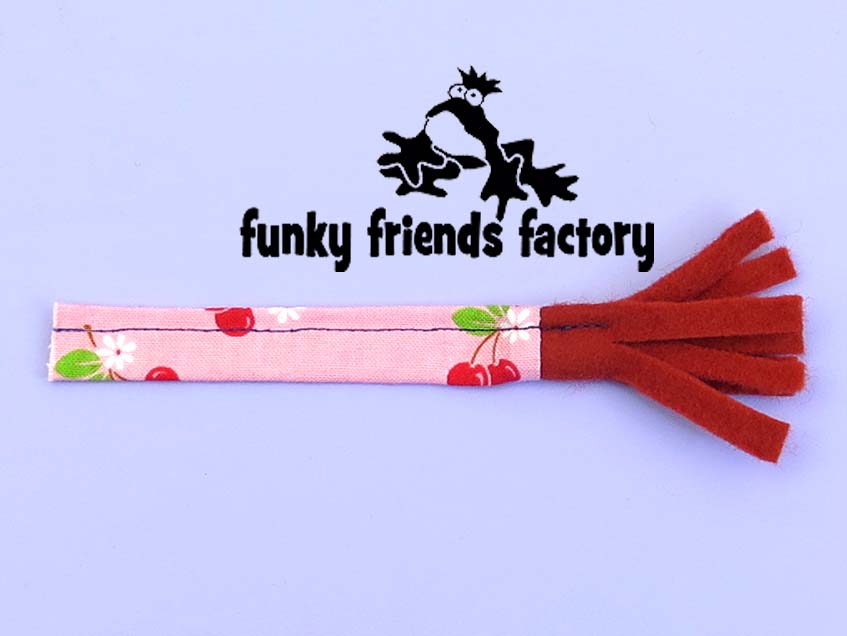
STEP 15c
Sew a line of stitching down the TAIL PIECE to hold it closed, you don’t need to sew the whole way down the TAIL TIP PIECE, only about 1cm (½ inch) at most. Cut the tassels in TAIL TIP PIECE, about 5mm/¼inch thick.
TIP: For a different look – you can use a 12cm(5inch) length of black cord for the tail. Tie a knot at the end so it doesn’t unravel. The end will fluff out nicely with a bit of coaxing.
BACK PIECES:
STEP 16
Pin the TAIL in position between the BACK PIECES, using the pattern markings to guide you with the position. Sew the BACK PIECES together from P – Q.
STEP 17a
Pin the BACK PIECES to the CHEST & FRONT PIECES at the sides (side seam).
(This photo is from the back)
STEP 17b
Sew the side seam from R – N – Q – N – R.
(This photo is from the front)
NECK SEAM:
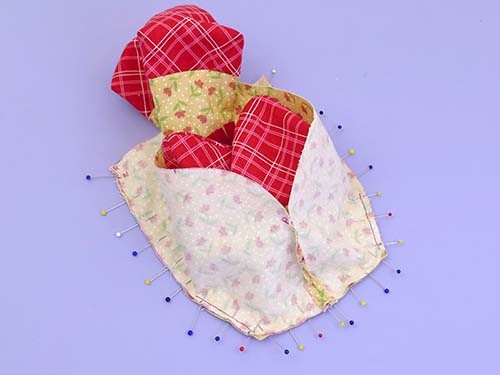
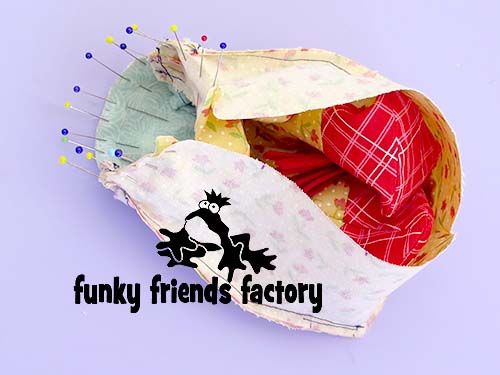
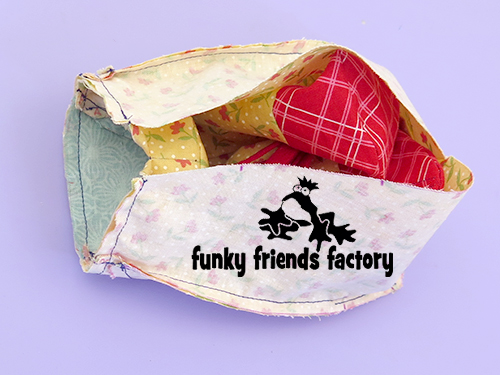
STEP 18a
Pin the head and the body together at the neck seam.
TIP: I find the best way to do this is to turn the head right sides out and position it ‘inside the body’ so you can pin the pieces together at the neck seam, and sew them together with the fabric right sides together.
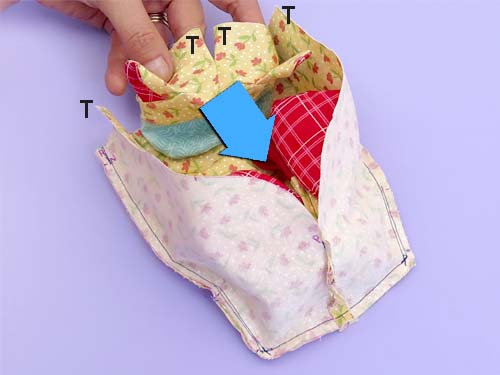
STEP 18b
Sew the HEAD & SNOUT BASE PIECES to the CHEST & BACK PIECES at the neck seam, matching T at the back and H at the front.
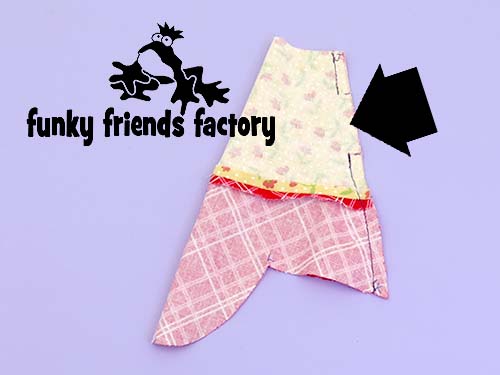
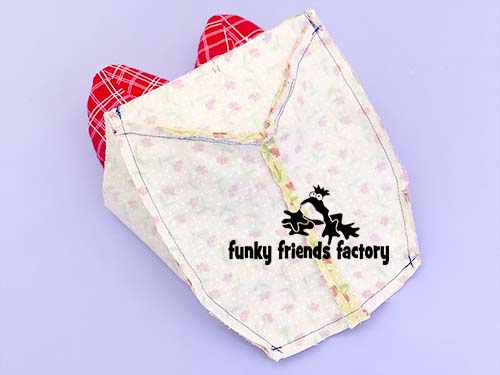
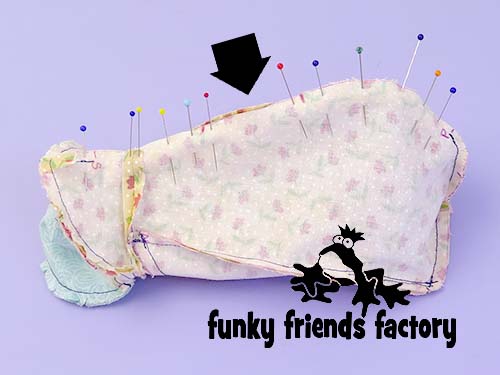
STEP 19a
Pull the HEAD back out of the body so the pieces are wrong sides out again. Sew BACK HEAD PIECES & BACK PIECES closed, sewing from S – T – P, remembering to leave the stuffing gap open. (See the black arrow in the photo below).
ASSEMBLY:
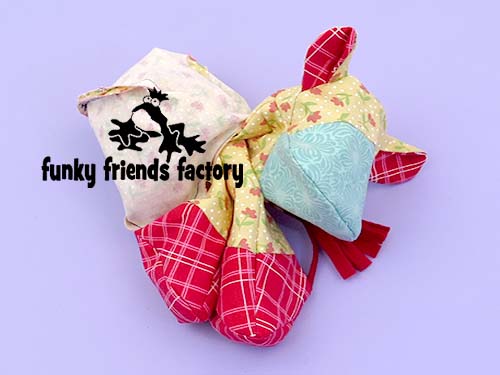
STEP 20
Turn Patty right sides out through the stuffing gap.
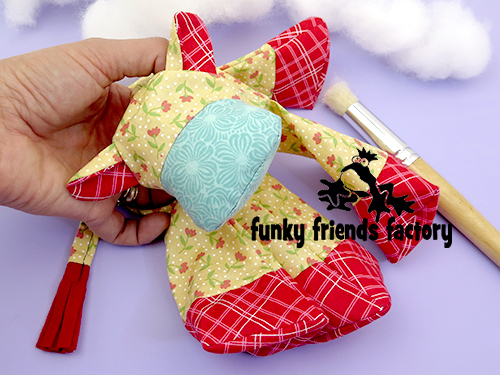
STEP 21
Fill the SNOUT and HEAD area firmly with toy stuffing. Stuff the LEGS and BODY with toy stuffing.
EYES:
STEP 22
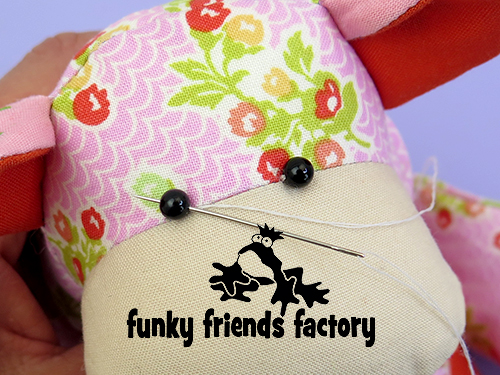
If you are using BEADS/BUTTONS sew them in place for Patty’s eyes now.
TIP: When you sew the eyes, secure your thread in the centre below the snout, where you can hide your stitching in the seam between the SNOUT BOTTOM PIECE and the CHEST PIECE. If you pull this stitching quite tight, it will pull the eyes in a bit as well as the snout to give Patty a really cute look!
STEP 23
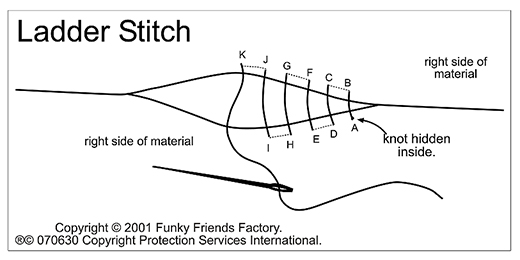
Sew ALL the stuffing gaps closed with ladder stitch.
HORNS:
STEP 24a
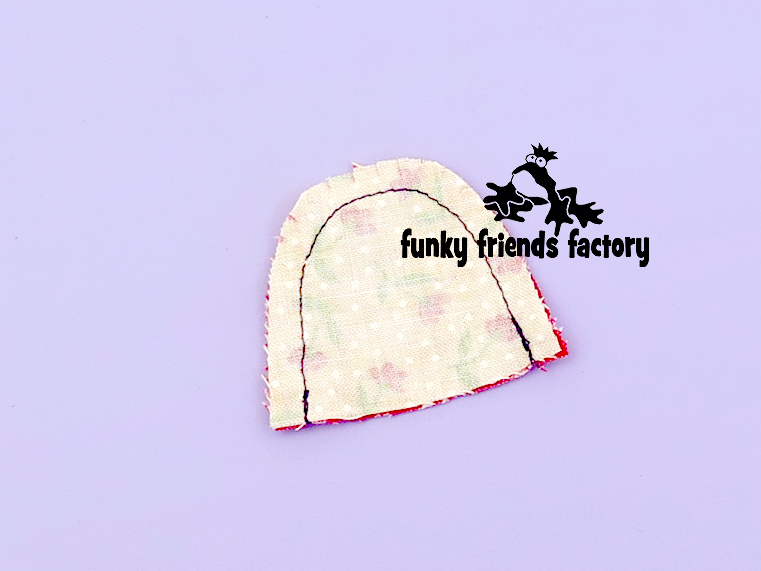
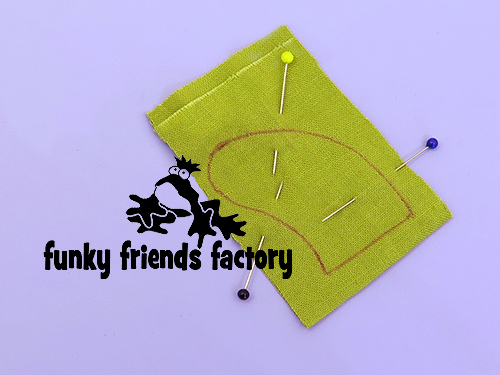
On a double layer of horn fabric, trace around the sewing line of your horn template for the HORNS.
(I have only shown 1 in this photo but you need 2 horns!)
STEP 24b
Sew on the lines you traced. Cut around the stitch line with a seam allowance of roughly 3mm(⅛inch) to cut out the HORNS and turn them right side out.
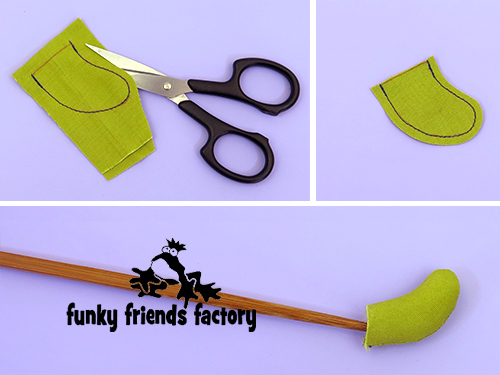
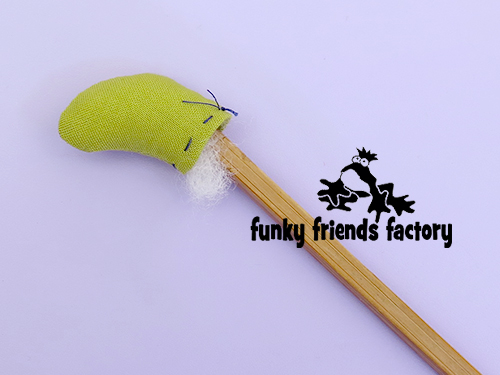
STEP 25
Fold the seam allowance in along the straight edge of the HORN PIECES, with the fabric wrong sides together, to form a 5mm(¼inch) ‘hem’ and tack (baste) this down. Stuff the HORNS with toy stuffing.
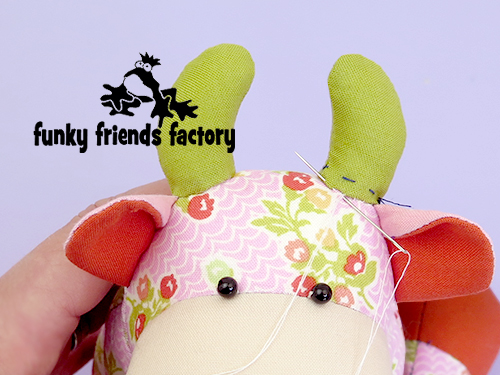
STEP 26
Sew the HORNS onto the HEAD & BACK HEAD PIECES with a ladder stitch (using the photo of the cow to guide you with their position).
TIP: Add a little bit of stuffing if you need to make sure the horns are stuffed firmly and stand up nicely! **Don’t forget to remove your tacking (basting) stitches!**
Your toy is ready to LOVE!
![]()
Come join the fun on Facebook!
Come and post some photos of your NEW Funky Friend for me to see on my Funky Friends Factory Facebook page.
You could WIN a FREE PATTERN in the MAKER OF THE MONTH Pattern Giveaway!
I can’t wait to see the Funky Friends you sew!

bye for now,
Pauline
![]()
