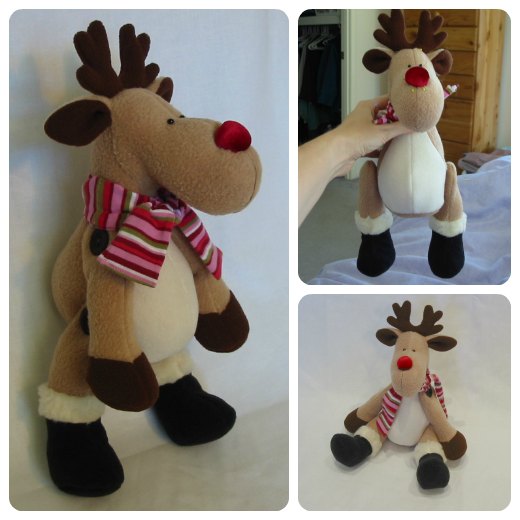
I think button-jointed toys are pretty cool because they can move their limbs and pose in different positions, BUT I know that some people don’t like making button-jointed toys so I’ve put together a quick photo tutorial to show you how easy it is to make Reggie without his joints! (If you like button-jointed toys too, you can check out my button-jointing tutorial here!)
NOW
you can make him WITHOUT joints
and the pattern is EXACTLY THE SAME!
HOW cool is that?
So…
if you HAVE bought the
Reggie Reindeer Pattern already
PLEASE DON’T BUY THE PATTERN AGAIN!!!
* IF you HAVEN’T got the pattern, you can purchase it here ~>
Reggie Reindeer INSTANT DOWNLOAD Sewing Pattern.
OK! Let’s give it a go!!!
STEP 1
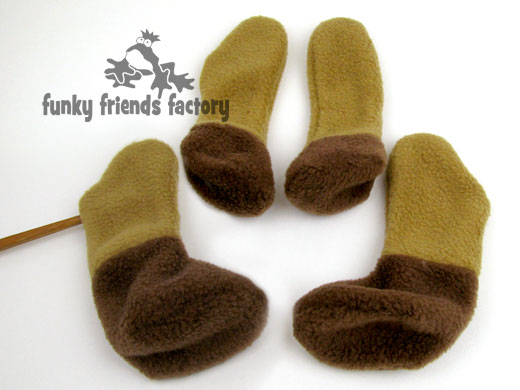
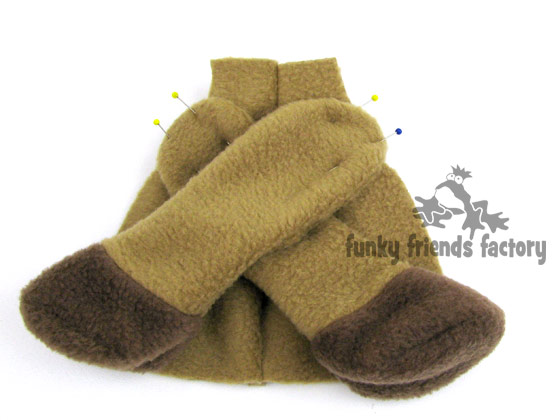
You will make the arms and legs for Reggie Reindeer EXACTLY as you would for the button-jointed version.
* Unfortunately, I didn’t have the fake fur for Reggie’s boots when I did this tutorial so I just left the FUR PIECE out and sewed the LEG PIECES to the BOOT PIECES. This made the legs about half an inch shorter, BUT he didn’t seem to mind? 😀
The pattern instructions will tell you to stuff the arms and legs and sew the stuffing openings closed…
DON’T DO IT!!!!
Well, don’t do it NOW. You will do this AFTER the reindeer is all sewn together!
STEP 2
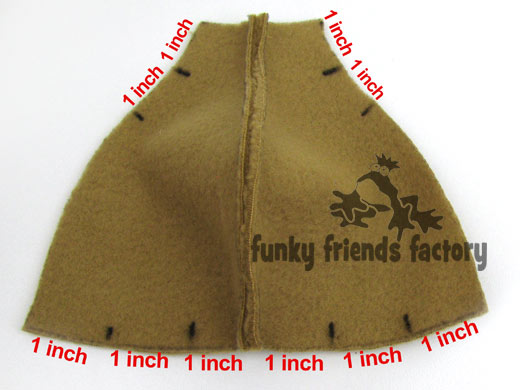
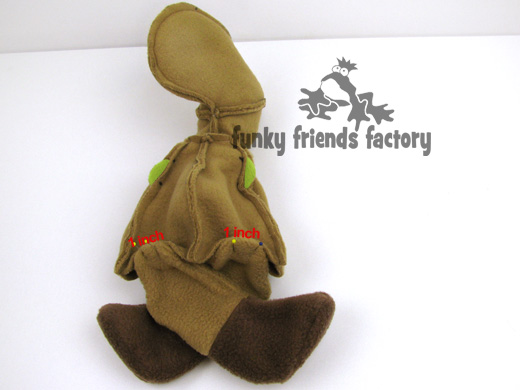
Mark up the TUMMY PIECES with some pattern markings so you can see where to attach the arms and legs. This is so simple – all you need is a ruler and a fabric/permanent marker pen. Using this photo to guide you, draw the markings on the wrong side of the fabric.
- Make 2 markings for the arms on each side – 1 inch (2.5cm) and 2 inches (5cm) down from the top edge.
- Make 2 markings for the legs on each TUMMY PIECE – 1 inch in from the side and 1 inch in from the center.
STEP 3
Pin the tops of the arms to the TUMMY PIECES, between the 2 markings you drew. Make sure that the top of the arms stick out a little bit past the edge of the TUMMY PIECES. This will make sure that the arms are caught nicely in the seam as you sew.
STEP 4
Place the BODY PIECES on top of the TUMMY PIECES. Pin and sew them together with the arms in between.
STEP 5
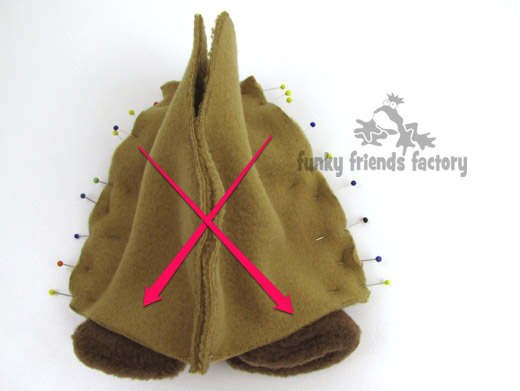
Sew the EAR, FACE and NECK PIECES together EXACTLY as you would for the button-jointed version. Here you can see Reggie’s head and body are all done, he’s waiting for some legs and a BASE PIECE, then he’s done!
STEP 5
TIP – Push the arms back inside the body. I push the hooves right up inside his head (it’s ok he is very flexible!)
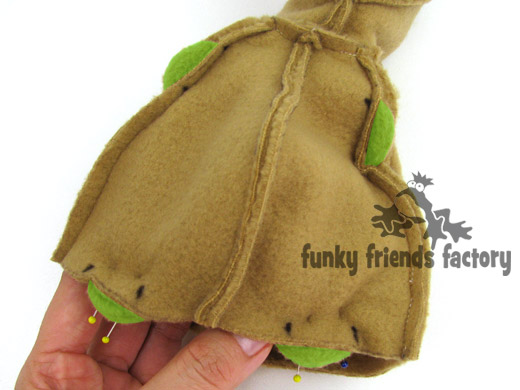
Pin the tops of the legs to the TUMMY PIECES, between the pattern markings you drew, on each side. Make sure that the top of the legs stick out a little bit past the edge of the TUMMY PIECES , just like you did with the arms. Use the photo below to guide you – I LOVE this pic, it looks as if Reggie is sitting with his legs crossed!
* I have used bright green to highlight where the top of the arms
are poking out past the edge of the TUMMY PIECES.
STEP 7
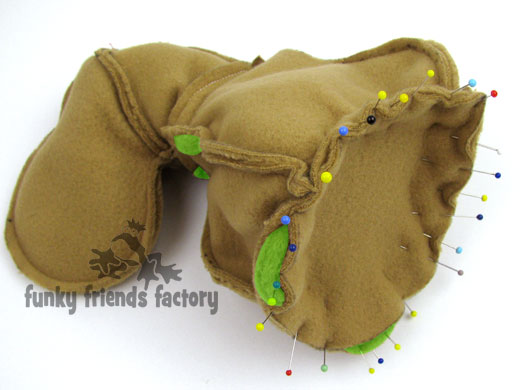
Push the legs inside the body so you can pin the BASE PIECE to the TUMMY and BACK PIECES with the legs inside them all.
* Again the bright green highlighted areas are
the tops of the arms AND legs poking past the edges of the pieces.
STEP 8
Pin the BASE PIECE to the TUMMY and BACK PIECES. Sew this in place just like you would for the button-jointed Reggie BUT with the legs in between.
STEP 9
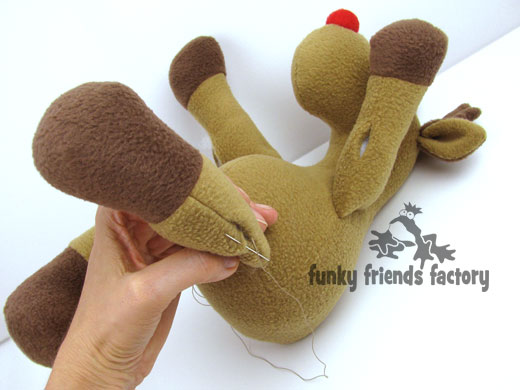
Stuff Reggie’s body, arms and legs nice and FIRMLY then sew up all the stuffing openings with a ladder stitch. Finish Reggie just like you would do with the button-jointed version… add his red nose and antlers, and a scarf if he’s COLD!
Woohoo!
Let’s go play
in the SNOW!!!!!!!!
Your Reggie Reindeer
is ready to LOVE!!!!!
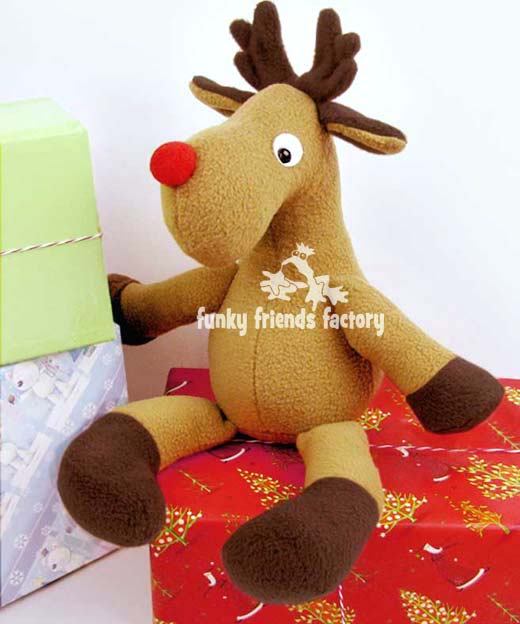
Please let me know which way you’d like to make him –
…buttoned or unbuttoned?
 . .
. .
Till next time… Happy Sewing,
Pauline
xxx ![]()




Thanks Karen… you should be able to, but you will need to work out exactly where to place the arms and legs like I did with Reggie so the arms and legs look nice, and the teddy can sit too! 😀
That’s so clever – I am going to try Reggie this way this Chrismas!
Thanks Pauline, I’m going to try it this way now for baby’s first Christmas toy!
Thanks. I’m going to try it this way. Since i have never done a jointed animal
Thanks Rita and Tracy – don’t forget to come and post a pic of your finished reindeer toys on my Facebook page! https://www.facebook.com/funkyfriendsfactory
Cool, just got the pattern, looks like fun!
thanks for share!
That’s so clever!
I find button joints a pain so tihs option is great. Thank you:D
Glad I did this tutorial then, Leonore!!! ;D
I love how you make tutorials so show beginners like me how to sew toys. Your toy patterns are always so easy to follow even for beginners like me your toys always turn out amazing!
Thank you Billie, the tutorials seem to take me F-O-R-E-V-E-R to make so it’s wonderful for me to know you appreciate them!!!!! 😀
I love your reindeer sewing pattern. It’s been a great hit!
Thanks Michaela! 😀
Are you coming out with any. new patterns? I love all your patterns and have just about all of them…lol
the link to the sewing tips for Reggie does not work. Can you send me the link so I can get your tips for making it? I find them very helpful.