
I made this photo tutorial so you can see how to sew my Meerkat Toy Pattern ~>
Scroll down for step-by-step photos!

*** PLEASE NOTE – this is ONLY a PHOTO TUTORIAL ***
The FULL PATTERN IS NOT included here.
It is NOT A FREE PATTERN.I have made this photo tutorial so people who have purchased the pattern can SEE how to sew a meerkat toy (I wanted to explain this so you are not disappointed if you have found this page via a search engine and not from the link in my Mango the Meerkat sewing pattern!)
First choose some fabric
You can sew Mango the Meerkat from most fabrics and you can use ANY colour! I chose a nice deep mango colour for this photo tutorial meerkat.
A meerkat doesn’t have to
be BROWN!!!!!

Right, let’s get sewing!
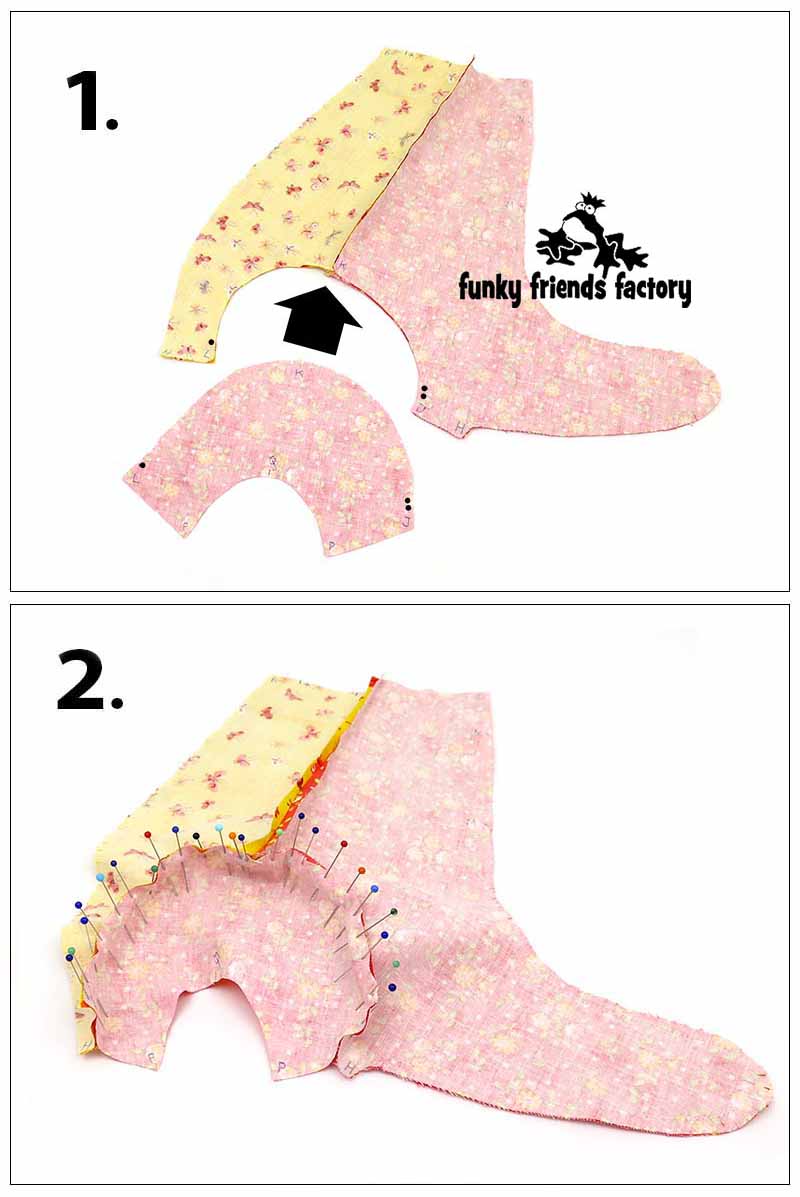
FACE:
STEP 1
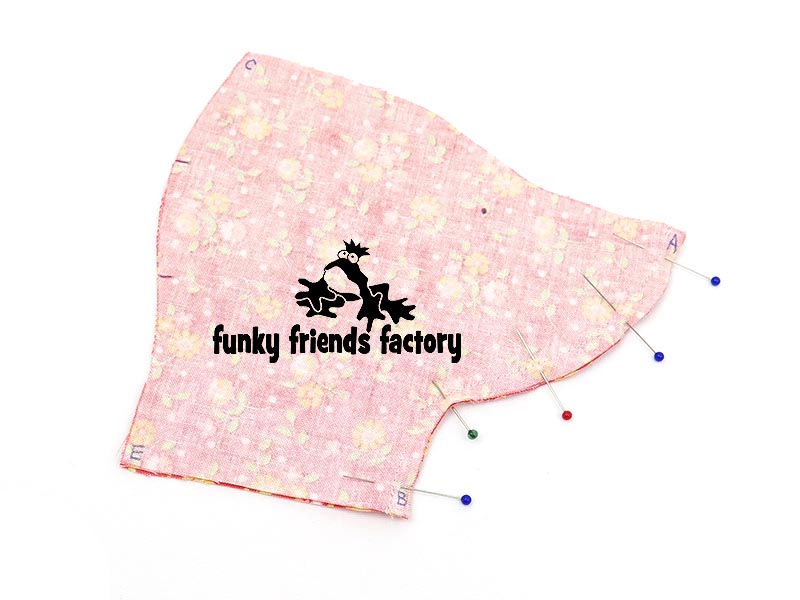
Sew the FACE PIECES from A – B.
STEP 2
Sew the FOREHEAD PIECE to the FACE PIECES from C – A – C
TIP: This is a hard seam to sew, so use lots of pins and take it slow! Sew this seam with the FOREHEAD PIECE facing down. That way you can smooth out any ‘wrinkles’ as you sew.
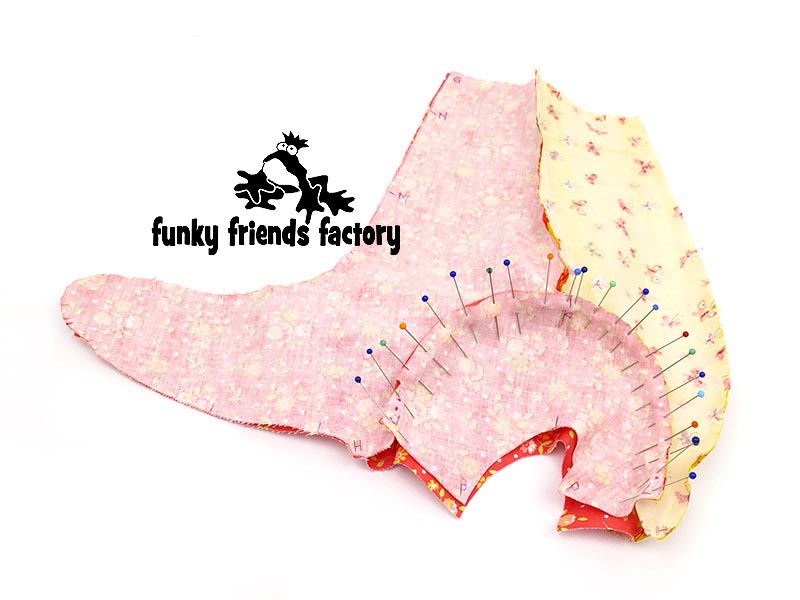
EARS:
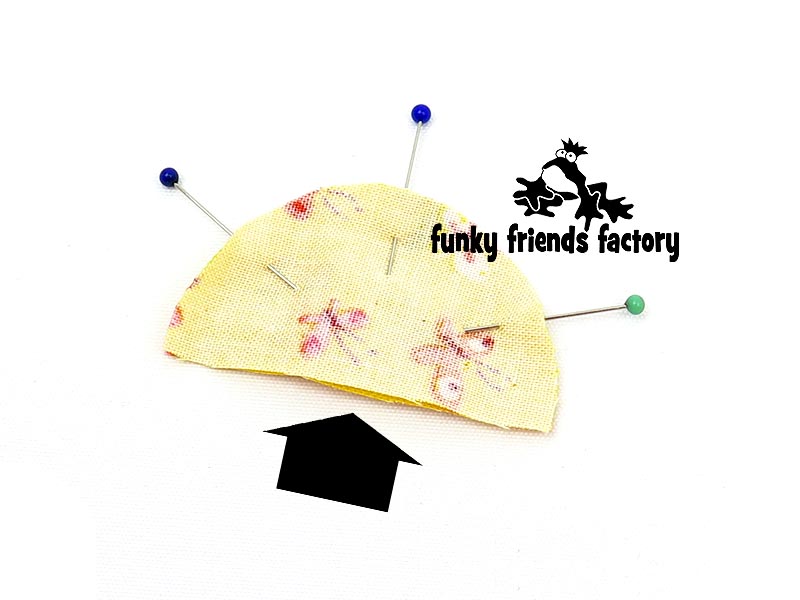
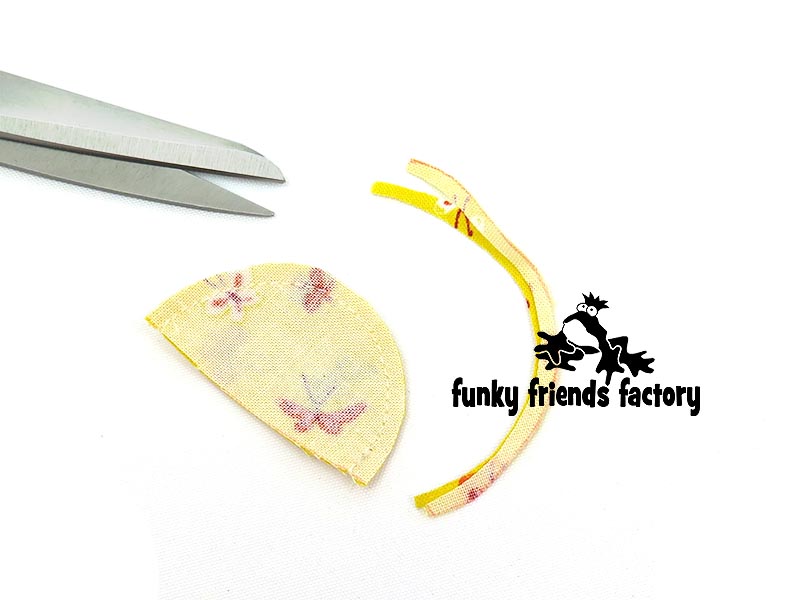
STEP 3a
Sew the EAR PIECES together in pairs, leaving the flat edge open for turning (see the black arrow in the photo below).
STEP 3b
Trim the seam allowance of the EARS to about 3mm ( 1/8 inch) around the sewing line.
STEP 3c
Turn the EARS right sides out.
TIP: I use a chopstick to push the seams out nicely. Run the end of the chopstick (or similar turning tool) along the seam from inside the EARS.

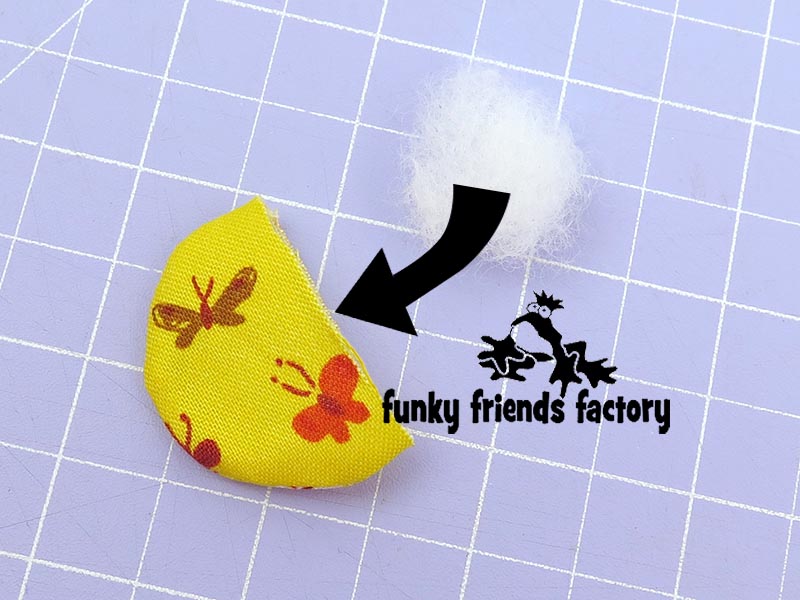
STEP 4a
Stuff the EARS with a little bit of toy stuffing. (Don’t stuff them too much – use just enough stuffing so they aren’t flat.)
STEP 4b
Pin the EARS closed at the straight edge.
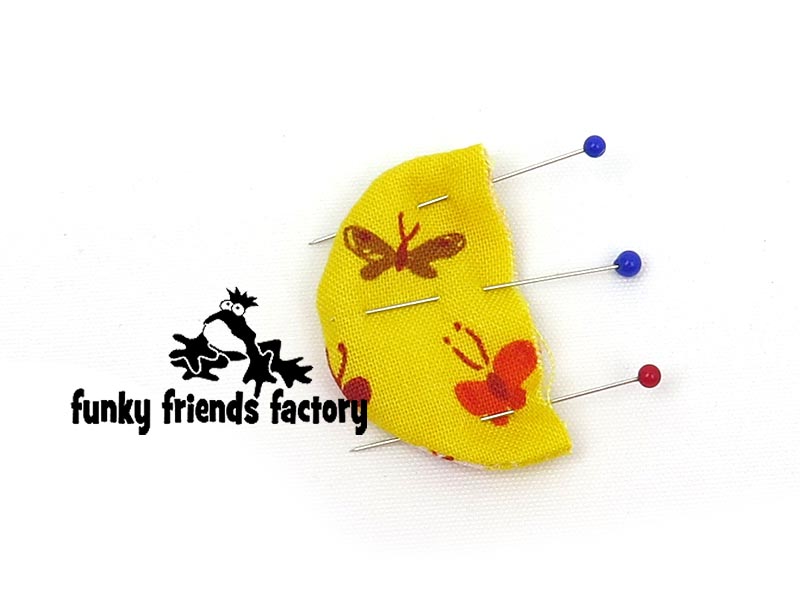
STEP 5a
Pin the EARS to the FACE PIECES, using the pattern markings to guide you with the placement.
STEP 5b
Sew the EARS to the FACE PIECES using a seam allowance of 3mm (1/8 inch).
TIP: You can tack(baste) the EARS in place by hand if you prefer. This will stop them slipping – so your Meerkat won’t have crooked ears!
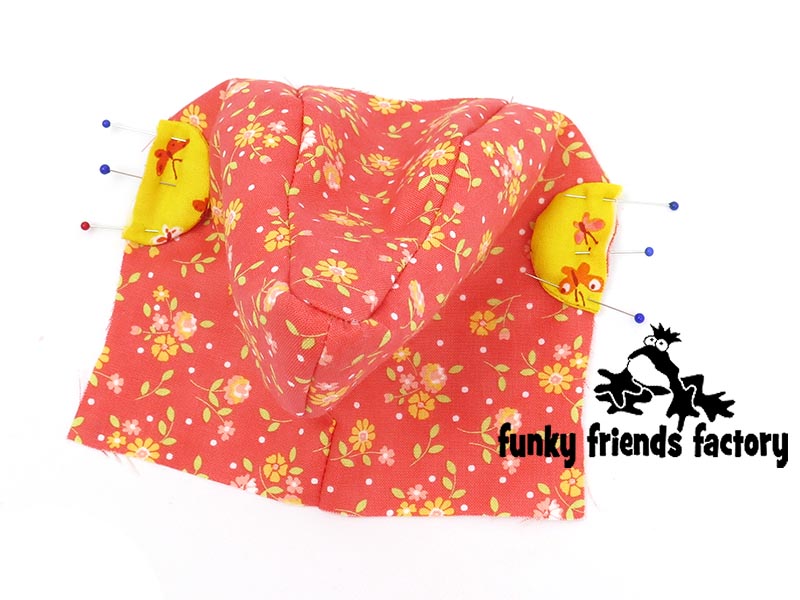
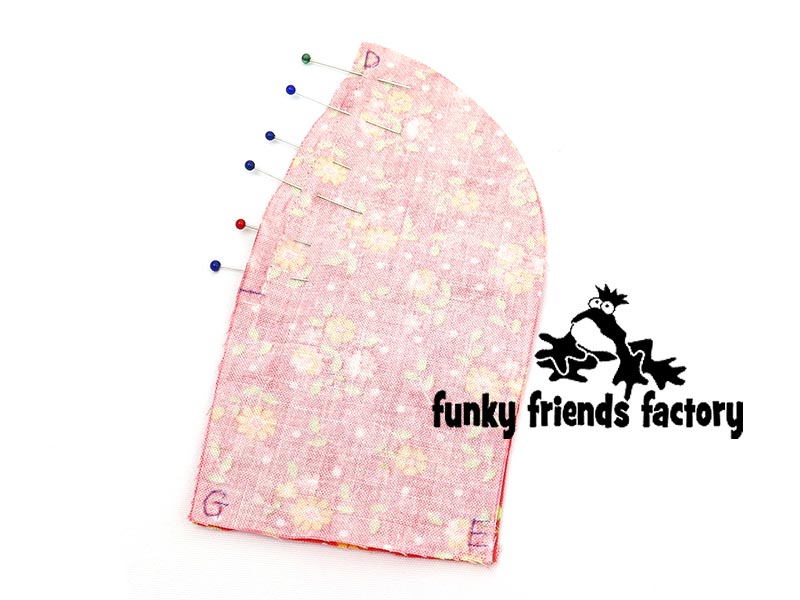
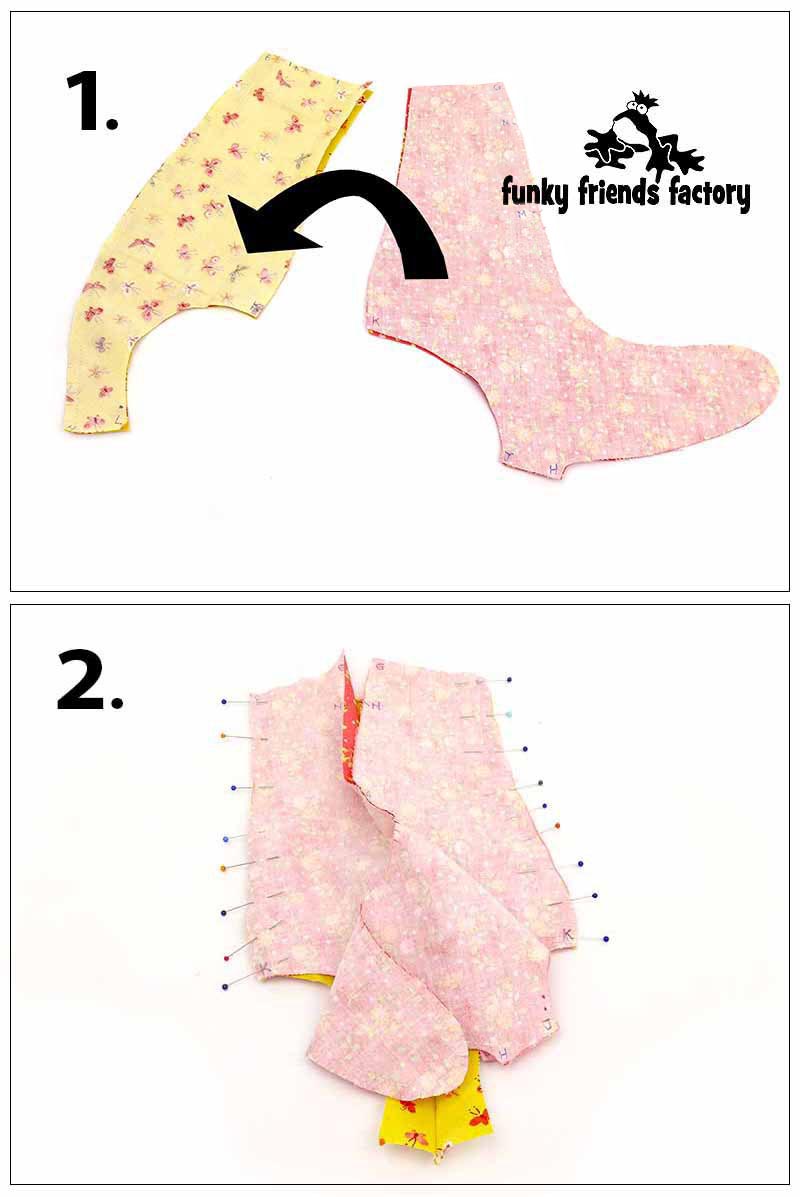
BACK HEAD:
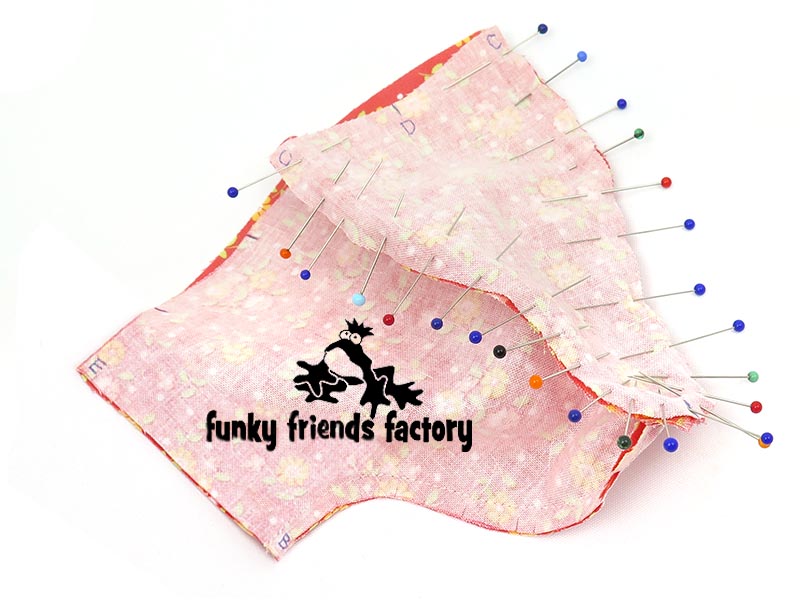
STEP 6
Sew the BACK HEAD PIECES together from F – D. (Leave them open at the bottom between F and G.)
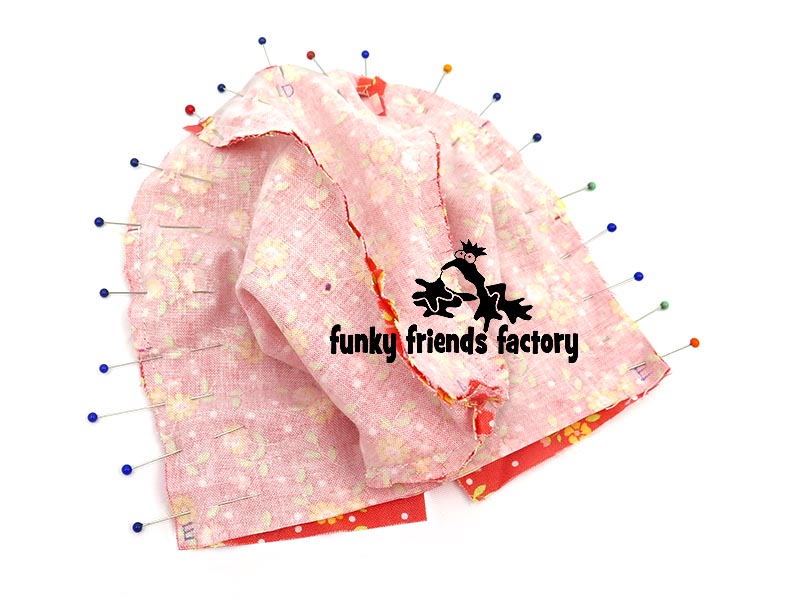
STEP 7
Sew the BACK HEAD PIECES to the FACE & FOREHEAD PIECES, from E – C – D – C – E, with the EARS in between.
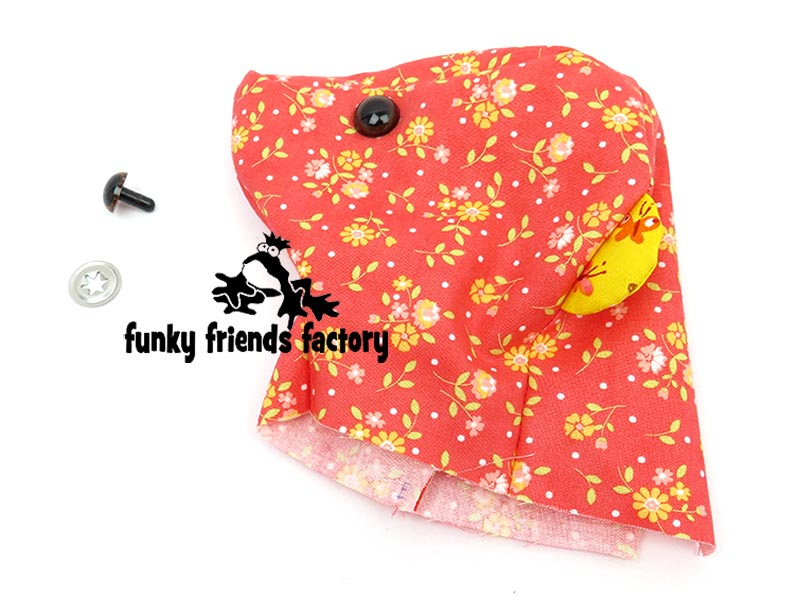
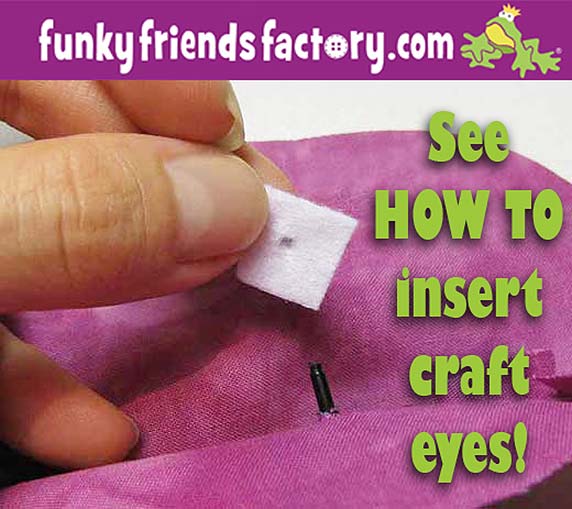
EYES:
STEP 8
If you are using CRAFT EYES insert these now.
TIP: I have a tutorial to show you how to insert craft eyes on my blog.
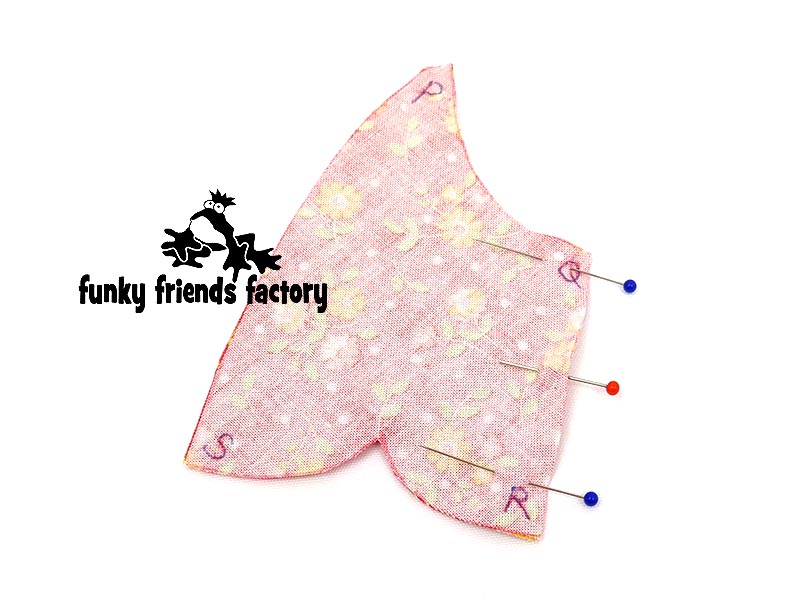
ARMS:
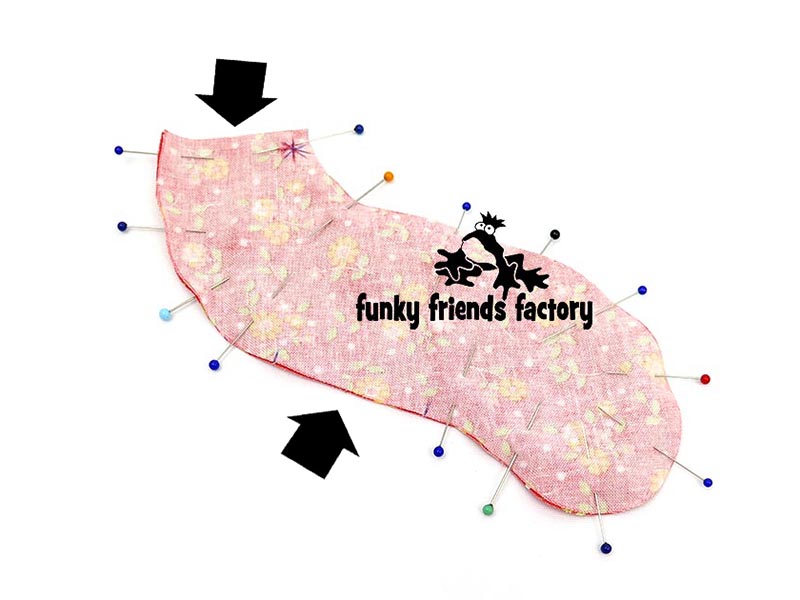
STEP 9a
Sew the ARM PIECES together in pairs leaving them open at the top and leaving the gap open for stuffing (see the black arrows in the photo below). Don’t stuff the arms now – this will make it hard to sew the neck seam.
STEP 9b
Clip the seam allowance, turn the ARMS right sides out and use a chopstick to smooth the seams. Pin the ARM PIECES closed at the top.
TIP: I like to put a red pin where the star pattern marking is to help me make sure I get the ARMS pinned the right way around!)

TUMMY & BACK:
STEP 10
Sew the TUMMY PIECES together, down the front seam, from B – H.

STEP 11
Sew the BACK PIECES together from H – M. (Don’t sew from M – the neck!)

STEP 12
Sew the TUMMY PIECES to the BACK PIECES along the side seams from E – K.
LEGS & FEET
STEP 13
Sew the LEGS to the TUMMY & BACK PIECES, matching the dots of the pattern markings, sewing from J – K – L.
I find it easiest to pin and sew one LEG PIECE first, then the other.
AND
Here is the other LEG PIECE pinned and ready to be sewn.
STEP 14a
Sew the FOOT PIECES together in pairs, along the top seam from Q – R.
STEP 14b
Sew the FOOT PIECES to the LEG PIECES from P – Q – P.
I find it easiest to pin and sew one FOOT PIECE first, then the other.
STEP 15
Pin and sew the FOOT, LEG , TUMMY and BACK PIECES closed at the bottom.
TIP: Use the letters of the pattern markings to help you match the pieces.


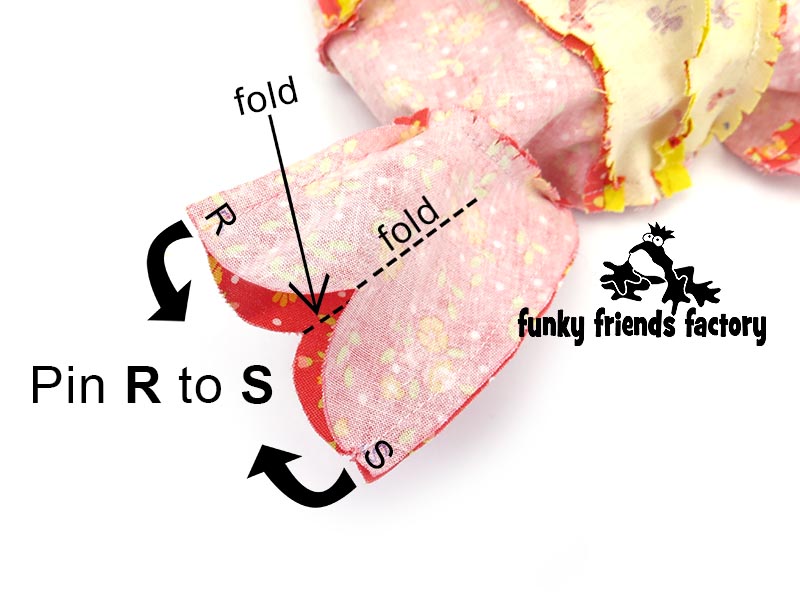
STEP 16a
Fold the FOOT PIECES as shown on the pattern markings…
STEP 16b
… and pin them closed at the front, with point R pinned to point S.
STEP 16c
Sew the FOOT PIECES closed from T – R/S – T (across the front of the feet).
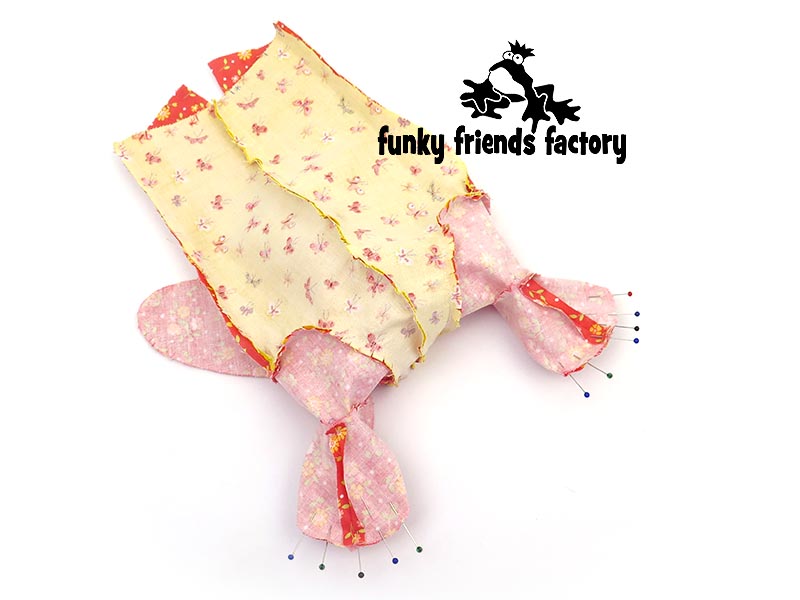

STEP 17
Turn the meerkat right sides out.
TIP: I like to take this chance to turn the feet and the tip of the tail really well (using my chopstick again!) because it is much easy to reach them NOW than later once the meerkat is all sewn.

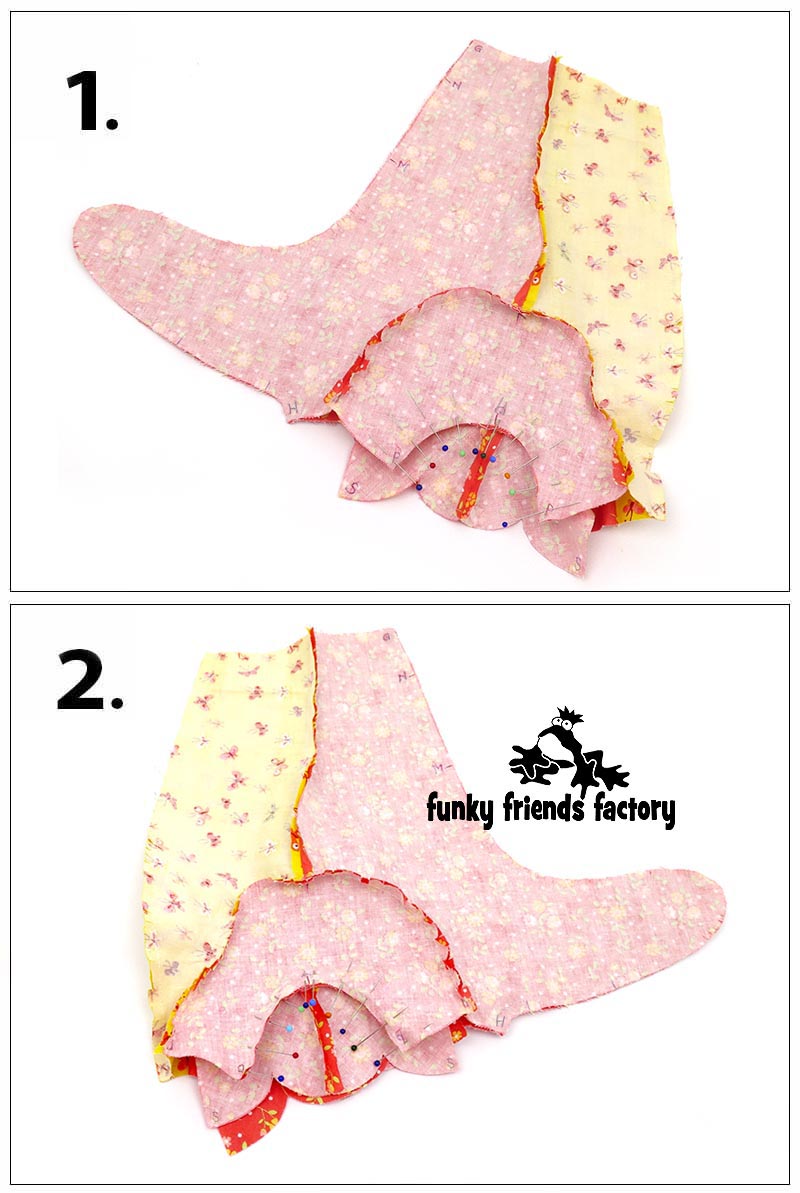
ATTACH THE ARMS:
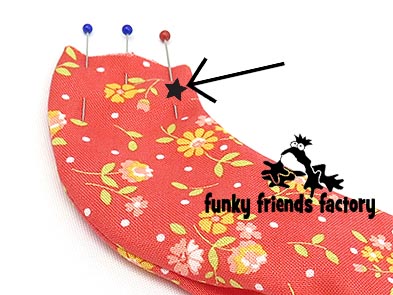
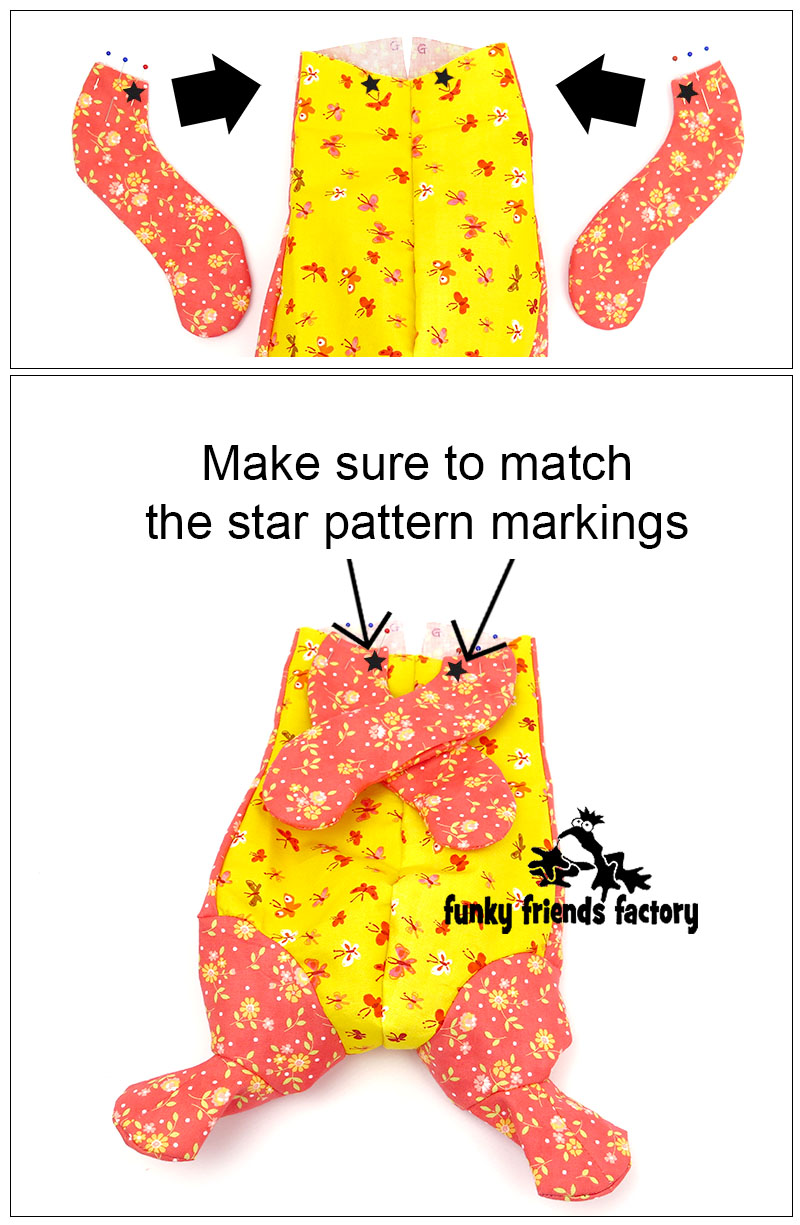
STEP 18a
Pin the ARMS to the right side of the TUMMY PIECES matching the star pattern markings (see the stars, and the red pins I used to help me match them up, in the photo below.)
The ARMS should cross over each other, in front of the TUMMY.
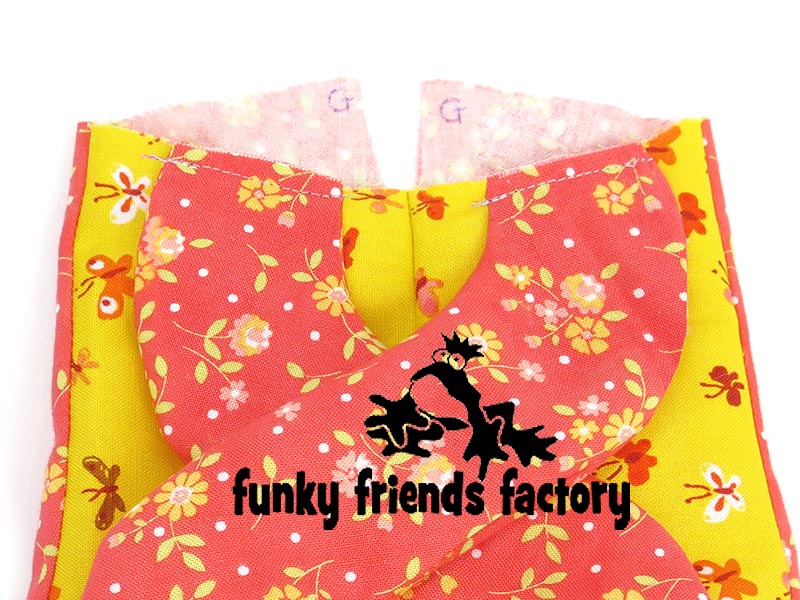
STEP 18b
Sew the ARMS to the TUMMY PIECES with a 3mm( ⅛ inch) seam allowance. This is very important because it helps the ARMS lie nicely. (It also adds extra strength which is great if the arms are likely to be tugged on by a young child!)
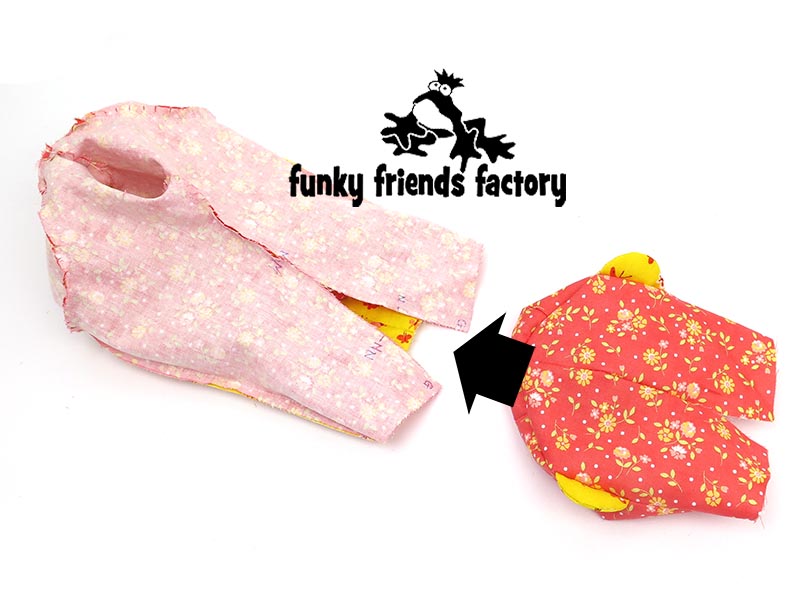
JOIN HEAD TO BODY:
STEP 19a
Turn the Meerkat wrong sides out. Pin and sew pin the head to the body at the neck seam.
TIP: I find the best way to do this is to turn the head right sides out and position it ‘inside the body’ so you can pin the pieces together at the neck seam, with the fabric right sides together.

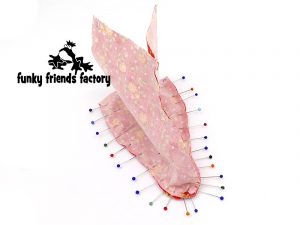
STEP 20
Pull the head back out of the body so the PIECES are wrong sides out again . Sew the Meerkat closed at the back from F – G on the BACK HEAD PIECES and from G – N, on the BACK PIECES, leaving the gap open for turning (see the black arrow in the photo below).
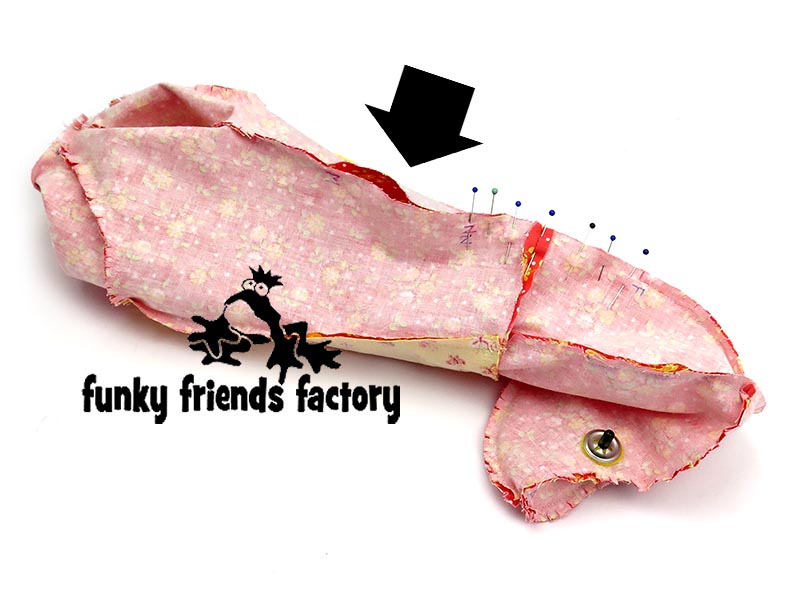
STEP 21
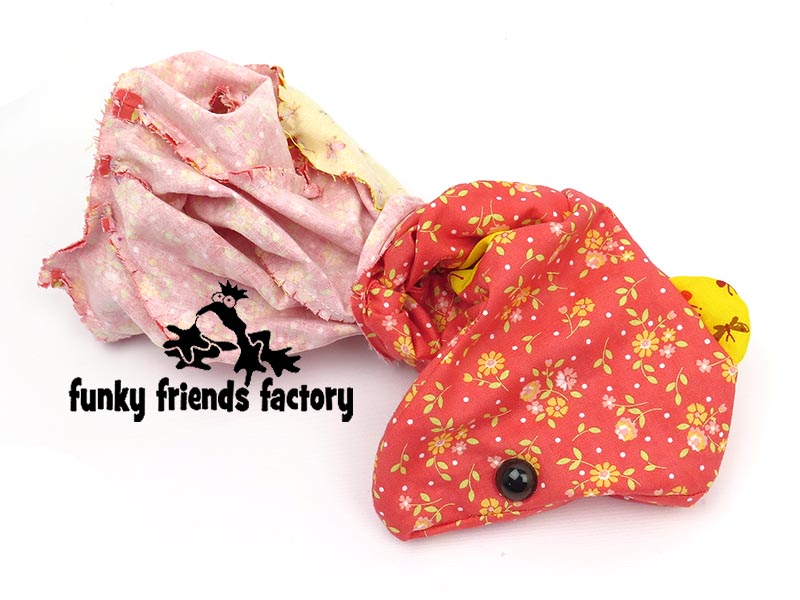
Turn the Meerkat right sides out through the turning gap.
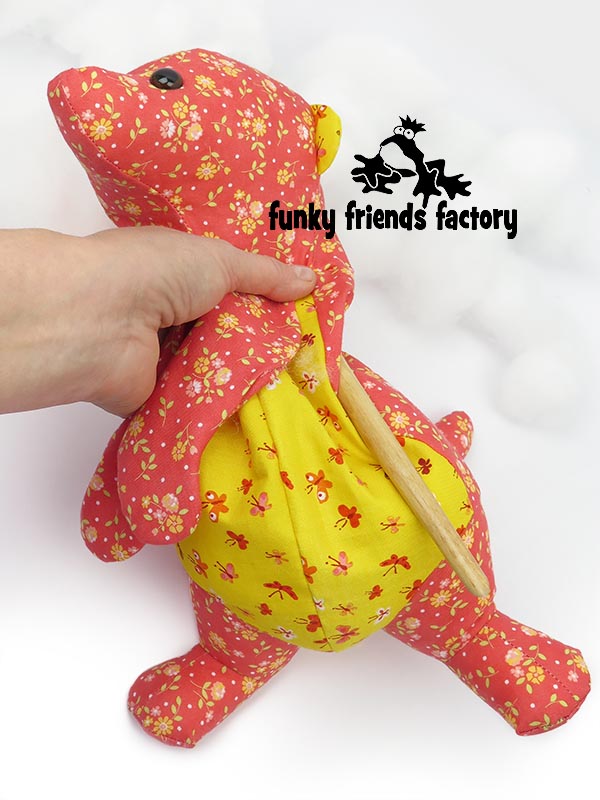
STUFFING:
STEP 22
SUPER-IMPORTANT: To get the Meerkat to stand up, you need to test you have enough stuffing as you go, so please stuff him in the following order:
Stuff the tail, starting at the ‘tip’, then stuff the feet and legs. Continue stuffing the top of the legs and the base of the tail and the lower part of the body until the bottom half of the Meerkat can stands up nicely on it’s own!
TIP: If you don’t add enough toy stuffing now, you won’t be able add more to his legs and tail after the body is all stuffed. Scrunch up the arms and head on top of the lower body and check that the Meerkat can stand on his legs – if NOT – keep adding stuffing until he CAN!
STEP 22b
Stuff the head, starting with the nose area. When the head is nice and firm, stuff the rest of the body. Stuff the ARMS last, making sure that they are even.

FACE (NOSE & MOUTH):
STEP 23a
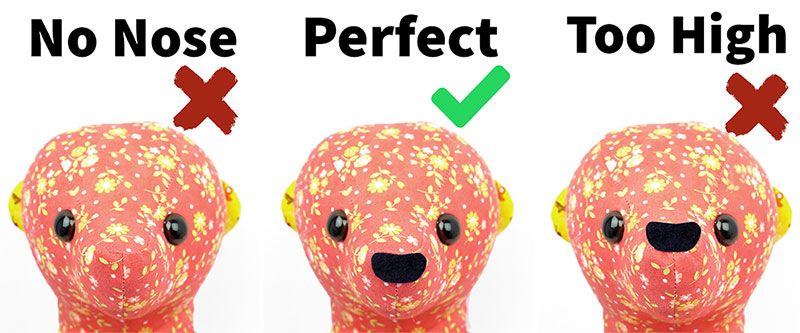
Cut the NOSE PIECE from felt. Look carefully at the pattern markings on the FACE PIECE template to check the nose position. Pin the NOSE PIECE on the FACE PIECES.
STEP 23b
The NOSE goes across the seam of both FACE PIECES.
Don’t put the NOSE on the FOREHEAD – it will be too high!
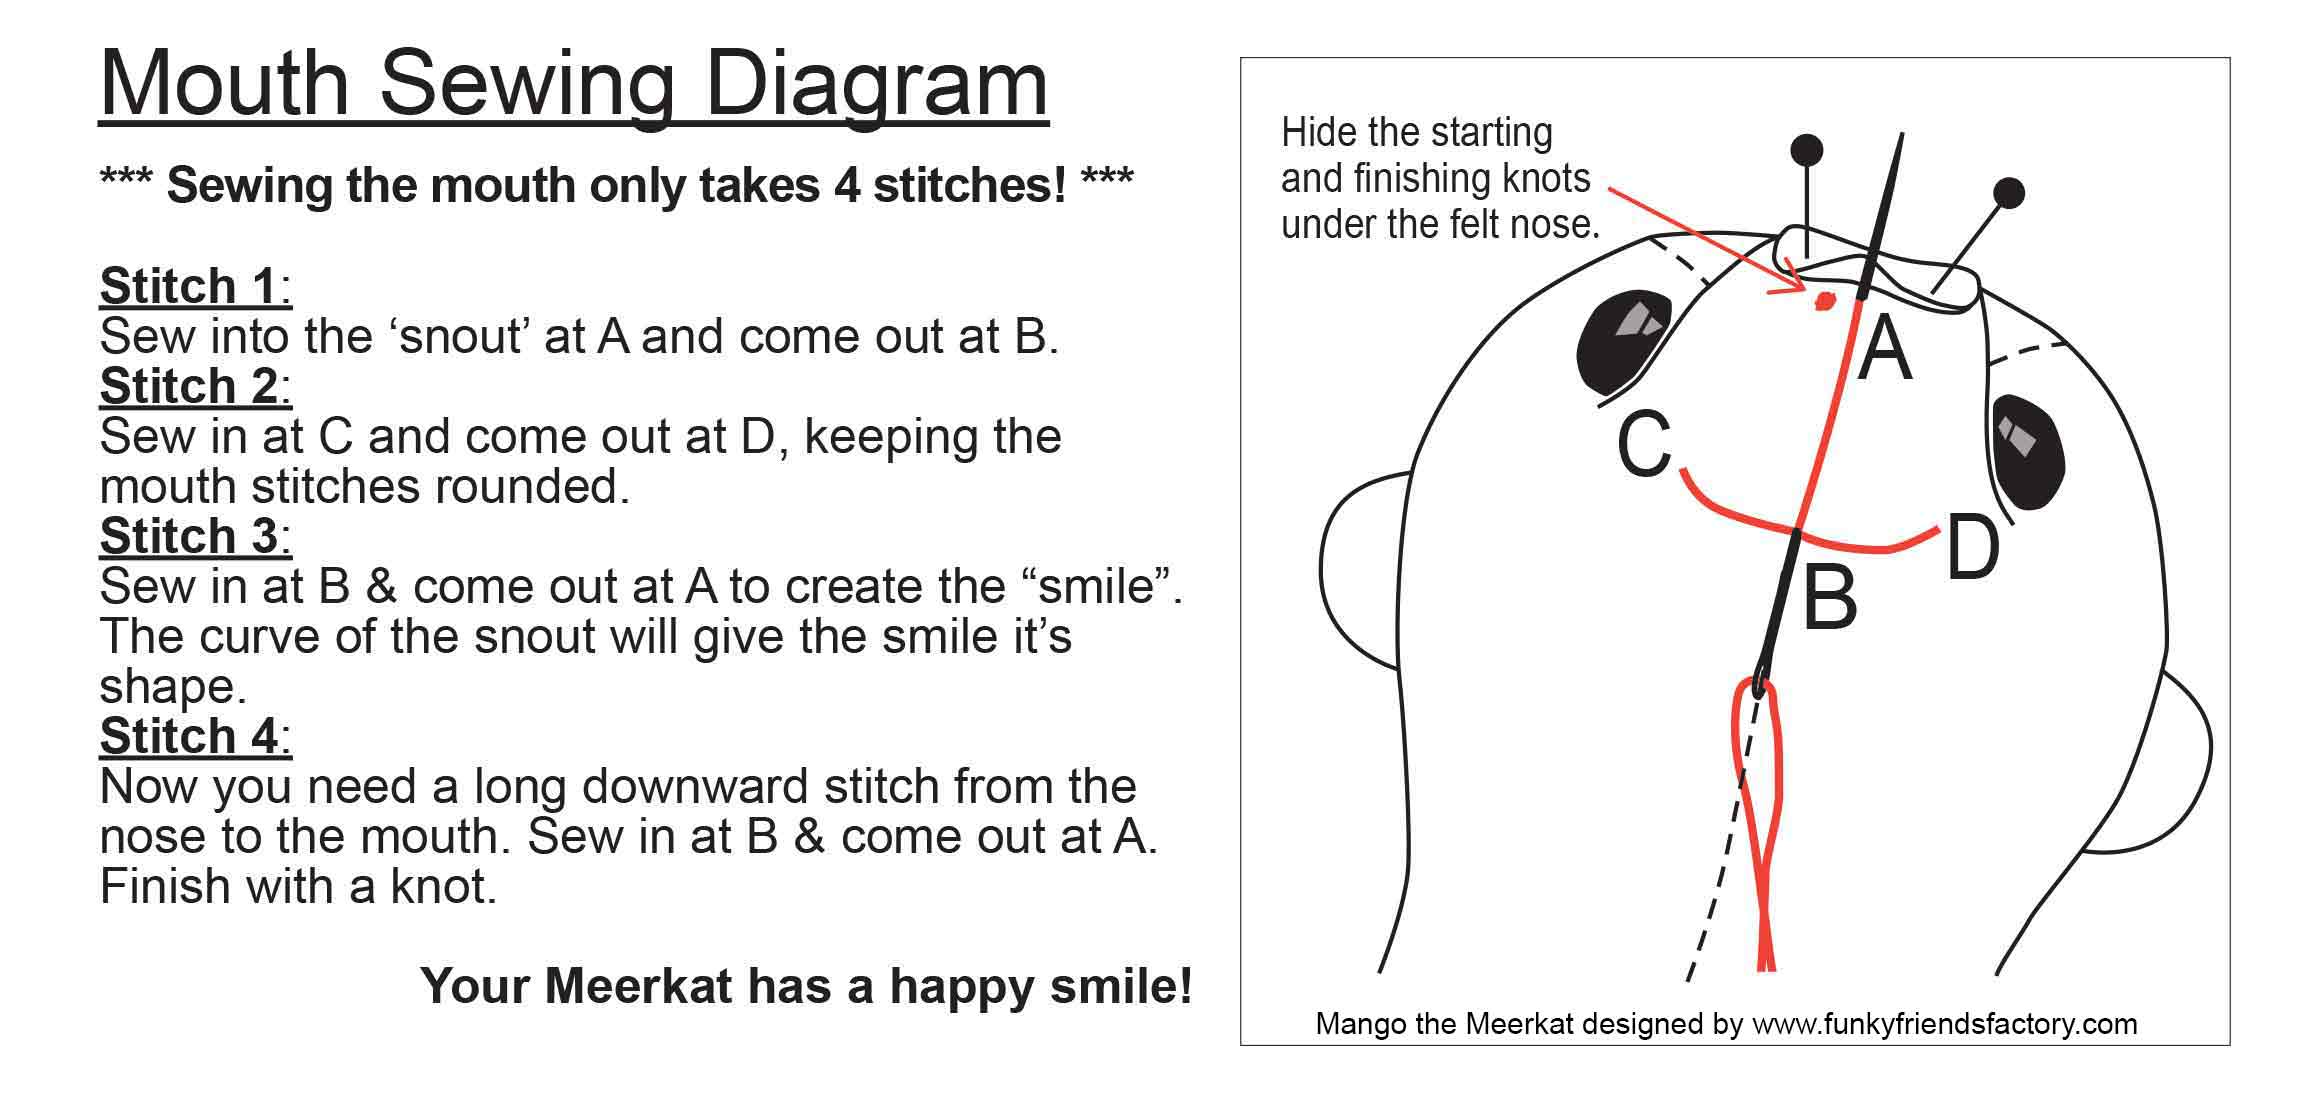
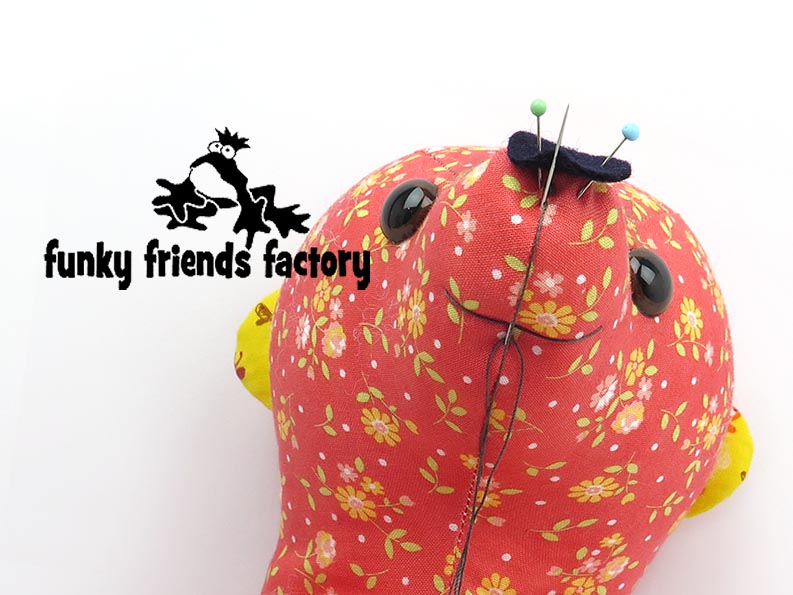
STEP 24
Sew the mouth using the Mouth Sewing Diagram (below) to guide you.
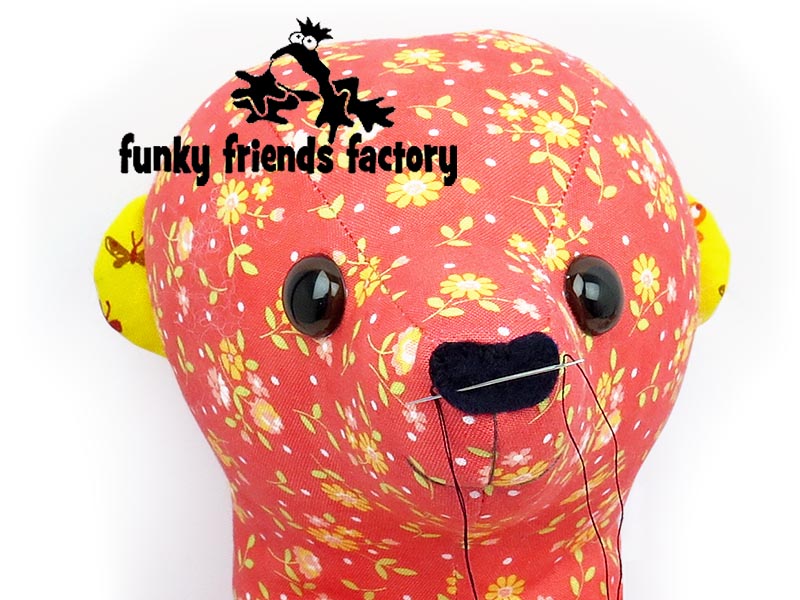
STEP 25
Sew the NOSE in place with embroidery thread and a blanket stitch. If you are hand-embroidering the eyes, sew these now.
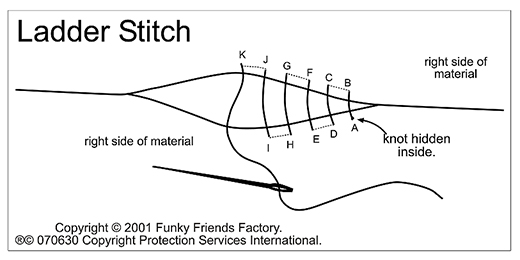
STEP 26
Sew the stuffing gaps on the BACK PIECES and ARM PIECES closed with a ladder stitch.
Your Meerkat is ready to LOVE!
Want to win a
FREE toy pattern?
It’s so EASY to enter our Pattern GIVEAWAY!
![]()
ALL you need to do is post a photo of a FUNKY FRIENDS FACTORY toy that you have made on the Funky Friends Factory Facebook Page.
At the end of each month I draw a winner and post the winner’s name on the Blog the following MONTH. I have an Album on Facebook for all the MAKEROFTHEMONTH winners. You can check it outHERE!
NOT on Facebook? ENTER by email! 😀
*** You can send me your photos by email too!
So come on! Share your photos ~>
The next winner could be YOU!!!
 .
.
Till next time,
Happy Sewing,
Pauline
xxx
![]()
