
I made this photo tutorial so you can see how to sew my Dress Up Doll Pattern ~> scroll down for step-by-step photos!
Daisy is a quick and easy doll pattern to sew and so are her outfits! I think she would be a great pattern for an advanced beginner. She has LOTS of fun options for different hairstyles and clothes you can make your doll TOTALLY unique!

.
*** PLEASE NOTE – this is ONLY a PHOTO TUTORIAL ***
The FULL PATTERN IS NOT included here.It is NOT A FREE PATTERN!
I have made this photo tutorial so people who have purchased my DRESS-UP DOLL Pattern can SEE how to sew a dress up doll! (I wanted to explain this so you are not disappointed if you have found this page via a search engine and not from the link in my Daisy DRESS-UP DOLL Sewing Pattern)
Let’s get started!
FACE & EYES:
STEP 1
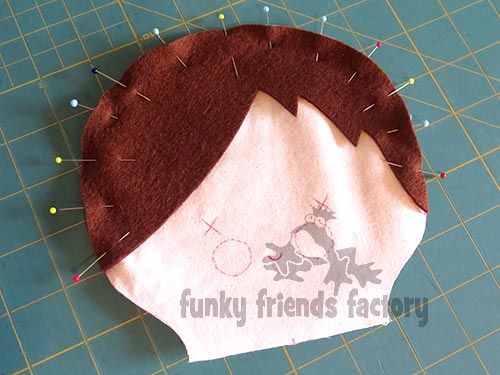
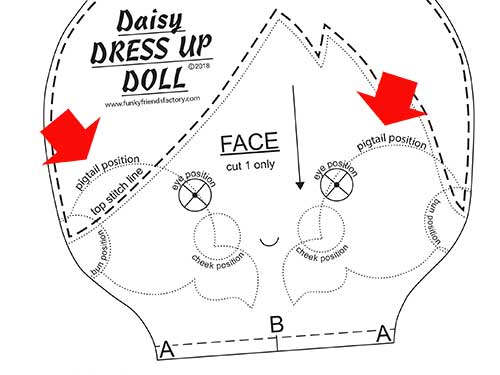
Trace the pattern markings for the face, onto the right side of the fabric of the FACE PIECE with a pencil or fabric pen.

STEP 2
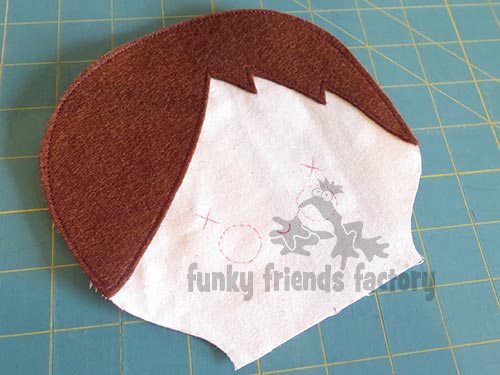
Pin and sew the FACE HAIR PIECE to the FACE PIECE, sewing about 3mm (⅛ inch) in from the edge.
TIP: Try and match your thread to the hair colour!
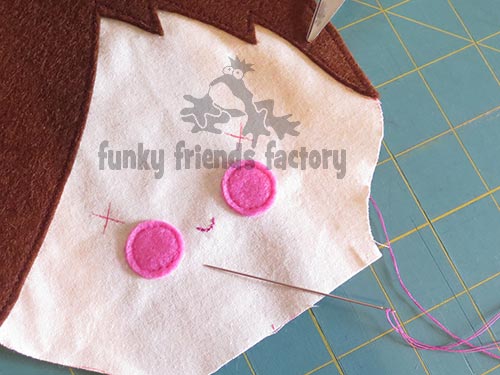
STEP 3
Cut the CHEEK PIECES from felt and pin and sew these on now. Pull the threads to the back and tie them to make sure they don’t unravel later. You can sew them by hand with embroidery thread.
TIP: If you want to have freckles instead of felt cheeks, embroider them now with French Knots. Or you can add a little bit of blusher to the give your doll some rosy cheeks. Test your make-up on a scrap of your skin-toned fabric first so you don’t use too much!

STEP 4
Embroider the MOUTH with pink/red embroidery thread.
STEP 5
If you are using craft EYES insert them now. (If you are embroidering EYES, use black embroidery thread and a satin stitch.)
TIP: I have a tutorial to show you how to insert craft eyes on my blog – /blog/safety-eyes-picture-tutorial-for-great-looking-peepers/


PIGTAIL/S:
STEP 6
* If you are going to have pigtails you will add them NOW. (If you want your doll to have a bun/s this will be done later after you have stuffed the head.)
Cut one or two PIGTAIL PIECES from felt. Pin the PIGTAIL on the FACE PIECE using the pattern markings to guide you.
TIP: Tack/baste the PIGTAIL in position so it doesn’t slip as you sew the doll together.
TUMMY:
STEP 7a
Sew the TUMMY PIECE to the FACE PIECE from A – B – A.
STEP 7b
Finger press or iron the seam allowance to the side of the TUMMY and sew a line of top-stitching just below this seam to hold this seam-allowance down so you don’t see the TUMMY fabric showing through the FACE fabric.
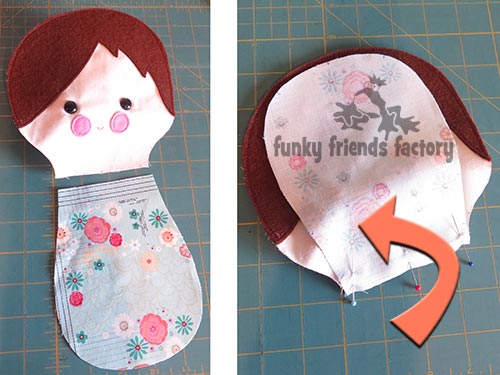

HEAD & BACK:
STEP 8a
Sew the HEAD PIECES to the BACK PIECES, in pairs from C – A.
STEP 8b
Sew the seam allowances towards the side of the BACK PIECES this time.

STEP 9
Sew the HEAD & BACK PIECES together along the back seam, from D at the top of the HEAD PIECES to E at the bottom of the BACK PIECES, leaving the gap open on the BACK PIECES for turning your dolly.
STEP 10
Pin and sew the BACK HAIR PIECE to the HEAD PIECES (with matching thread) sewing about 3mm (⅛inch) in from the edge of the felt.

ARMS:
STEP 11
Sew the ARM PIECES together in pairs, leaving the top open for turning.
STEP 12
Turn ARMS right sides out. Stuff them with toy stuffing, leaving about 12mm (½ inch) unstuffed at the top, and pin the open edge closed.
TIP: Clip the seams around the ‘hands’ very well so the seams are nice and smooth.
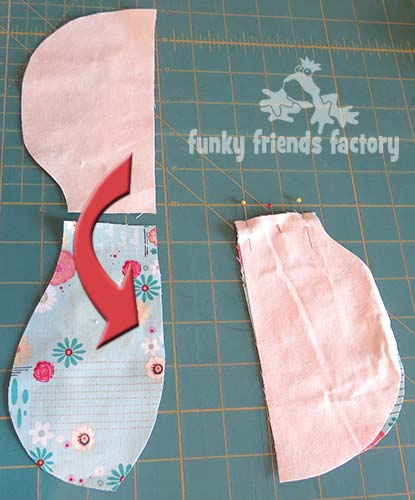
LEGS:
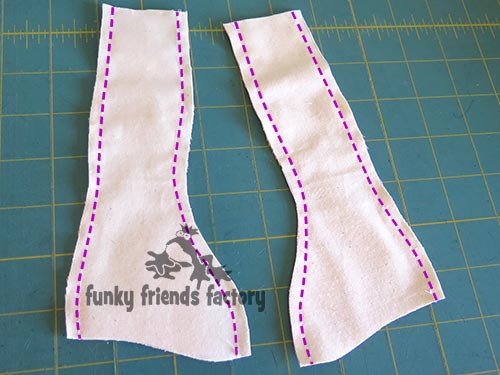
STEP 13
Sew the LEG PIECES together in pairs leaving them open at the top AND bottom.
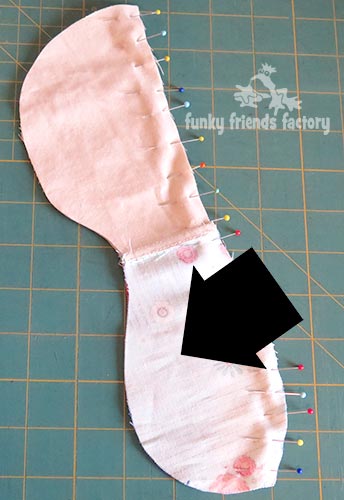
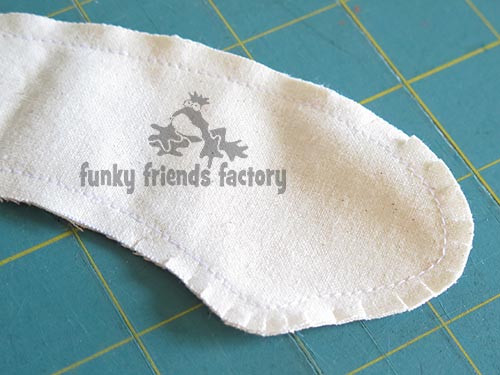
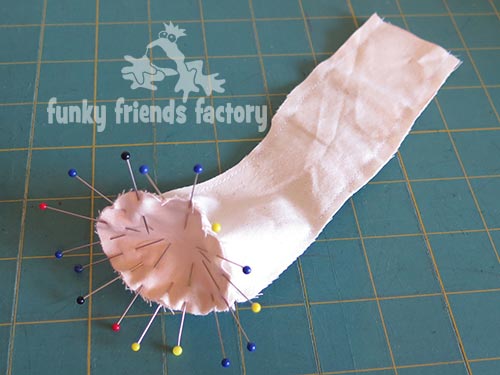
STEP 14
Pin and sew the FOOT PIECES to the LEG PIECES.
TIP: I have a photo tutorial on my blog with step-by-step photos how to make perfect feet without any ugly wrinkles! ~>

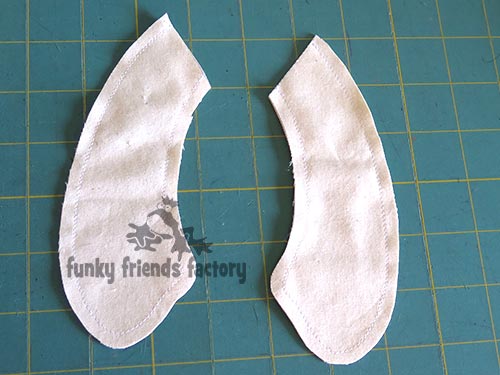
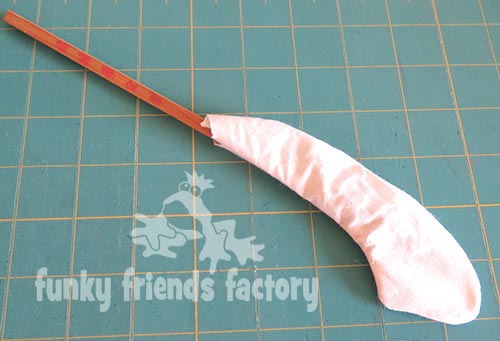
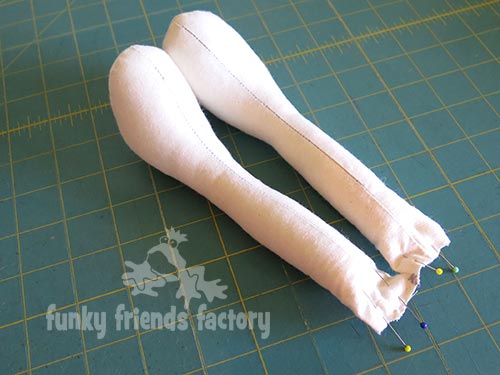
STEP 15
Clip the seam allowance very well before turning the LEGS right sides out. Stuff the LEGS with toy stuffing, leaving about 12mm (½ inch) unstuffed at the top. Fold and pin the LEGS closed at the top so that the seams are together in the centre. (This is so that the ‘toes’ will face forwards.)
TIP: I like to sew the legs together at the top with a zig-zag stitch so they don’t slip as I sew them in position.

ASSEMBLE BODY, ARMS & LEGS:
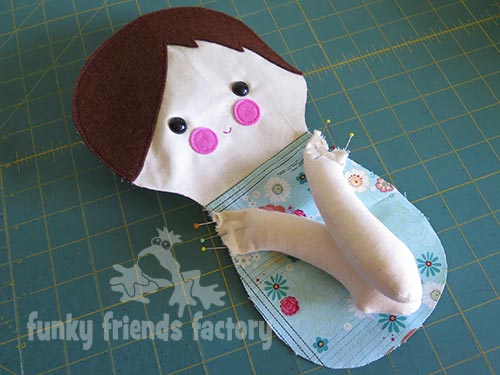
STEP 16
Pin the ARMS to the TUMMY PIECE using the dot pattern markings to guide you so that the ARMS don’t end up upside down!
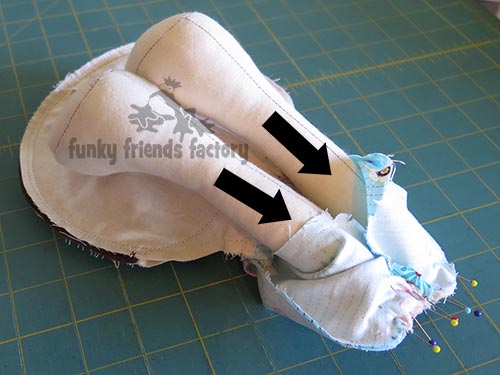
STEP 17
Pin the HEAD & BACK PIECES to the FACE & TUMMY PIECES with the ARMS in between. Sew HEAD & BACK PIECES to the FACE & TUMMY PIECES, making sure you catch all the layers in the seam, sew from point F on one side, up around the top of the head at D and down to F on the other side. (Check that the ARMS have been sewn into the seam properly now, it would be hard to fix this later.)
TIP: Push the hands through the turning gap (from the inside) so the PIECES lie flat as you pin.
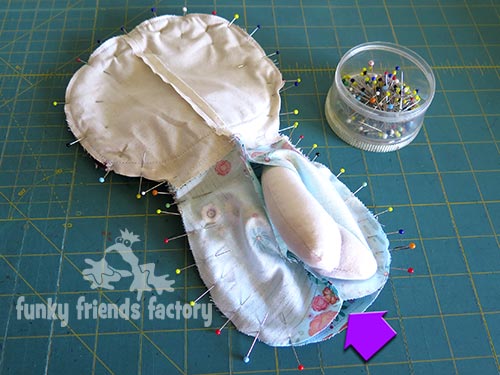
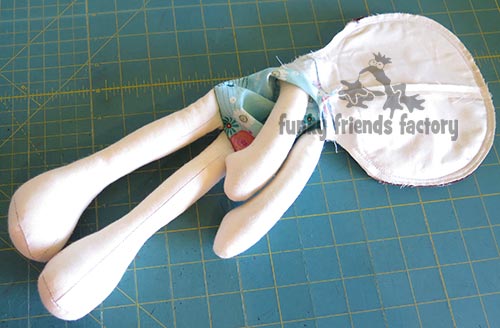
STEP 18
Push the ARMS up inside the head (between the FACE PIECE and HEAD PIECES) to make it easier to sew the LEGS in place.
STEP 19
Push the top of the LEGS through the turning gap (from the outside) and pin them in position on the TUMMY PIECE making sure that the ‘toes’ are sticking ‘up’ and towards the FACE PIECE. With the LEGS still sticking through the turning gap, pin the TUMMY PIECE to the BACK PIECES at the bottom, with the top of the LEG PIECES in between, and sew them together.
TURNING AND STUFFING:
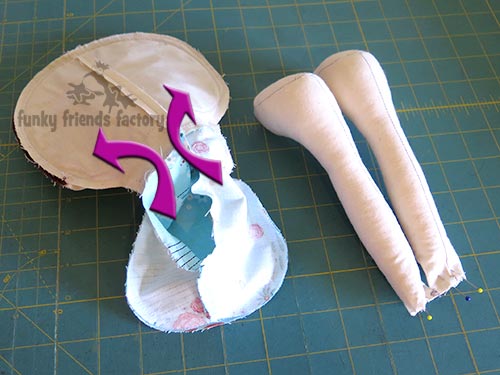
STEP 20
Turn your dolly right sides out through the turning gap on the BACK PIECES. It is easy to pull the LEGS out but take your time with the ARMS and especially with the head! Push the top of the head out through the neck first and pull the head out of the turning gap very gently.
TIP: Use a wooden chopstick (or the end of a paint brush or knitting needle) to smooth out the seam where the felt hair is. Run the end of the chopstick back and forth along the seam on the inside of the head until it is smooth!
STEP 21
Stuff the head quite firmly, but press it with the palm of your hand, so it is still a flat shape. Stuff the neck area very well so the head will stay up nicely, then finish stuffing the body with toy stuffing.
TIP: A children’s paintbrush is a great stuffing tool for pushing the stuffing right up into the head and neck so it’s firm and smooth.
STEP 22
Sew the stuffing gap on the BACK PIECES closed with a ladder stitch.

BUN HAIR STYLES:
STEP 23
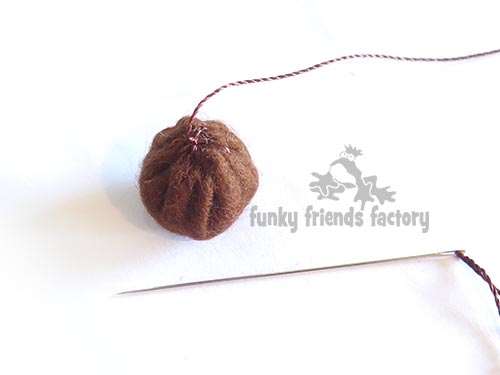
Decide how many and what size BUNS you want and cut these out of felt. Sew a running stitch around the outside of the BUN PIECE with a strong thread to gather each BUN PIECE to form a cup shape and fill the BUN with toy stuffing.
TIP: I made 3 different sizes so you can play around with different hair styles. I like one LARGE BUN for the centre top of head, 2 MEDIUM BUNS at the back of the head on each side at the bottom hairline or 2 SMALL BUNS at the sides of the FACE PIECE (as shown on the pattern markings!).

STEP 24
Pull the thread tightly to form a ball shape and sew each BUN closed with lots of strong stitches and a strong thread. Pin the BUN/S on the doll’s head. Once you are happy with the bun/s position, sew in place with a ladder stitch and matching haircoloured thread.
WRAP SKIRT:
STEP 25a
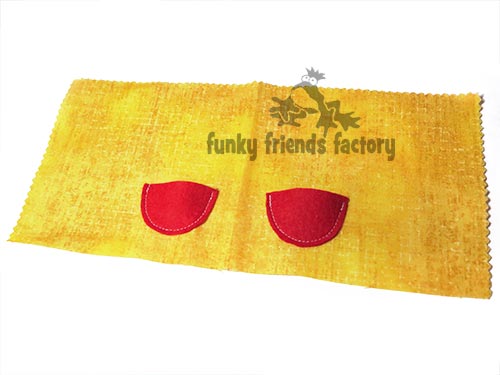
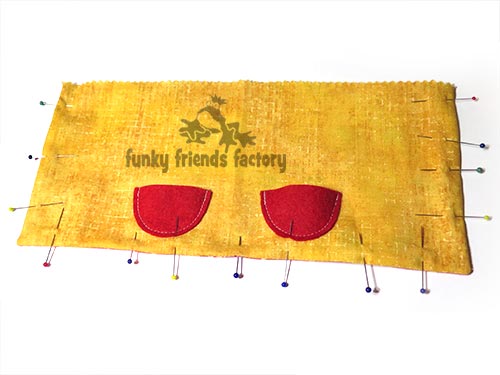
Cut 2 WRAP SKIRT PIECES. (Cut the WRAP SKIRT PIECES from 2 different fabrics for a reversible skirt!) Add POCKETS to one or both WRAP SKIRT PIECES in ANY variation you like!
STEP 25b
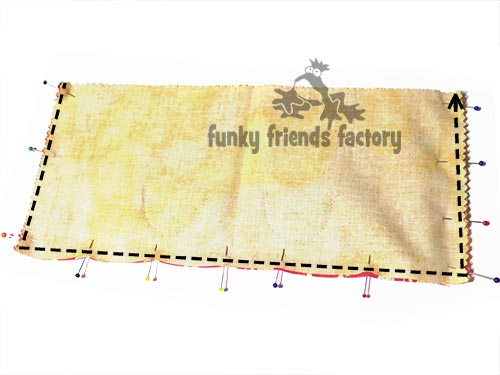
Pin the WRAP SKIRT PIECES right sides together. Sew the WRAP SKIRT PIECES together, as shown by the pattern markings, leaving them open along one of the long edges (the top).
STEP 26a
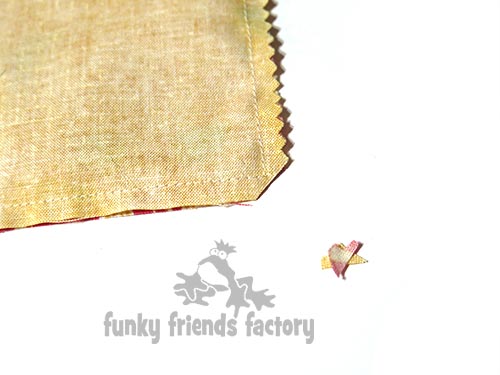
Trim the seam allowance at the corners and turn the WRAP SKIRT right sides out.
STEP 26b
Press the WRAP SKIRT or pin the edges flat and sew a seam around the edges you just sewed.
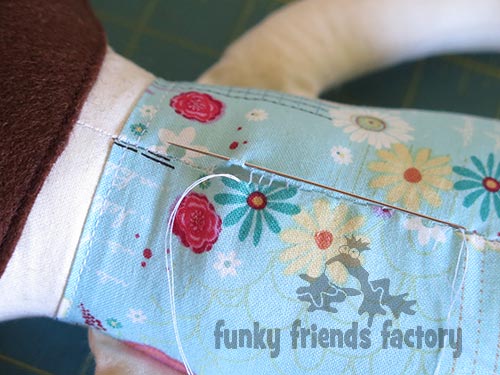
STEP 27
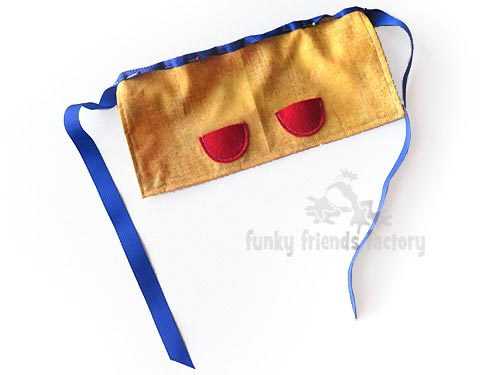
Cut a piece of fabric for the TIE PIECE 4cm x 80cm (1½ inches x 34inches) and iron this in half along the length to form a centre crease. Open up the TIE PIECE and fold the long edges to the centre crease and iron them in this position. Fold and iron it in half along the length again, this time with the raw edges tucked nicely inside. Line up the centre top (front) of the WRAP SKIRT PIECES with the centre of the TIE PIECE so the raw edges are tucked into the centre crease and pin them together. Sew the TIE PIECE closed along the whole length (not just where the wrap skirt is).
*** I didn’t have my iron because it got packed up when I moved house and it’s still lost in ALL our boxes so I used a piece of 3/4 inch-wide ribbon and folded it in half over the top of the WRAP SKIRT and sewed it down in place!
TIP: You can ALSO use 10mm bias-binding instead of making the TIE PIECE from fabric.
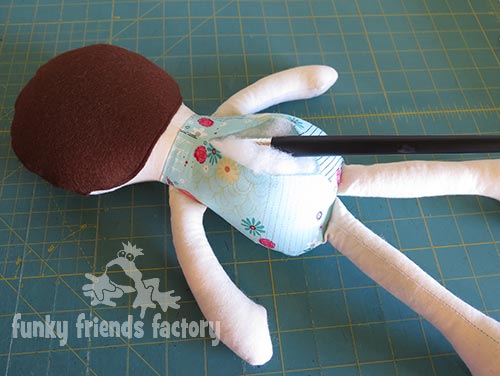
STEP 28
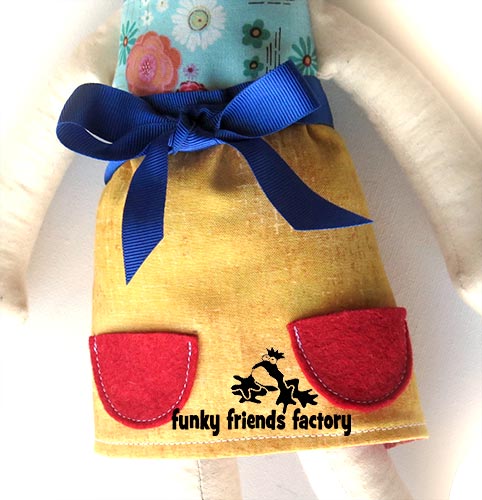
To put the skirt on the doll, place the centre front on her tummy, wrap the skirt around to the back and bring the TIE PIECE ends to the front and tie them in a bow at the front.
COLLAR:
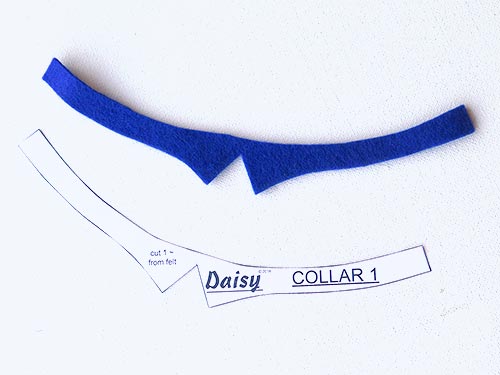
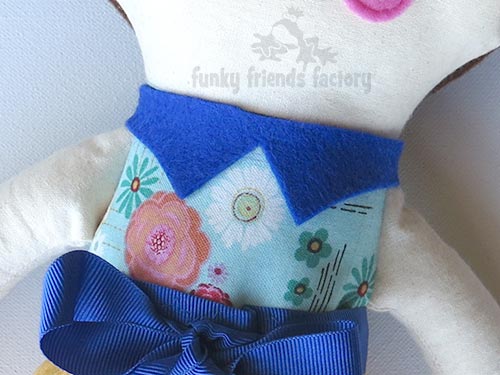
STEP 29a
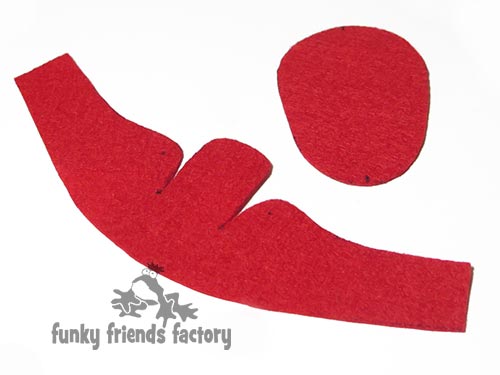
Cut a COLLAR PIECE from felt. There are 2 shapes to choose from.
STEP 29b
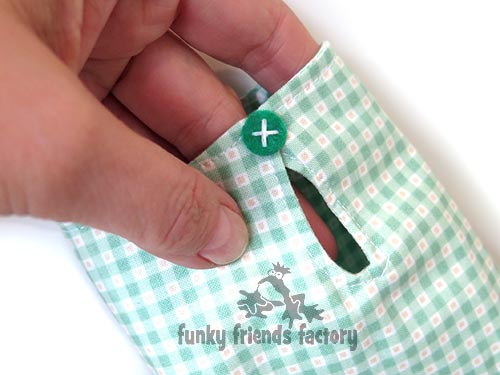
Wrap the COLLAR PIECE around the doll’s neck and secure it at the back with glue or stitches.
TIP: Cut a hole and use a button to make it removable. (Or use velcro, or snaps).
DRESS:
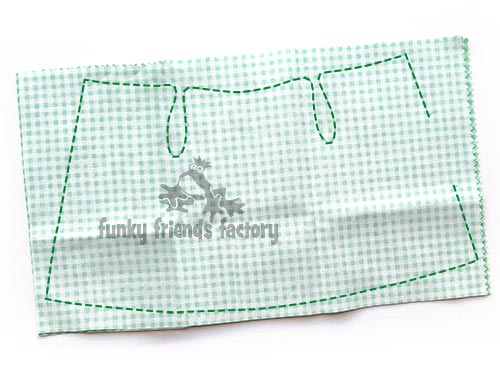
STEP 30
Trace DRESS PIECE onto the wrong side of one of the pieces of your dress fabric. (Remember – this will be the sewing line.) Lay the 2 pieces of dress fabric, right sides together, as shown in the Layout Diagram and sew them together along the sewing line you traced, leaving the turning gap open on one side.
TIP: Use 2 different fabrics for a reversible dress!
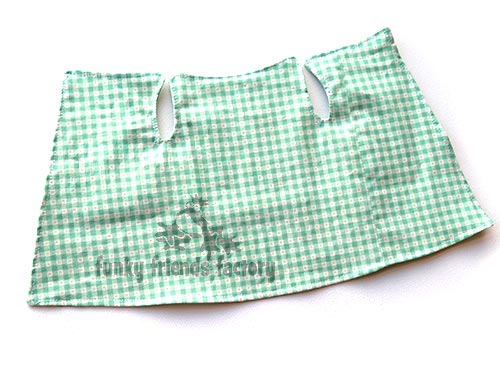
STEP 31a
Cut out the DRESS with a very small 3mm (1/8inch) seam allowance, clipping off the excess fabric at the ‘corners’ so the DRESS with turn nicely. Press the DRESS so it lies nice and flat then sew across the turning gap.
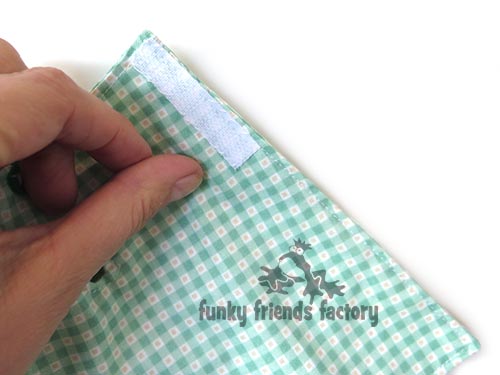
STEP 31b
Sew some velcro to the DRESS at the top to secure the DRESS at the back of the doll.
STEP 31c
Overlap the top of the DRESS at each arm hole and pin the front over the back part of the dress. Put the dress onto the doll and adjust the fitting if needed at the pins. Once the DRESS is fitting nicely, sew the top of the armholes closed. (You can add a decorative button to hide your stitching if it’s not too neat!)
SHOES
STEP 32a
Cut the SHOE PIECES and the SOLE PIECES from felt. (Here is one set)
STEP 32b
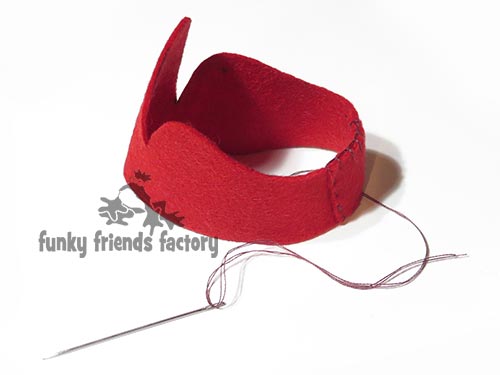
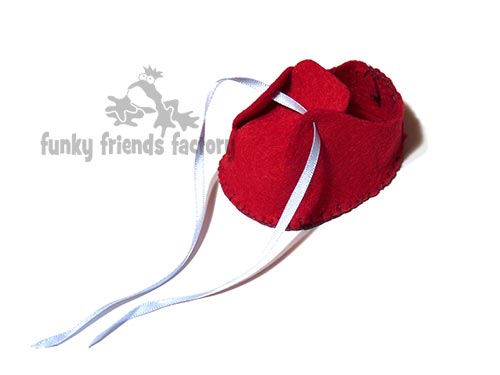
Wrap a SHOE PIECE around the foot of your doll and pin it together. Remove and sew it together at the back. (I have added a little bit extra to allow for variations in the fabrics people might use. So overlap the edges a bit if needed.)
TIP: Use a contrasting thread colour if you want to see where the shoes are sewn up. If you don’t think you can sew small stitches very neatly you can use a matching thread colour to ‘hide’ the stitching.
STEP 34a
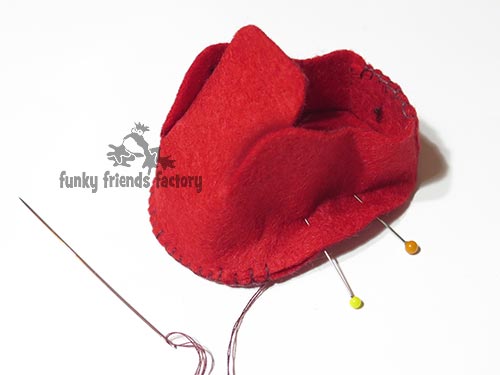
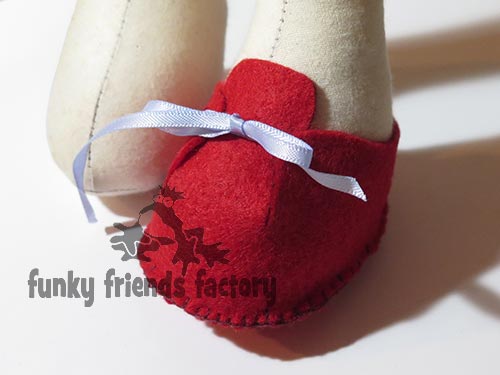
Sew the SOLE PIECES to the SHOE PIECES. Cut the holes as indicated on the pattern markings (a cross cut in the felt is good enough) and thread a piece of thin ribbon through the holes and tie this in a bow for shoe laces.
STEP 34b
Cut the holes as indicated on the pattern markings (a cross cut in the felt is good enough) and thread a piece of thin ribbon through the holes and tie this in a bow for shoe laces.
STEP 34c
Tie this ribbon in a bow for shoe laces.
DAISY FLOWERS:
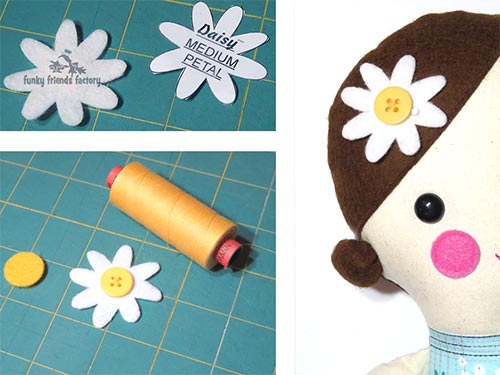
STEP 35
Cut the PETAL PIECE/S from felt. Sew a button onto the centre of the PETAL PIECE or use the CIRCLE PIECES to cut a felt circle for each flower. Glue or sew the DAISY/DAISIES onto your doll – you can use the flowers to decorate her clothes, shoes or hair.
Your Dolly is ready to LOVE!
Come join the fun on Facebook!
![]()
When you’ve made your own Dress-up Dolls – come and post some photos of your NEW Funky Friends for me to see on my Funky Friends Factory Facebook page.
You could WIN a FREE PATTERN in the MAKER OF THE MONTH Pattern Giveaway!
I can’t wait to see the Funky Friends you sew!

bye for now,
Pauline
![]()
