
I made this photo tutorial so you can see how easy it is to sew my NEW sitting dog pattern – Kip the KEEPSAKE DOG ~> scroll down for step-by-step photos!
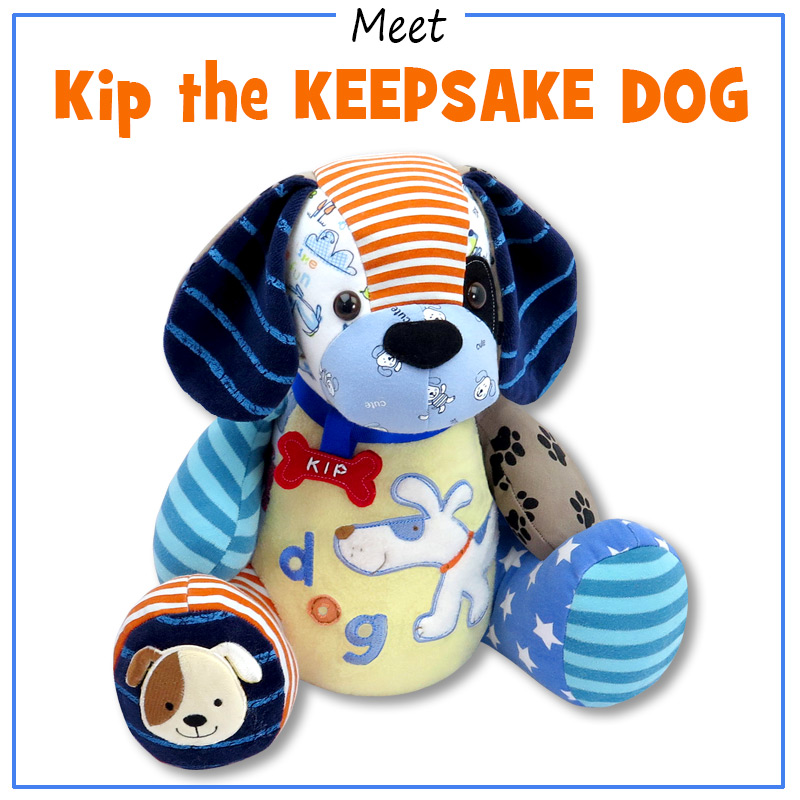
*** PLEASE NOTE – this is ONLY a PHOTO TUTORIAL ***
The FULL PATTERN IS NOT included here.
It is NOT A FREE PATTERN.I have made this photo tutorial so people who have purchased the pattern can SEE how to sew a memory dog toy (I wanted to explain this so you are not disappointed if you have found this page via a search engine and not from the link in my Kip the KEEPSAKE DOG sewing pattern!)
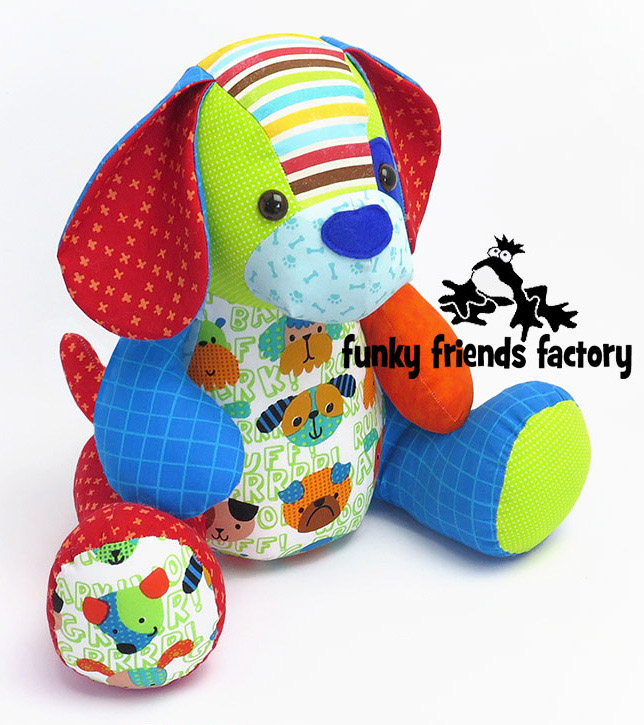
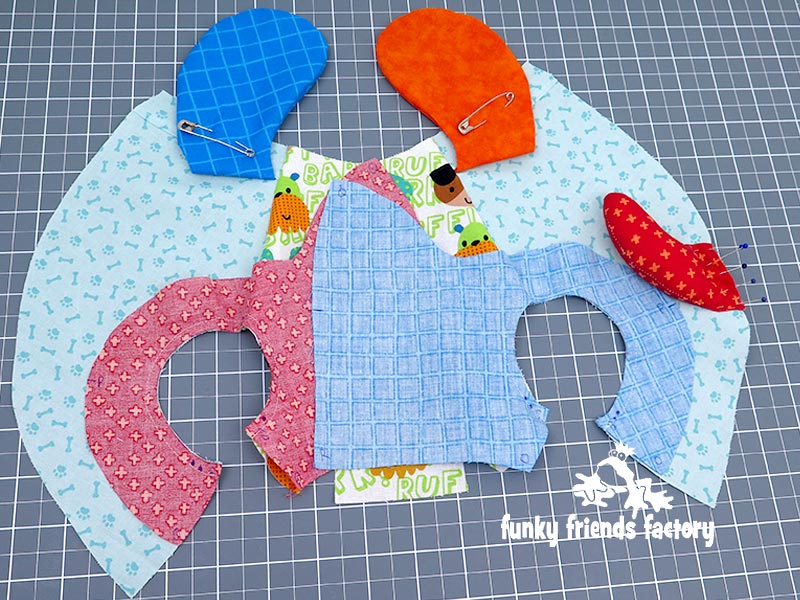
First choose some fabric:
You can create a ‘patchwork’ effect by using LOTS of different fabrics (for example, a memory dog from 6 – 8 items of baby clothes) OR use the Layout Diagram in the pattern to create a toy dog with a Main fabric and Contrast fabric.
Prepare the fabric pieces:
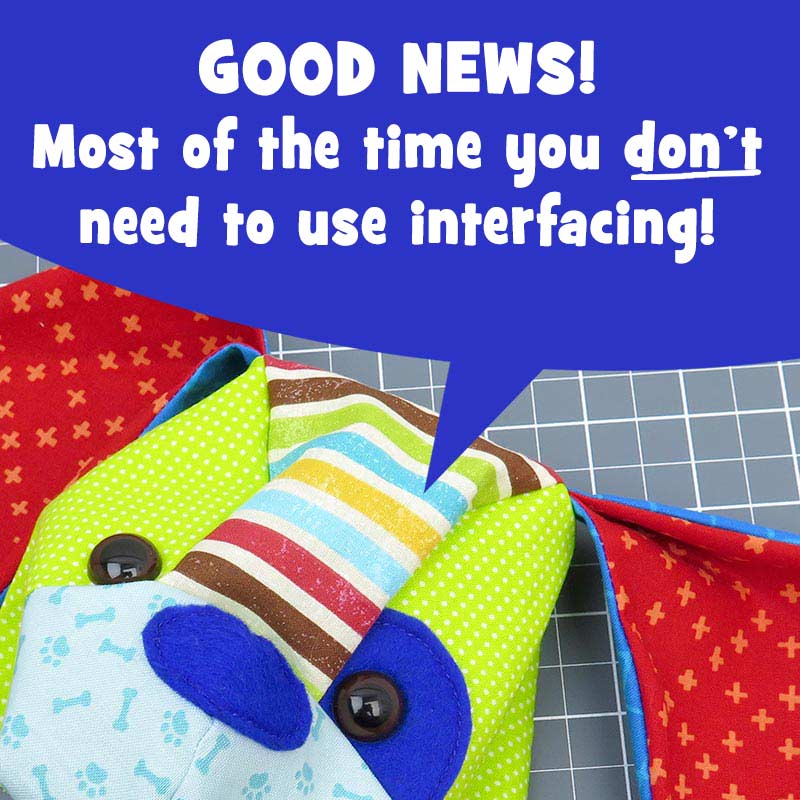
Must ALL fabrics be lined with interfacing?
Here is an explanation of when to use interfacing (and when not to) ~>
NO:
You don’t need to use interfacing to line the pieces if you are using all woven fabrics like quilting cottons and corduroy. Regular fleece bought off the bolt does not require interfacing. (I have NEVER interfaced fleece or Cuddle® and I have made a LOT of toys in these fabrics!)
MAYBE:
Specialty fabrics like minky or plush(fake furs) may require interfacing, depending on the manufacturer. If the fabric stretches more than regular fleece, use interfacing. When using fleece or specialty knits, take care not to overstuff the toy – if these fabrics stretch too much he’ll be very chubby!
YES:
Use interfacing to stop the pieces from stretching out of shape if you are using clothing items that are made from very thin or very stretchy fabrics, or if you are using a mix of woven (non-stretchy) and knit (stretchy) fabrics. Always interface jersey knits like t-shirts and baby onesies.
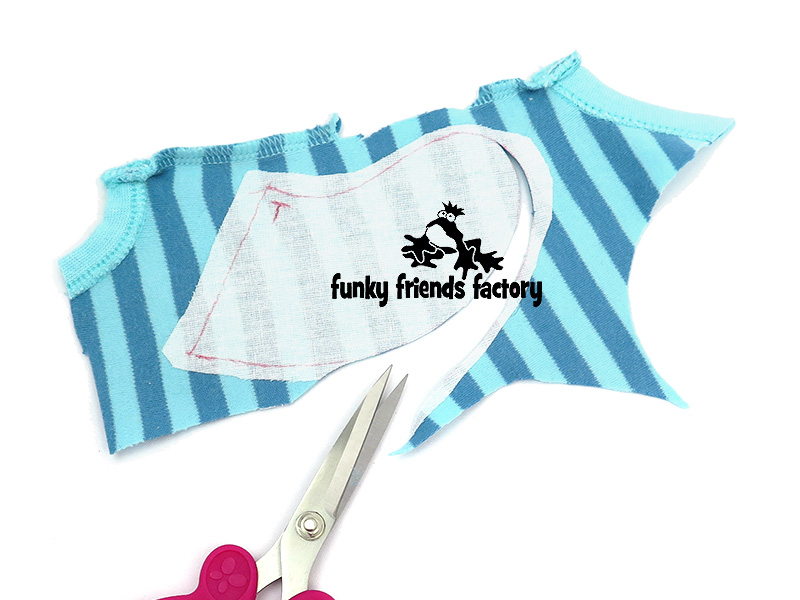
HOW TO use iron-on interfacing:
- Trace all the pieces, including all the ‘reversed pieces’, onto the smooth (NON-STICKY) side of the iron-on interfacing.
- Roughly cut out the pieces from the interfacing but leave about 3mm (⅛ inch) extra around each piece. WHY? You’ll cut them out neatly on the traced line after the interfacing is fused to the fabric.
- Iron the interfacing pieces onto the fabric of the clothing items, with the STICKY (GLUE) side facing the BACK of the fabric. Follow the manufacturer’s guidelines to make sure they are fused together well (stuck together).
- Cut the pieces out on the traced lines.
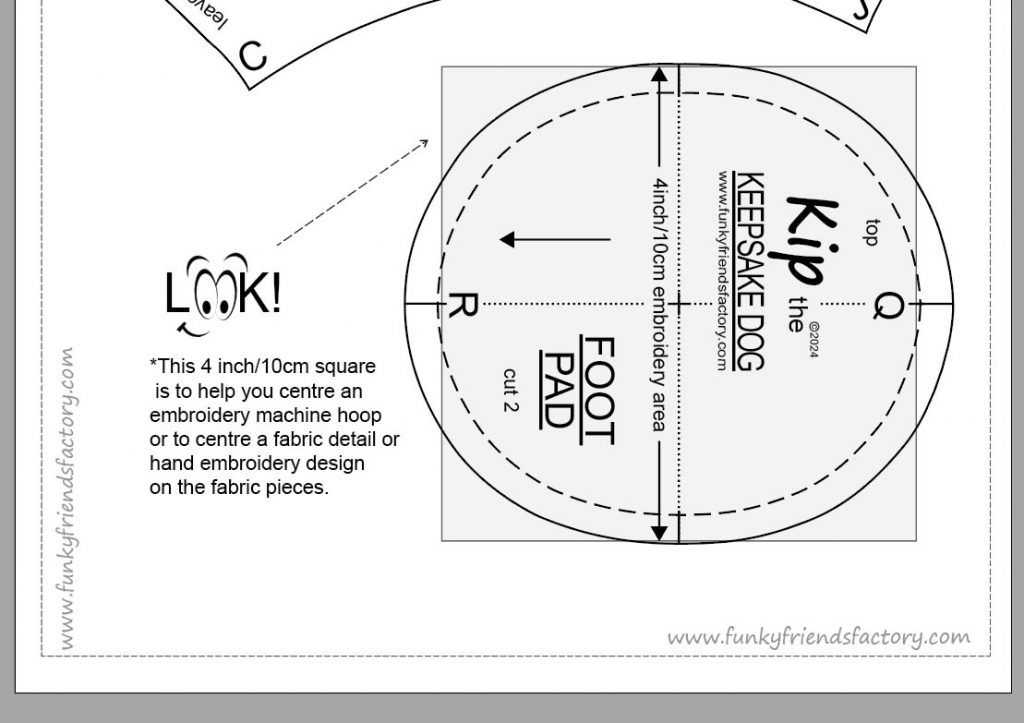
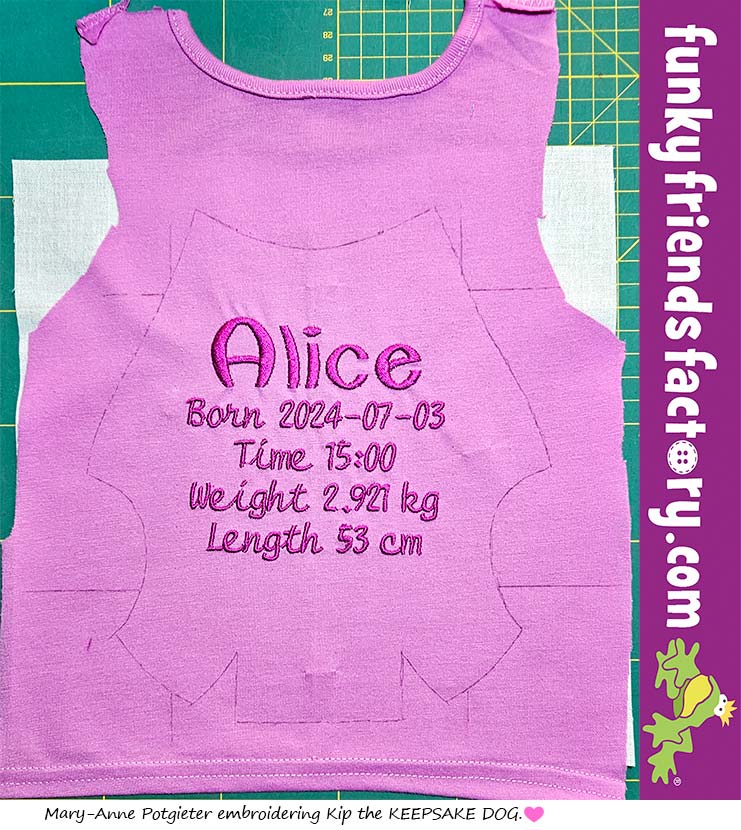
How to embroider a memory toy:
You can embroider by hand or machine. Use the grid markings to center the embroidery design. Here you can see the grid on the FOOT PAD PIECE.
If you are using machine embroidery – you will want to do this FIRST, BEFORE you cut out the PIECES.
Before you get started…
***A SPECIAL NOTICE***
for THIS Keepsake Dog PATTERN:If you don’t use the dots and letter pattern markings to guide you, it can be VERY easy to muddle up the LEG PIECES and sew them on upside down OR the wrong way around!
So, I have a favour to ask you!
Pretty please!!!!!!
PLEASE transfer all of the letters and pattern markings onto your FABRIC pieces!
I know I always say to do this BUT this time, with this pattern – I think it’s REALLY IMPORTANT that you do it!!!!! It’s the EASIEST way to guarantee you’ll get it right first time, and won’t end up UNPICKING pieces… (like I did a few times when sewing my prototypes!)
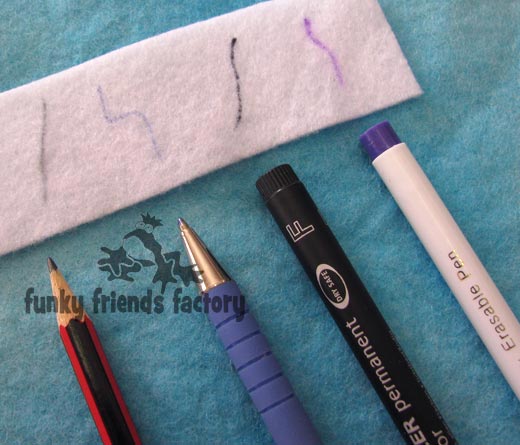
What can you use to mark fabric?
There are LOTS of options for writing the pattern markings on the fabric pieces – I use pencil, ball point pen, permanent markers and erasable fabric pens.
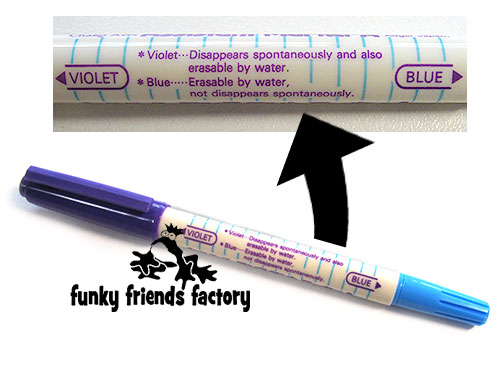
There are 2 types of erasable fabric pens.
AIR ERASABLE Fabric Markers (disappear after a little while) are used when you don’t want your markings to be visible forever. These are great for drawing on the facial features before you embroider them BUT not when you want to see pattern markings and letters LATER while you’re sewing the toy!
WATER ERASABLE Fabric Markers (you need to apply water to make these disappear) are great for pattern markings! (You don’t see these pattern markings from the right side of the fabric so you can also use a pencil, ball point pen, or permanent marker as above!)
For dark fabrics I have used a white pencil crayon, a light coloured fabric chalk pen, and even a paint marker (which I took from my husband’s tool box!!!!).

🐶OK, let’s sew a keepsake memory dog!
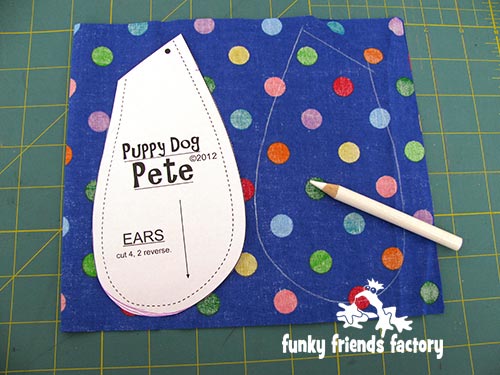
EARS:
STEP 1a
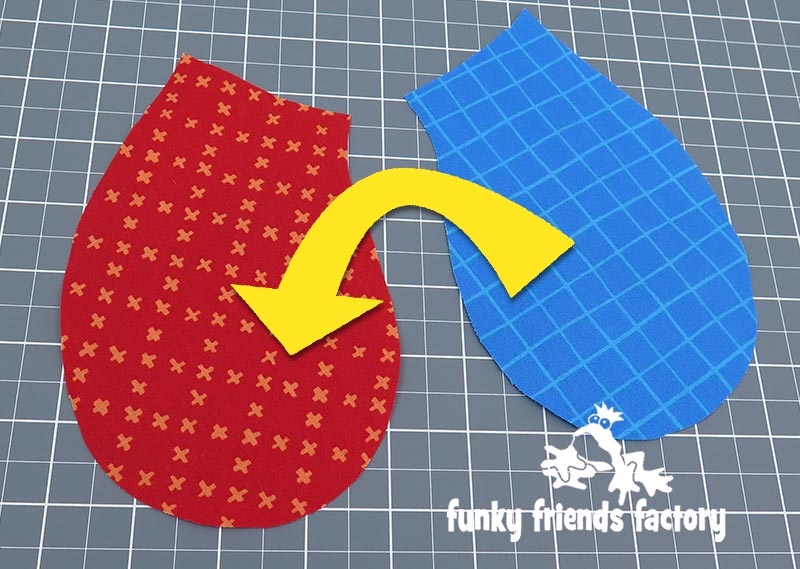
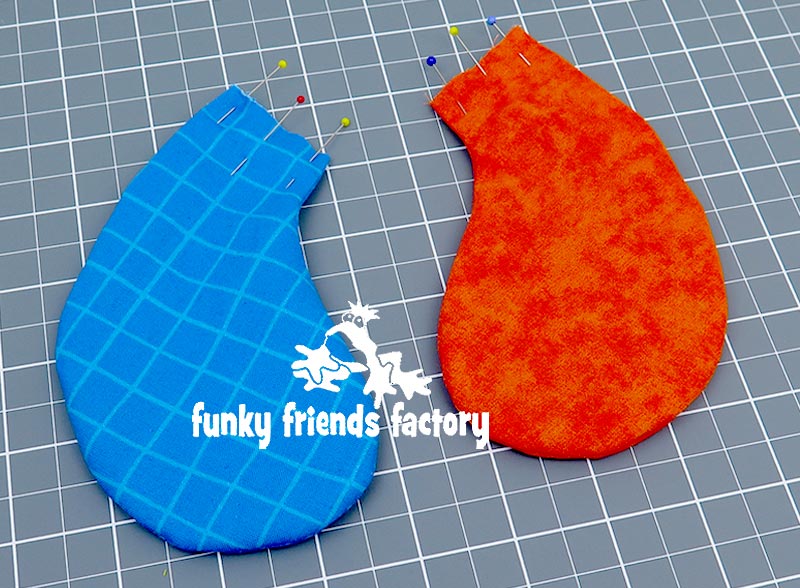
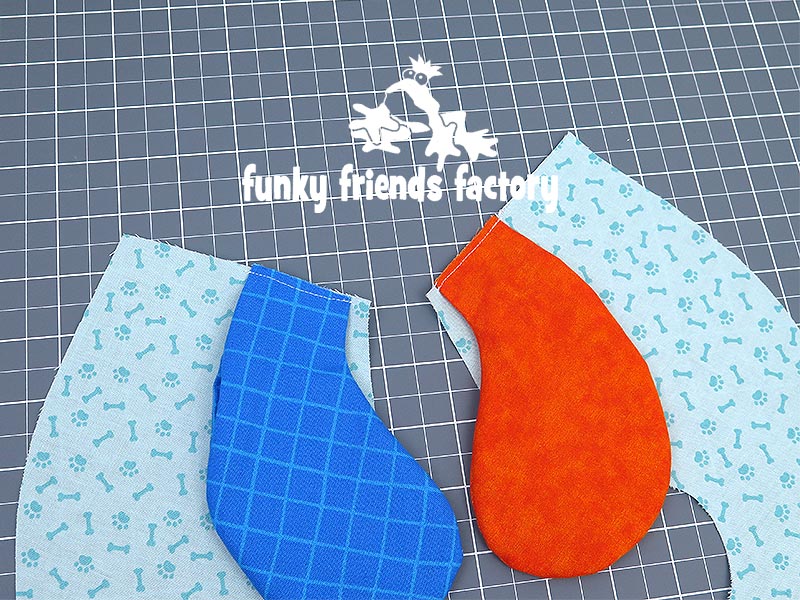
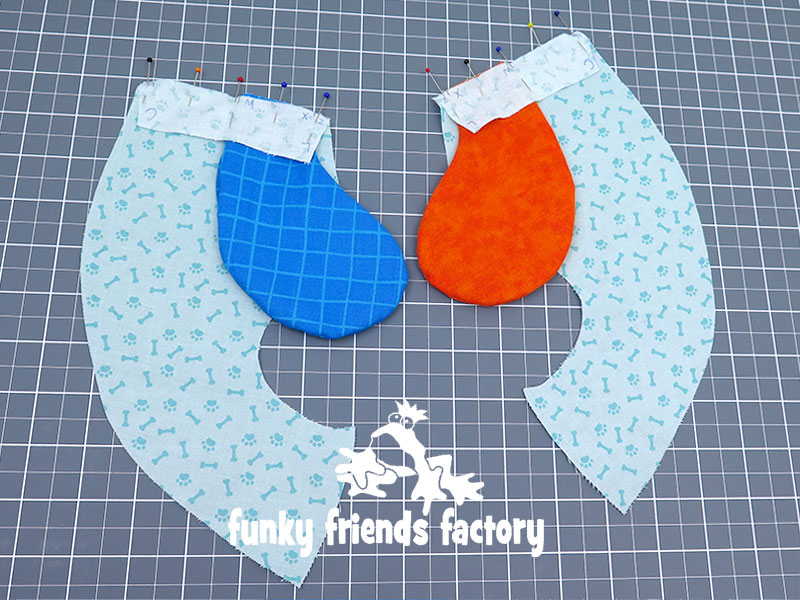
Pin the EAR PIECES together in pairs (1 Main and 1 Contrast piece).
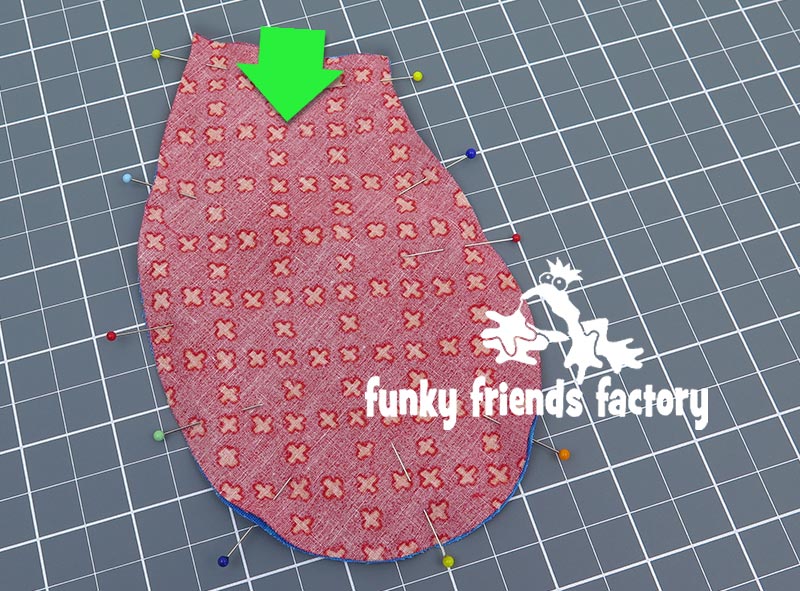
STEP 1b
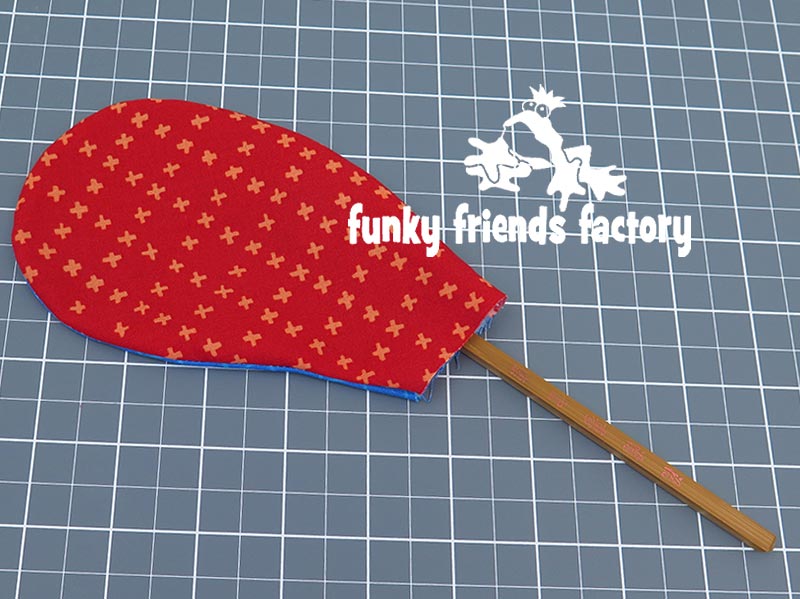
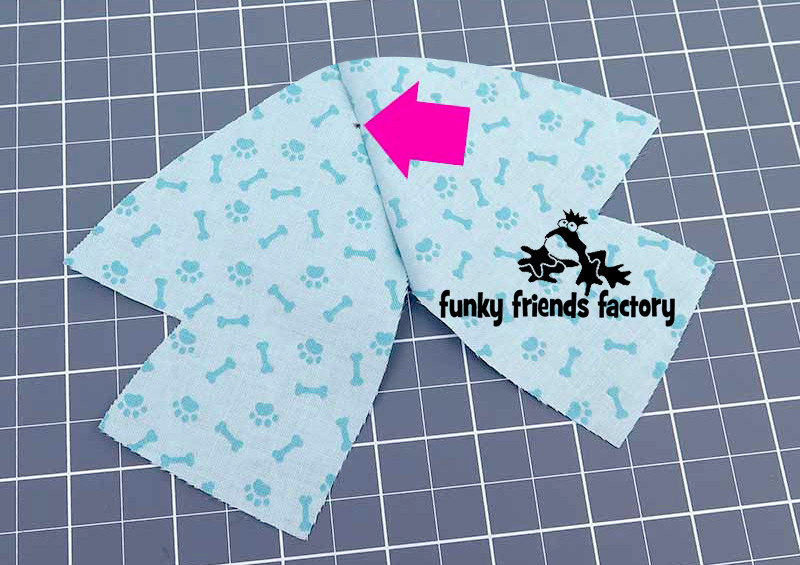
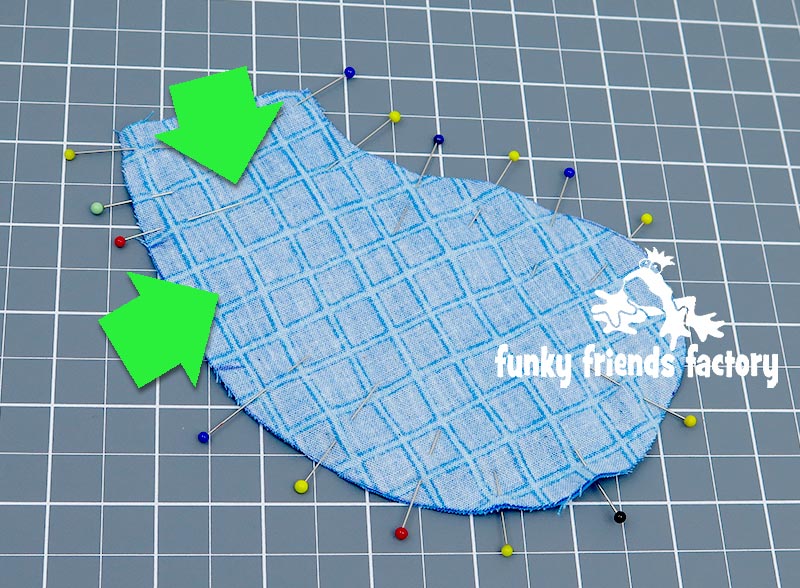
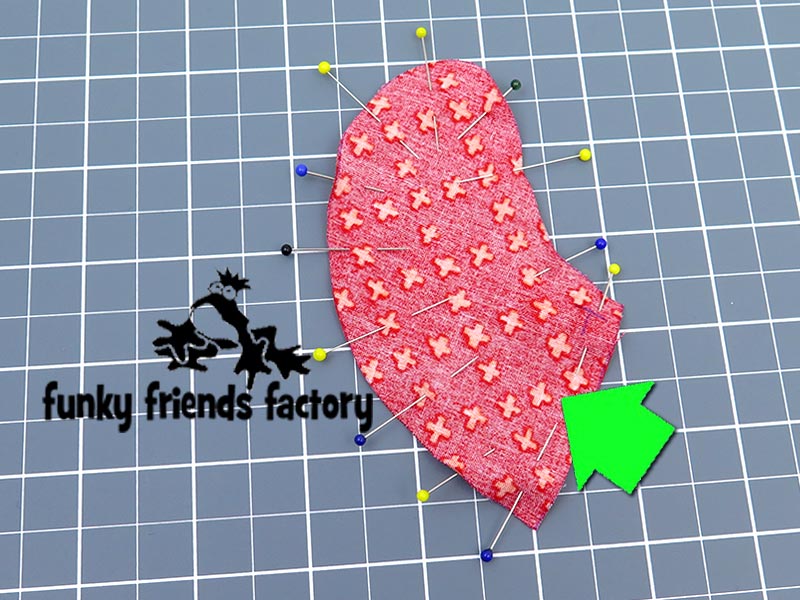
Sew the EAR PIECES together, leaving them open at the top edge for turning (See the green arrow in the photo below).
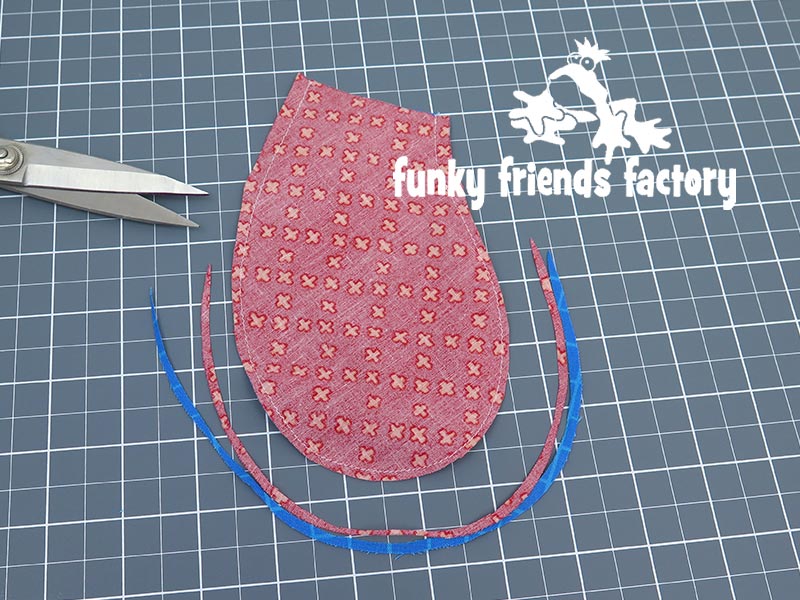
STEP 1c
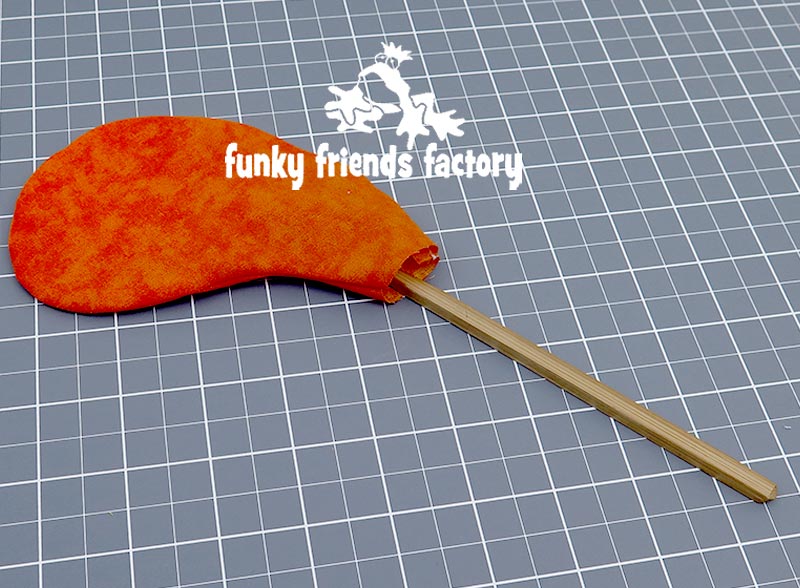
Trim the seam allowance around the bottom of the EAR PIECES to 3mm (⅛ inch) and turn the EARS right sides out. *** Do NOT stuff the EARS. We’re going to fold them!***
TIP: Use a chopstick (or similar turning tool) to smooth the seams.
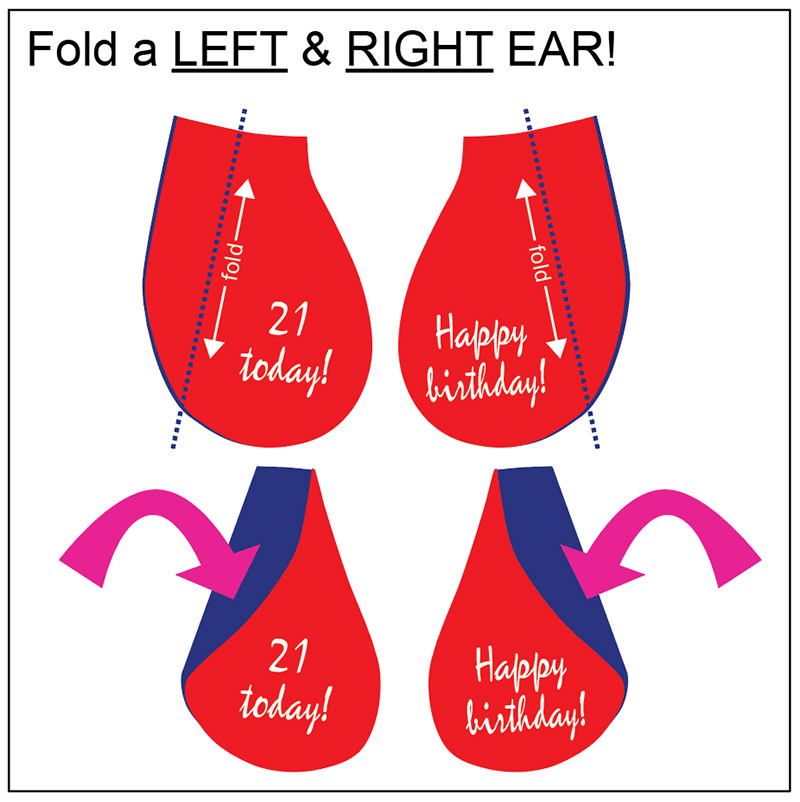
STEP 2a
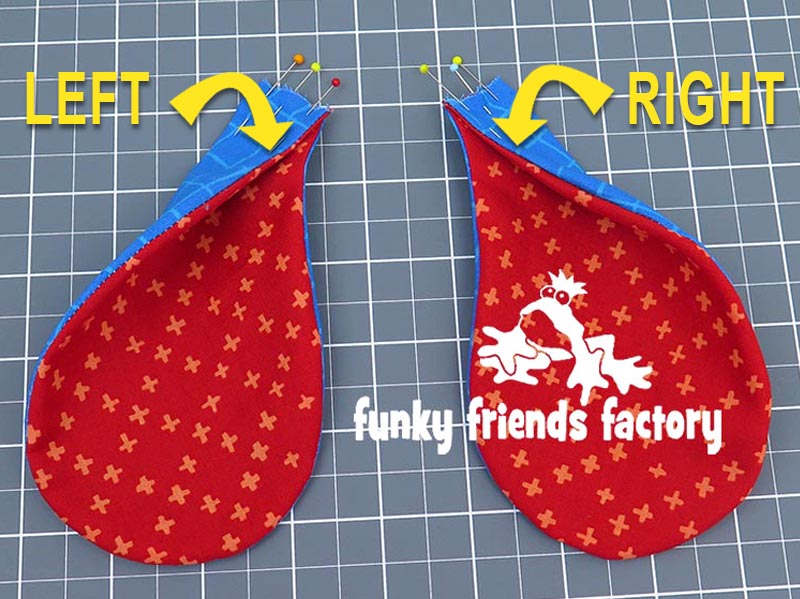
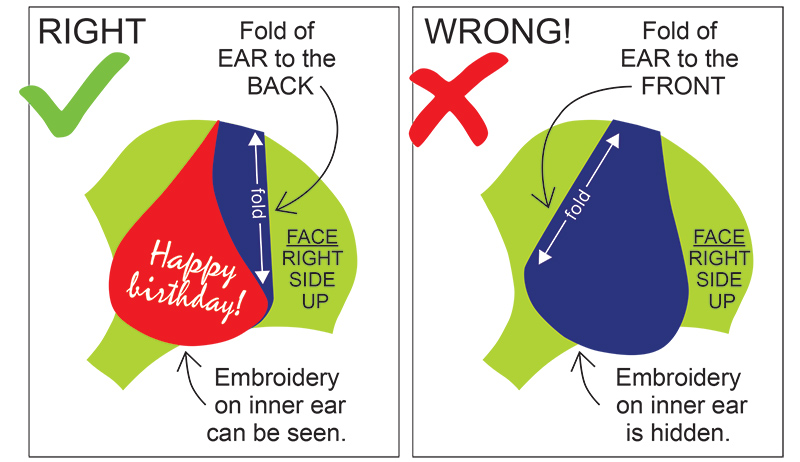
Fold the EARS, as shown by the pattern markings. Look carefully at this diagram to help you fold them the right way ~>
**** PLEASE double check that you have folded a LEFT and RIGHT EAR.****
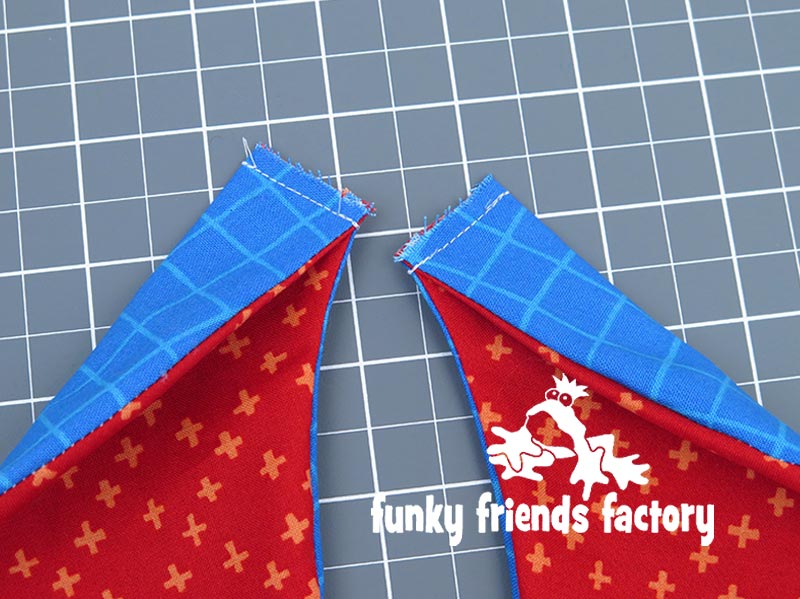
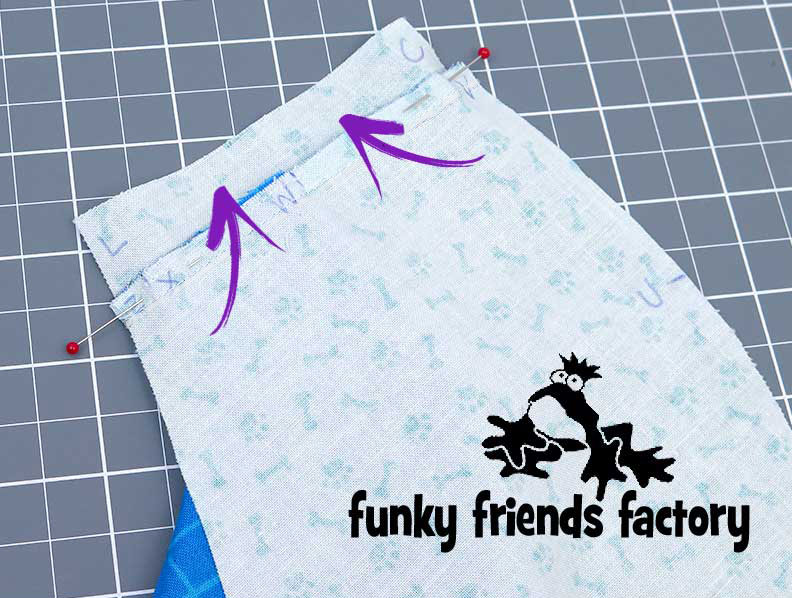
STEP 2b
Sew across the top of the EARS with a 3mm (⅛inch) seam allowance – this is so the layers won’t slip as you sew the EARS in place.
EYE PATCH:
STEP 3a
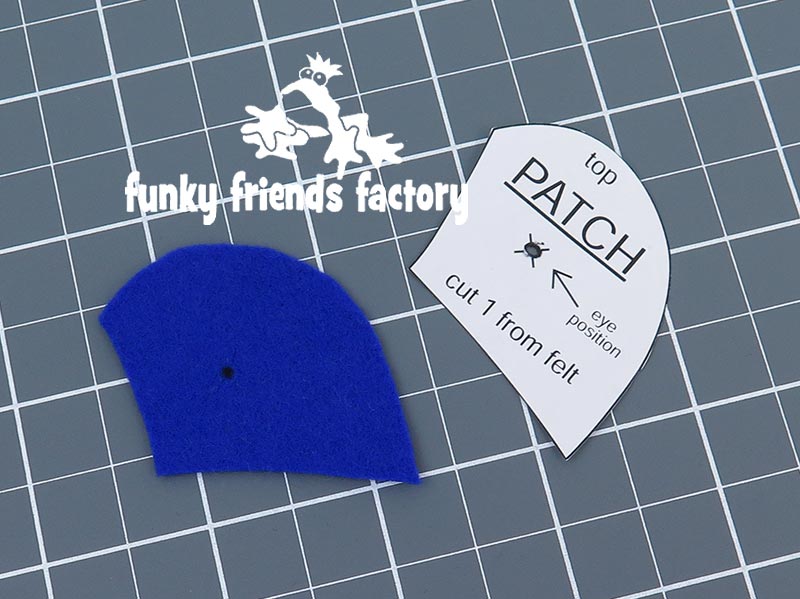
Cut a PATCH PIECE from felt and mark the eye position.
TIP: How to cut Felt EASILY & ACCURATELY – 5 different techniques!
When you are cutting out small felt pieces, PINNING felt pieces is NOT as accurate as you’d think. This is because the pattern templates move or slip as you cut and you can end up with some very wonky shapes! I have put together this photo tutorial to show you 5 different techniques that I use to cut out Felt EASILY and ACCURATELY here!
STEP 3b
I think it’s easier like to cut the hole in the PATCH PIECE now (for the craft eye) but you can do this later when you insert the craft eyes (Step 11).
STEP 3c
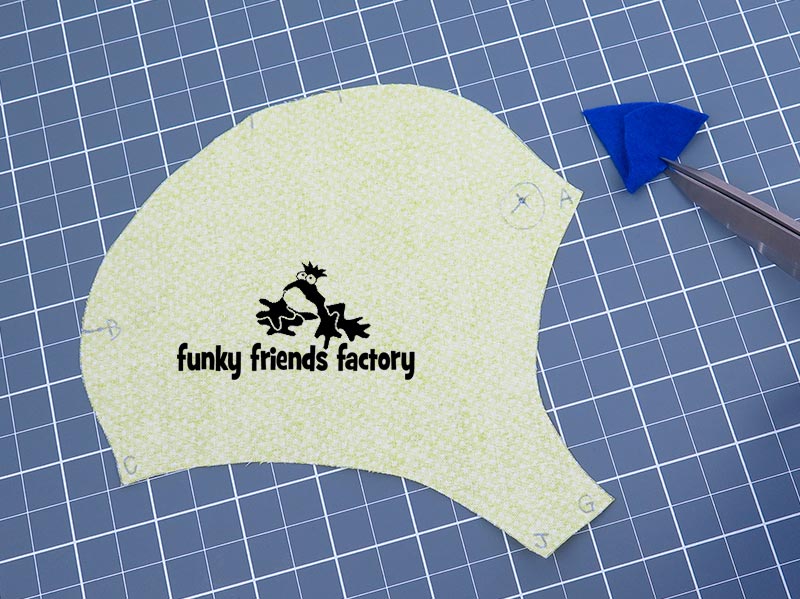
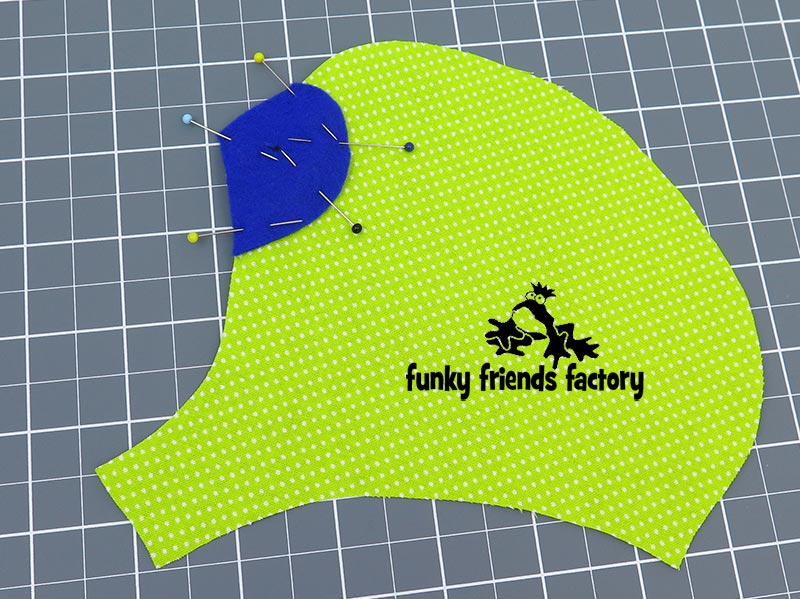
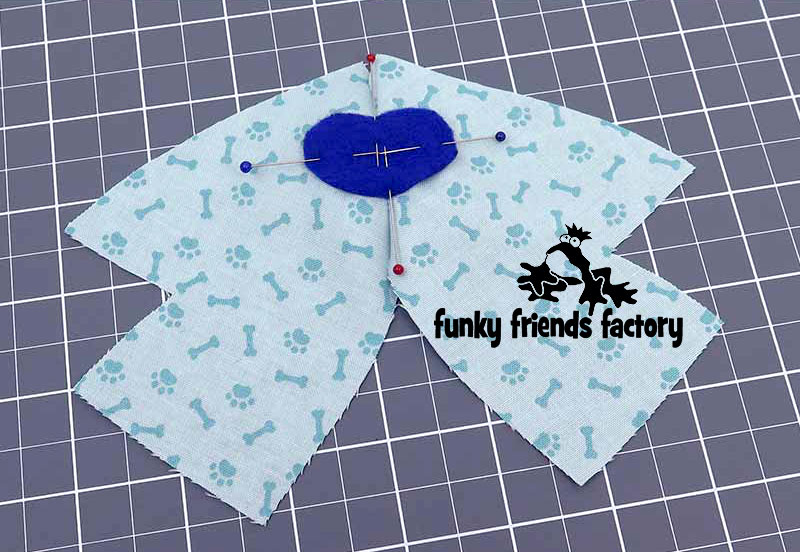
Pin the PATCH onto a FACE PIECE, using the pattern markings to guide you.
STEP 3d
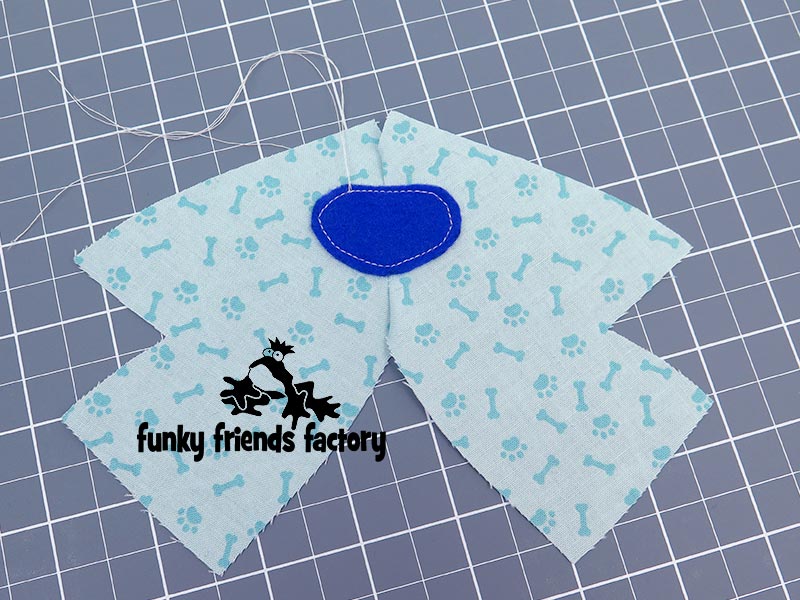
Sew the PATCH in place.
TIP: Try and use a matching thread when you sew on the felt pieces so that you won’t see the thread if your stitching is a bit crooked! (This time I ‘cheated’ and used a blue, non-toxic permanent marker to draw over the white thread!)


FACE & FOREHEAD:
STEP 4a
Please double-check the fold placement in the EAR PLACEMENT DIAGRAM below – you don’t want your ears to be on BACKWARDS! 😫
STEP 4b
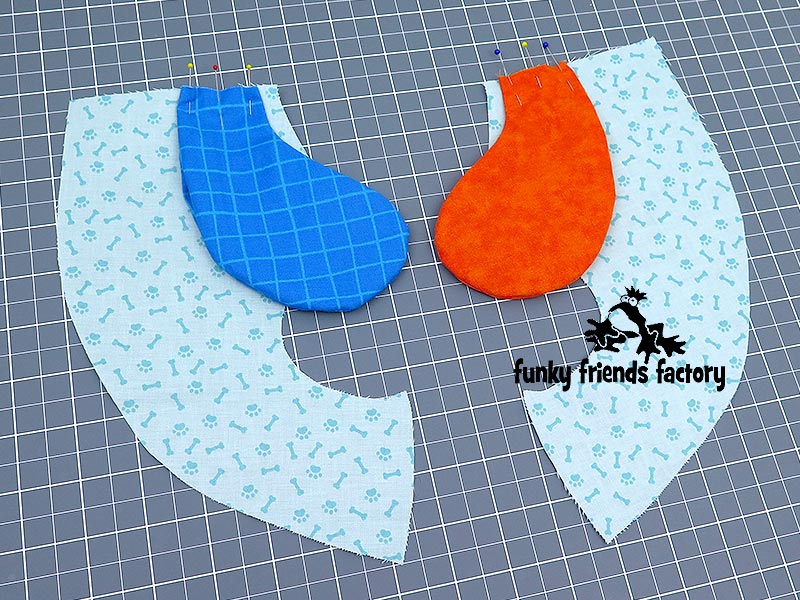
Pin one of the EARS to a FACE PIECE, using the pattern markings to guide you with the placement, with the fold of the EAR towards the BACK.
STEP 4c
Pin the other EAR to the other FACE PIECE making sure to place the fold of the EAR towards the BACK.
STEP 5
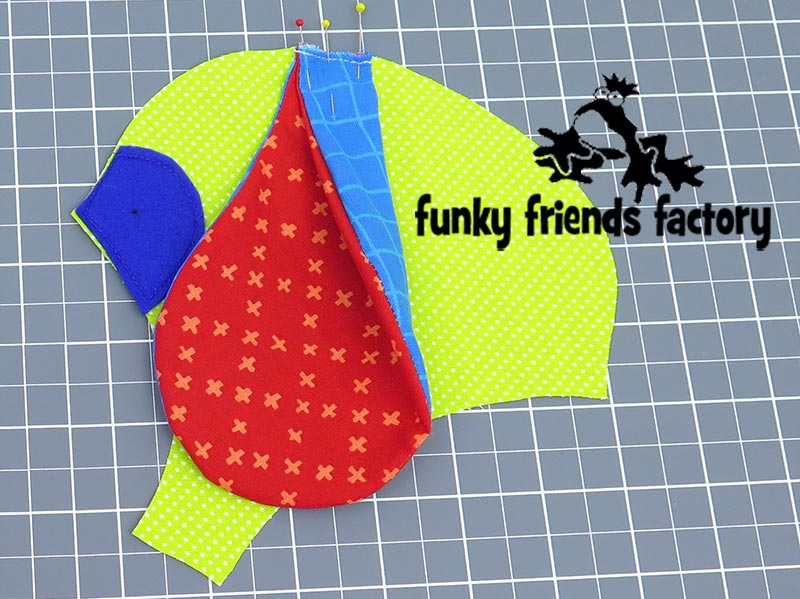
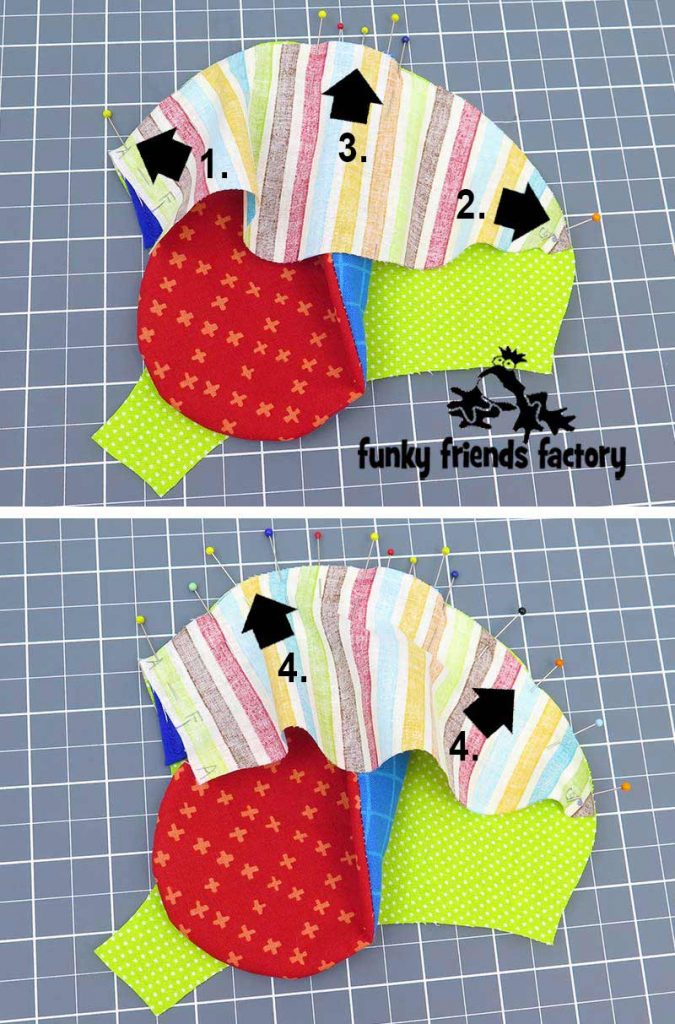
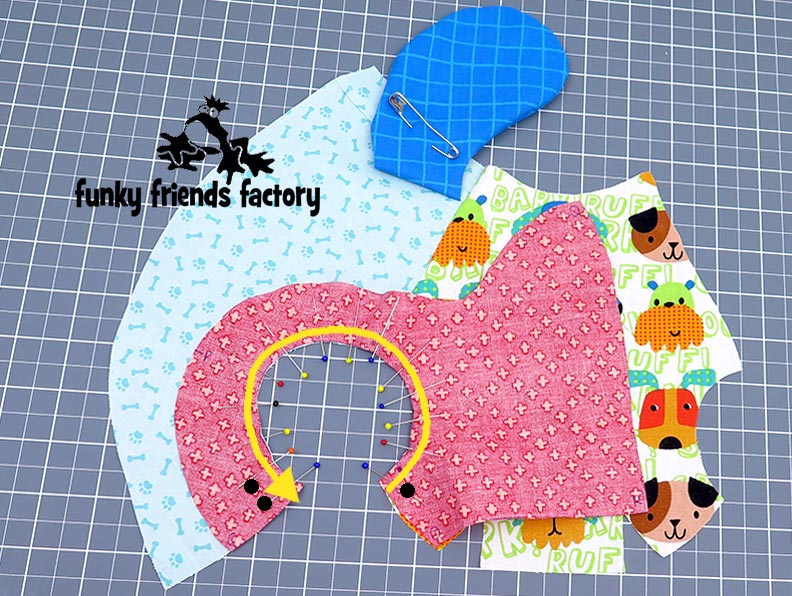
Sew the FOREHEAD PIECE to one of the FACE PIECES. Sew ONLY from A – B, do not sew to the edge of the fabric at the back of the FOREHEAD PIECE. (See the tip below about pinning curved pieces together, if you are a beginner!)
TIP: You must be careful to stop at point B, or you won’t be able to fold the piece correctly in the next step!

TIP: Pinning curves made EASY!
If you’re a beginner, you might be thinking – the FOREHEAD PIECE and the FACE PIECE don’t fit together very well because they’re different shapes? Don’t worry – it’s easy to join them.
You just need PINS!
Use this method & you’ll be fine:
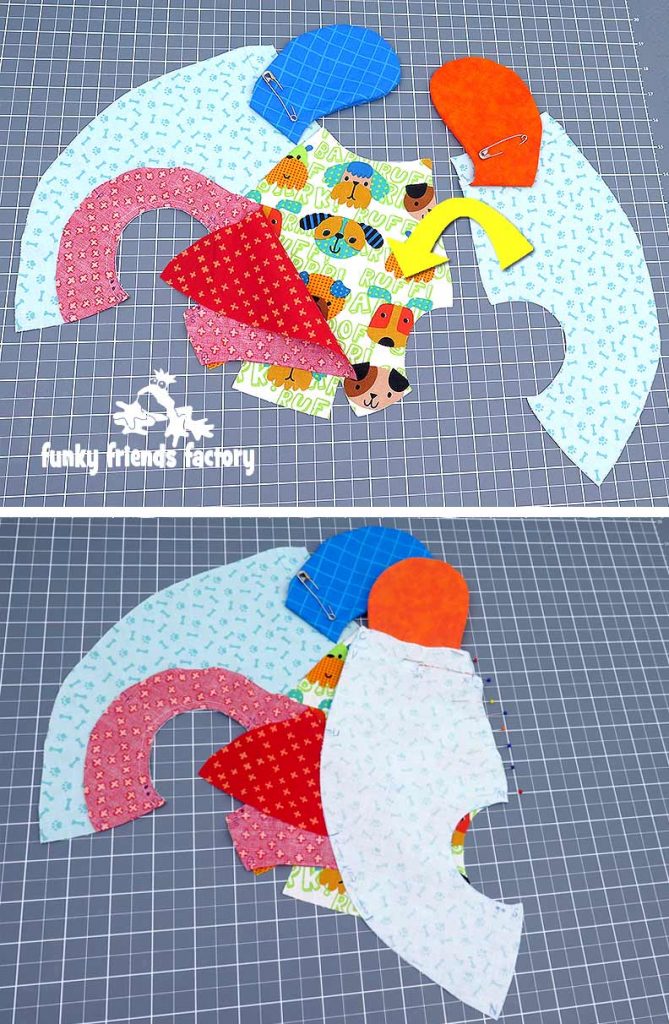
1. Pin the pieces together at the front.
2. Pin the pieces together at the back.
3. Pin the pieces together in the middle/at the EAR.
4. Pin in between these 3 pins.
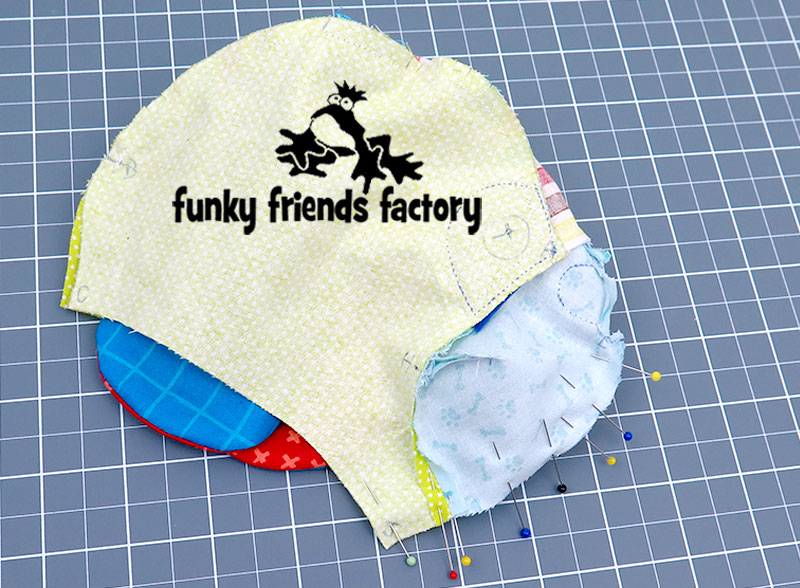
PLEASE NOTE: The PIECES will pucker up in certain areas in order to create a curve. This is normal! (When you have sewn the pieces together you’ll see the result is a lovely rounded shape.)
LOOK how perfectly the seams line up in that bottom photo!
See ~>
PINS are
your FRIENDS!
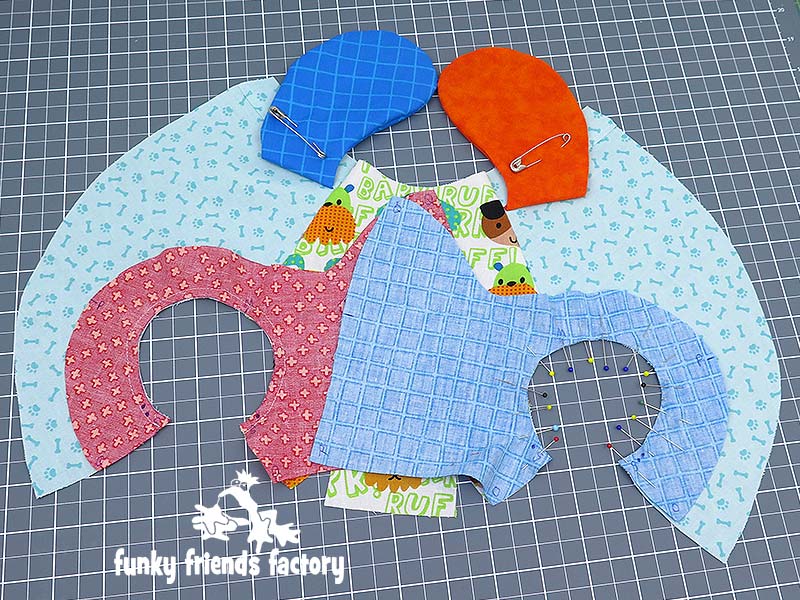
STEP 6a
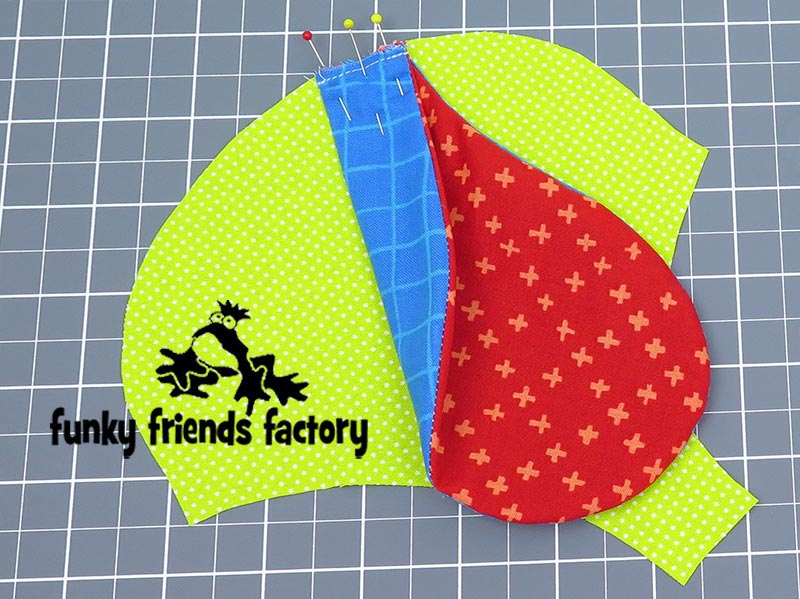
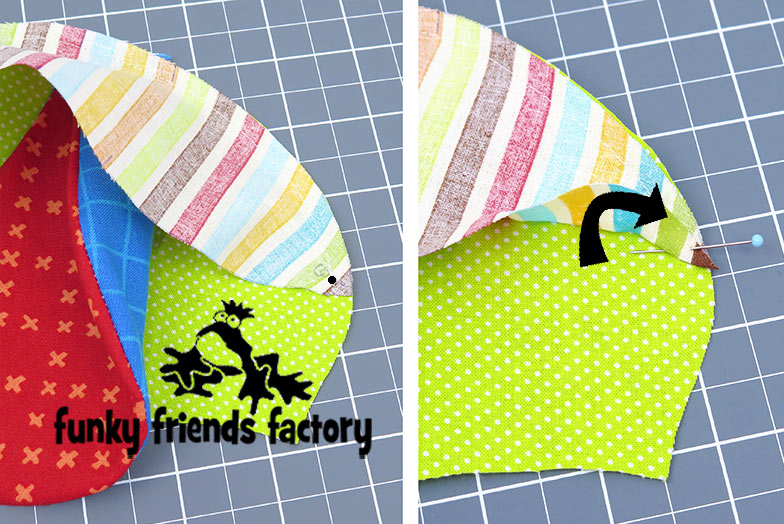
Fold the FOREHEAD PIECE back at point B, as shown on the pattern markings (with the fabric wrong sides together), and pin it in this position.
STEP 6b
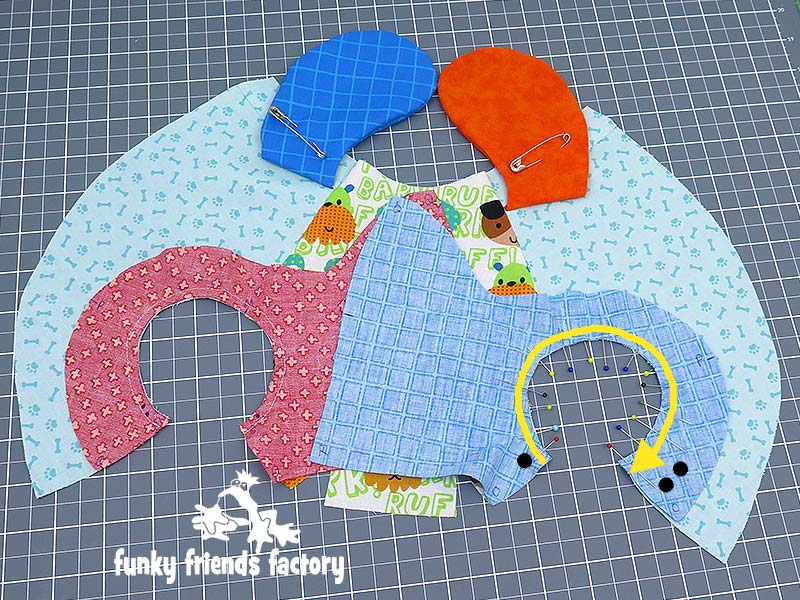
Pin the FOREHEAD PIECE to the other FACE PIECE with the EAR in between them. Sew from A – B. Sew a little bit past point B, BUT do not sew to C because this will make it difficult to fit the head to the body later!
TIP: I use a safety pin to hold the FACE PIECES together – so this reminds me NOT to sew to C! 😁
NOSE & SNOUT:
PLEASE NOTE:
The felt NOSE PIECE can be sewn on now by machine Option a (Steps 7a – 7d) or sewn on by hand after stuffing the toy Option b (skip ahead to Step 7e). Follow the method for the option that you want to use:
Option a. MACHINE SEWING NOSE:
STEP 7a
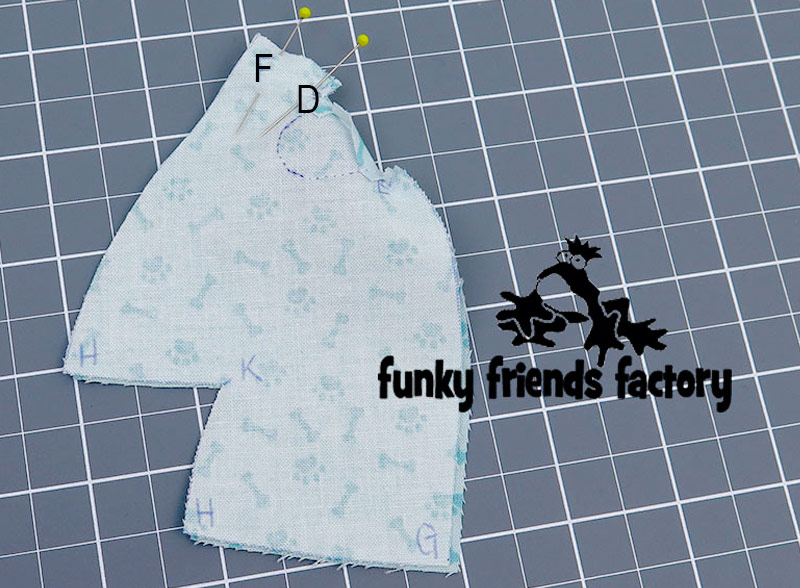
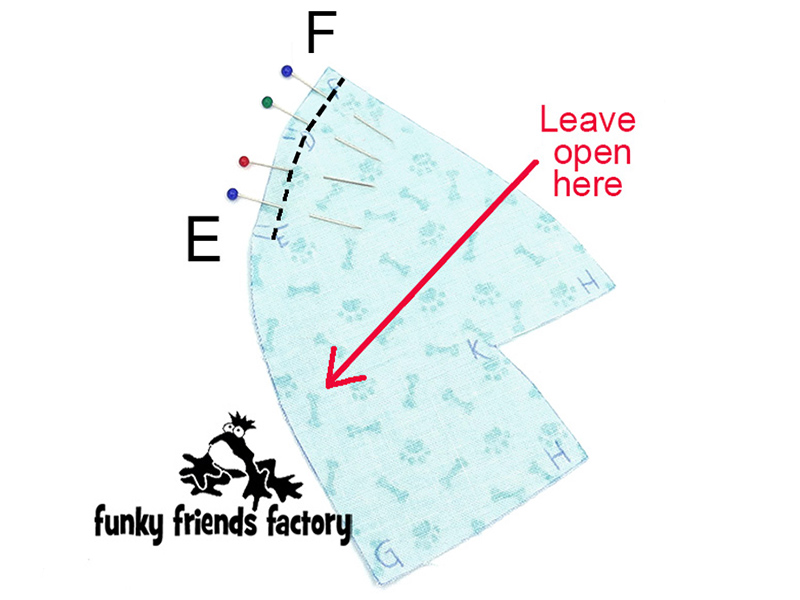
Sew the SNOUT PIECES together from D – E only, as shown on the pattern markings – do NOT sew the whole seam, from F – G!
TIP: It is VERY important that you ONLY sew from D – E because you won’t be able to open the SNOUT PIECES flat to machine sew the NOSE PIECE on if you have sewn the whole seam.
STEP 7b
Cut the NOSE PIECE from felt. Clip the seam allowance of the SNOUT PIECES at D and E so you can pin the NOSE PIECE flat on the front (right side) of the SNOUT PIECES.
STEP 7c
Using a dark/matching thread, sew the NOSE PIECE to the SNOUT PIECES.
I used a white thread so you could see where the stitch line should be!
STEP 7d
Sew the SNOUT PIECES together from F – D.
*** SKIP AHEAD to the SNOUT DARTS (Step 8) ***
Option b. HAND SEWING NOSE:
STEP 7d
Sew the SNOUT PIECES together from F – E.
STEP 7e
Mark the position of the NOSE with a fabric pen, on the RIGHT side of the SNOUT PIECES – so you know where to place the NOSE PIECE after stuffing. (I don’t mark the bottom as well, in case I make a mistake and the felt won’t cover both marks!)

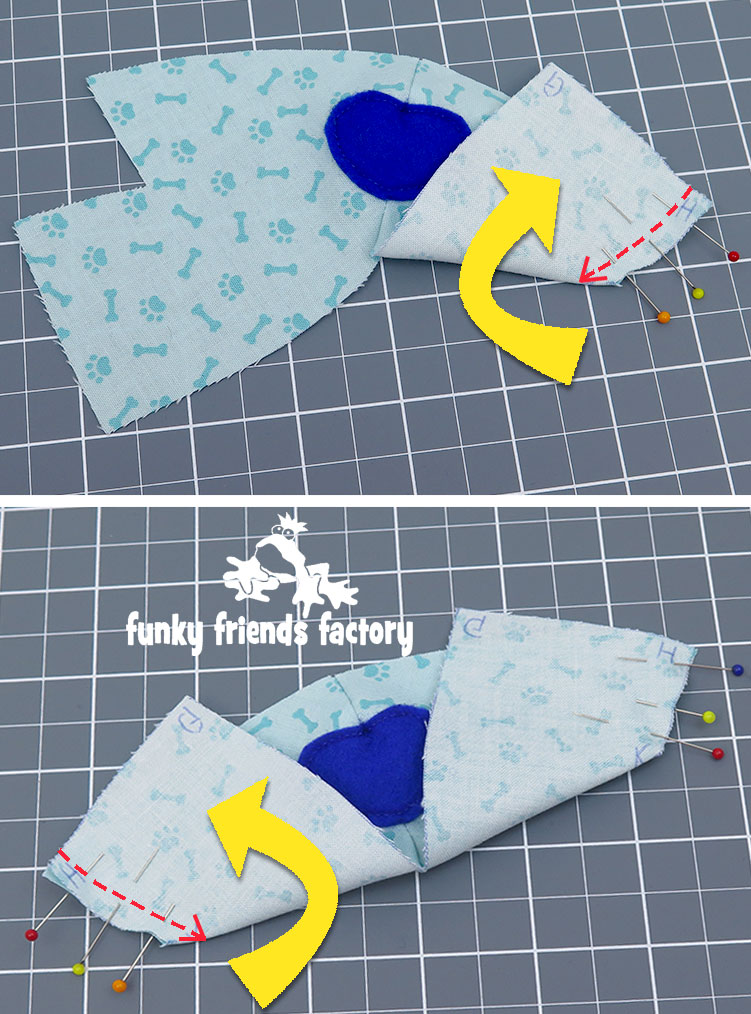
SNOUT DARTS
STEP 8
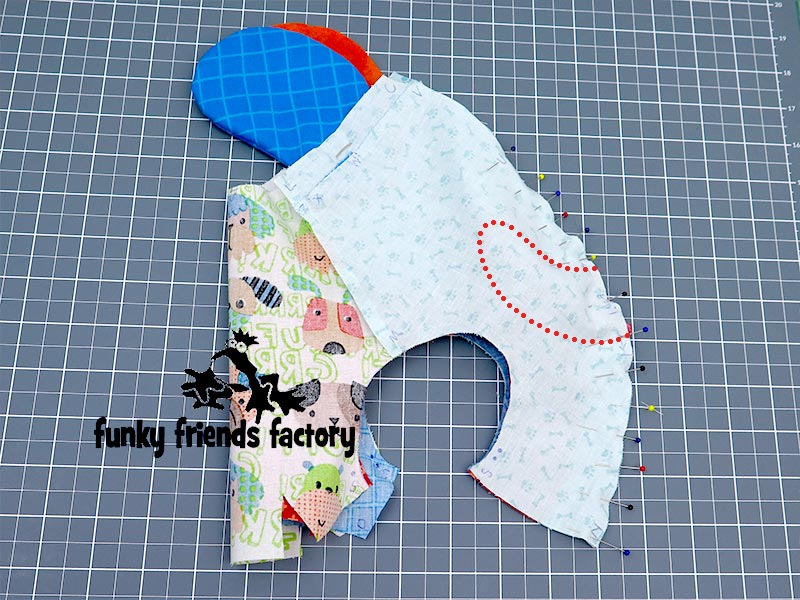
Fold the SNOUT PIECES with the fabric right sides together and sew the snout darts in the SNOUT PIECE from H – K, as shown on the pattern markings – see the red dashed arrows in the photos below. (1 dart on each SNOUT PIECE = 2 darts in total).
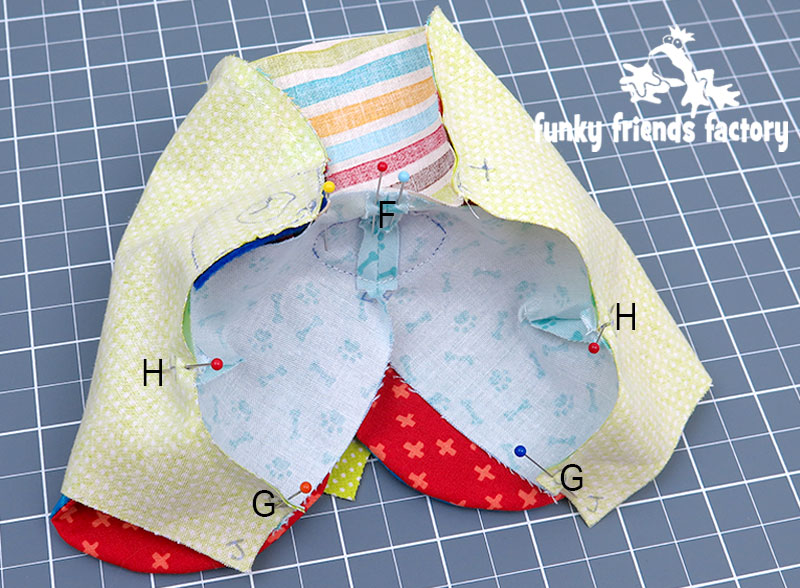
STEP 9
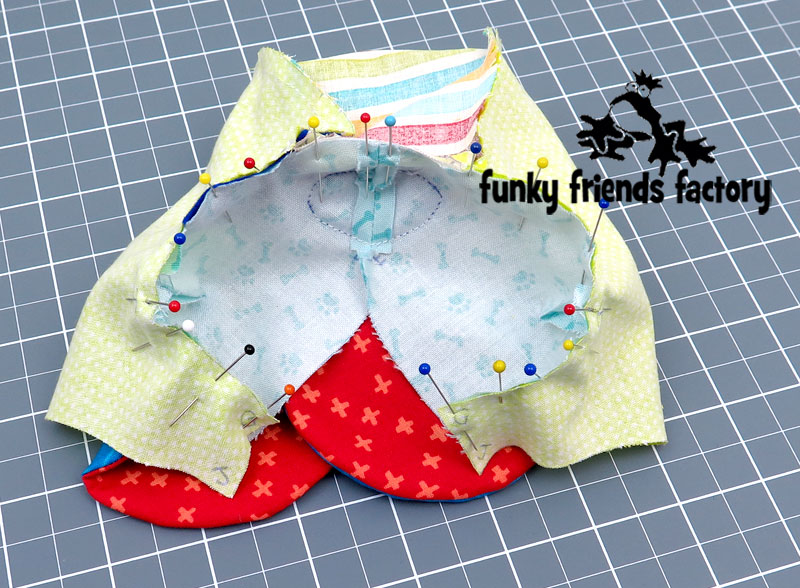
Pin and sew, the the SNOUT PIECES to the FOREHEAD & FACE PIECES.
TIP: This seam is right in the middle of your dog’s face, so take your time and use LOTS of pins. Pin the PIECES together at points G, H and F first…
…then pin in between these pins. (If you are a beginner it will be easier to sew one side at a time, i.e. pin and sew together from G – F, and then do the same for the other side).
STEP 10
Sew the SNOUT and FACE closed at the front, sewing from E – G on the SNOUT and from G – J on the FACE PIECES.
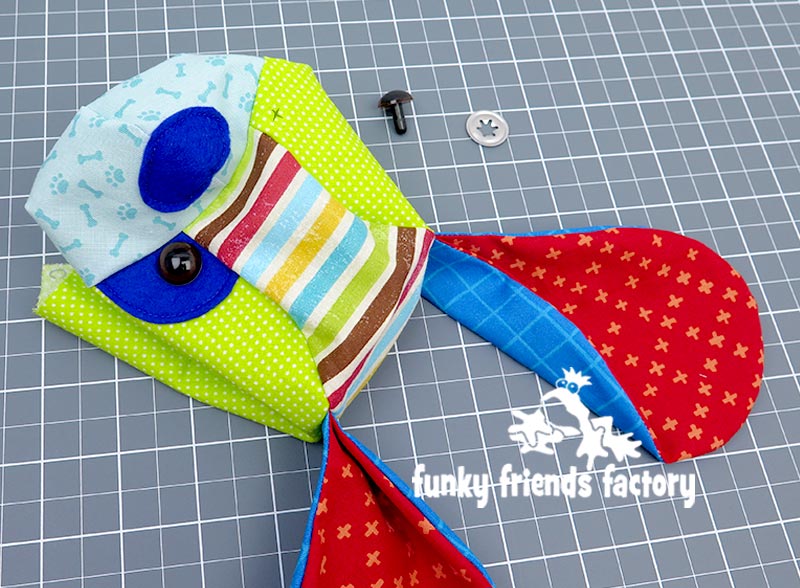
CRAFT EYES:
STEP 11
If you are using CRAFT EYES cut the hole in FACE PIECES and the PATCH PIECE and insert them now.
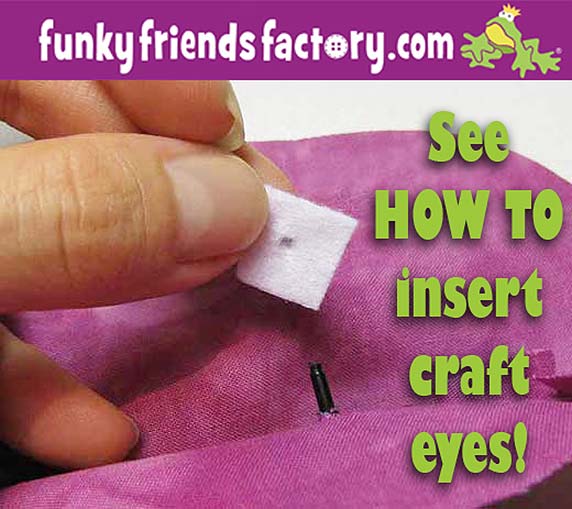
TIP: I have a tutorial to show you how to insert craft eyes on my blog.
ARMS:
STEP 12a
Pin the ARM PIECES together in pairs.
STEP 12b
Sew the ARM PIECES together, leaving them open at the top and leaving the turning gap open at the back, for turning and stuffing.
STEP 12c
Clip the seam allowance, turn the ARMS right sides out and use a chopstick to smooth the seams.
STEP 12d
Pin the ARM PIECES closed at the top. (with the seams at the sides.)

STEP 13a
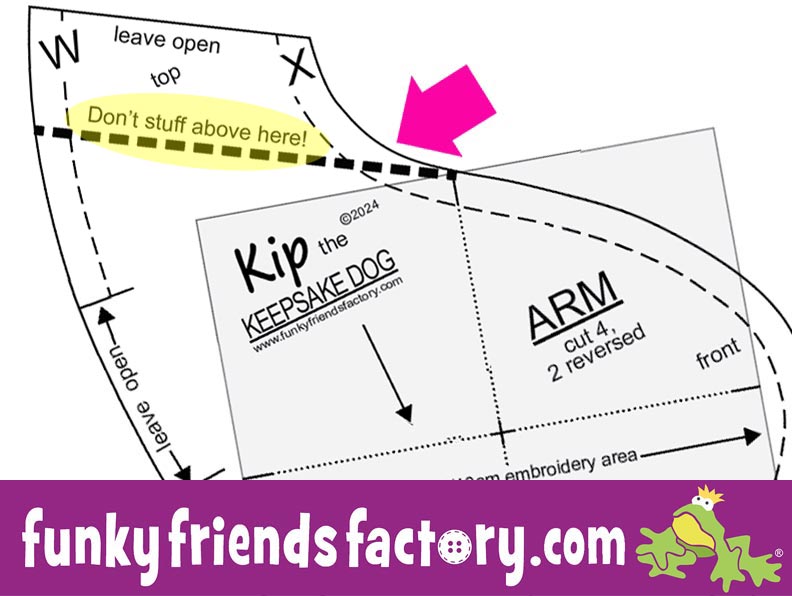
Pin the ARM PIECES to the BACK PIECES matching W and X. (*** If you have embroidery on the ARMS, this should be facing UP, not ‘touching’ the BACK PIECES.)
STEP 13b
Sew the ARMS in place with a 3mm or ⅛ inch (smaller than usual) seam allowance.
STEP 13c
Pin the SHOULDER PIECES to the BACK PIECES and sew them together (at the arm seam) with the ARMS in between.
STEP 13d
Fold the seam allowance of the arm seams towards the SHOULDER PIECES and pin it in this position.
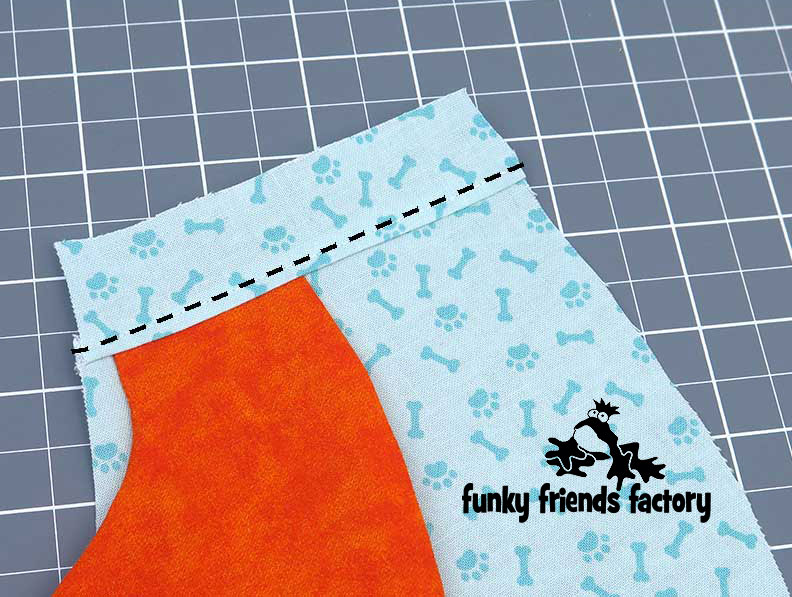
STEP 13e
Sew a line of top stitches through all of the layers (the SHOULDER PIECE and the seam allowance). This extra row of stitches is important because it makes the ARMS very secure and able to withstand LOTS of tugging!
I used a black dashed line in the photo to show you where to sew.
(This row of stitching will be visible on the completed toy.)
TIP: This is what the ARMS will look like BOTH sewn in place.
TUMMY, BACK & LEGS:
STEP 14
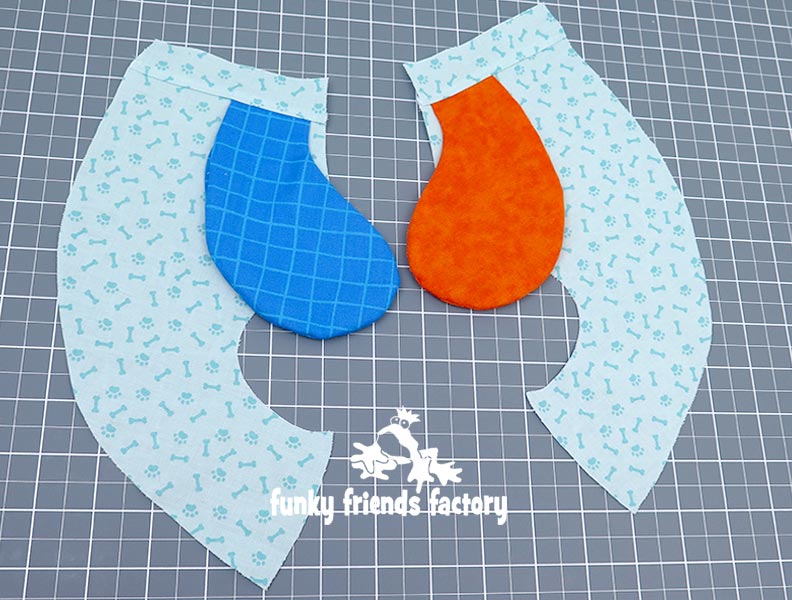
Folding the arm out of the way, pin and sew one of the BACK PIECES to the TUMMY PIECE from L – M, as shown on the pattern markings.
PLEASE follow the EXACT ORDER for the LEGS in the steps below ~>
Why? Because it is very easy to sew the LEGS on back to front if you do both of them at the same time! (I know because I did this myself!😖)
TIP: It’s easy to get confused with the LEGS if you don’t use the dots and letters of the pattern markings to guide you! So please transfer these to the fabric pieces NOW, if you haven’t done this already.
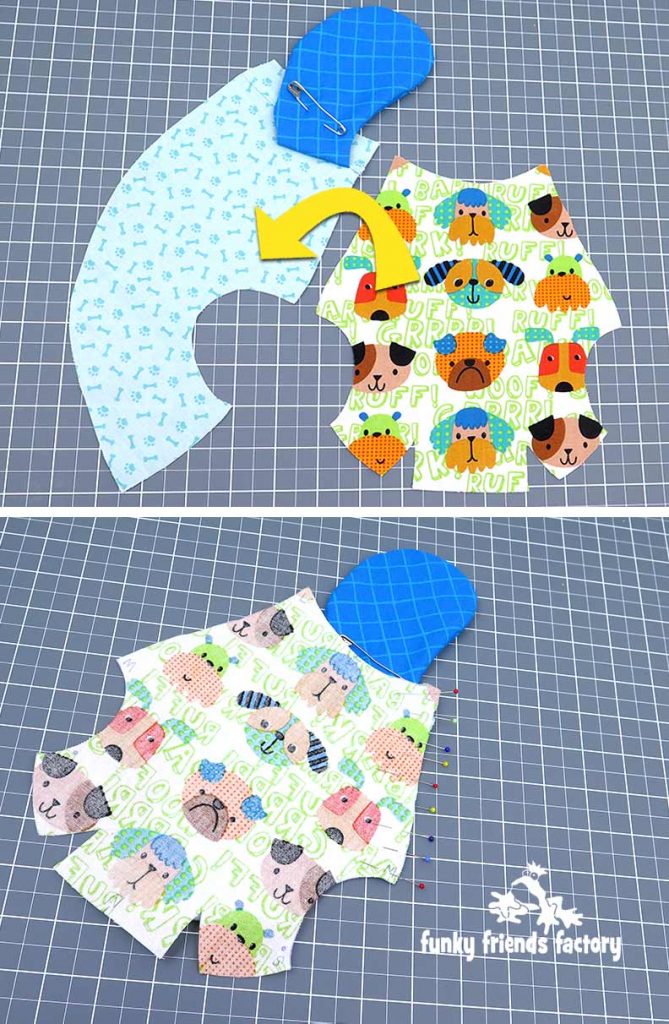
STEP 15a
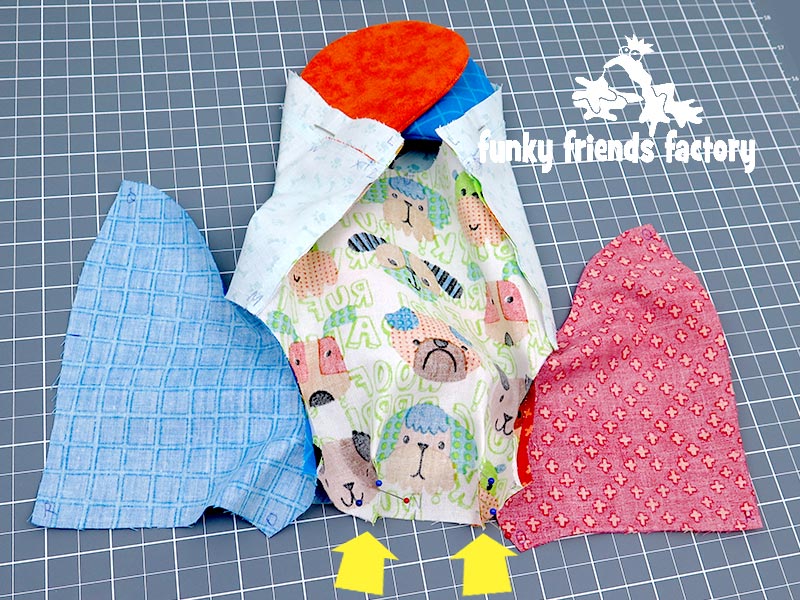
With the RIGHT SIDES of the fabric together, pin one of the INNER LEG PIECES to the BACK & TUMMY PIECE you just sewed, matching the single dot pattern marking (on the TUMMY) and double dot pattern markings (on the BACK) with the dots on the INNER LEG PIECE. (See the INNER LEG PINNING DIAGRAM).
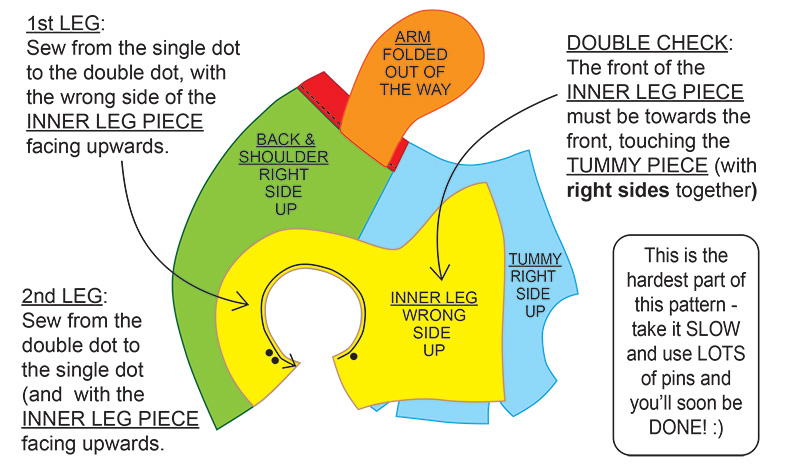
LEG PINNING DIAGRAM:
TIP: I don’t want to beg, but pleeeeeez transfer the dots and letters to the fabric pieces NOW, if you haven’t done this already. 😄🙏
STEP 15b
Sew the INNER LEG PIECE to the BACK & TUMMY PIECE. (I find it easiest to sew from the single dot to the double dot, with the wrong side of the INNER LEG PIECE facing upwards.)
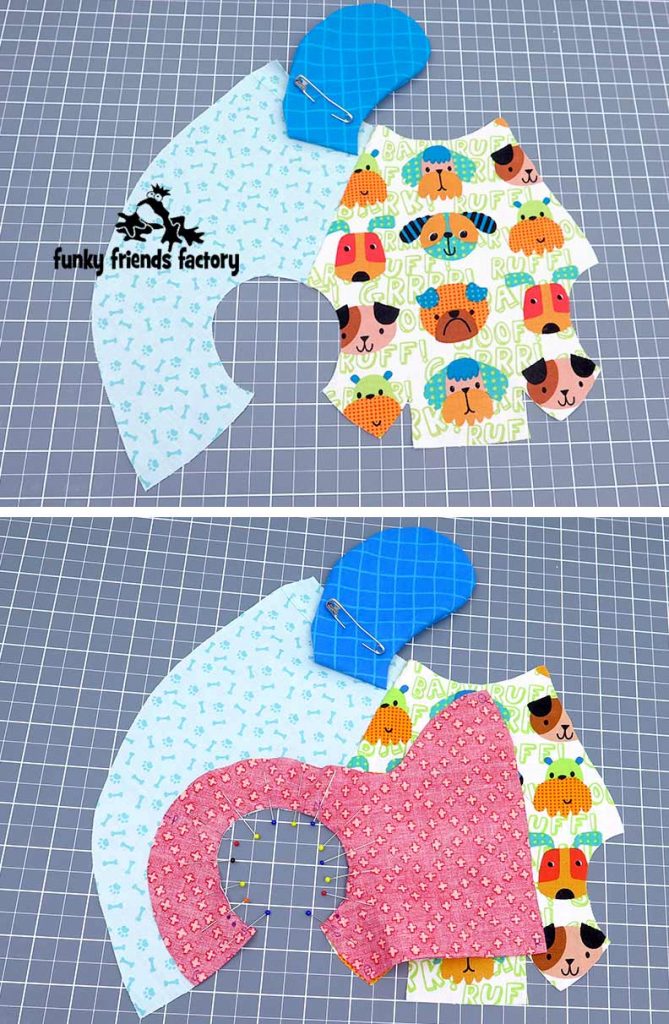
STEP 16a
Folding the other arm out of the way, pin and sew the TUMMY PIECE to the other SHOULDER, ARM & BACK PIECE from L – M.
STEP 16b
With the RIGHT SIDES of the fabric together, pin the other INNER LEG PIECE to the BACK & TUMMY PIECE, matching the dot pattern markings.
STEP 16c
Sew the INNER LEG PIECE in place (This time, I find it easiest to sew from the double dot to the single dot!)
TAIL:
STEP 17a
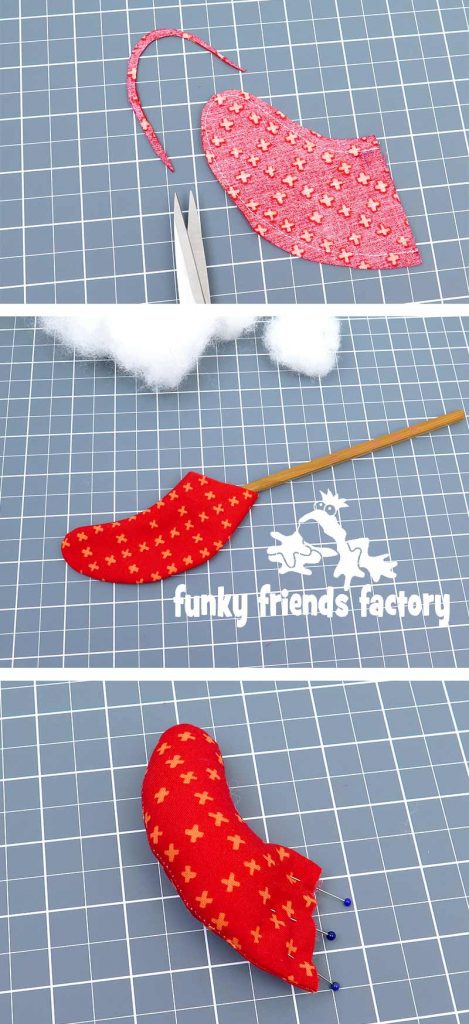
Sew the TAIL PIECES together, leaving the straight edge open.
STEP 17b
Trim the seam allowance at the ‘tip’ of the TAIL PIECES to 3mm (⅛inch) and turn the TAIL right sides out. Stuff the TAIL with toy stuffing and pin it closed along the straight edge.
STEP 17c
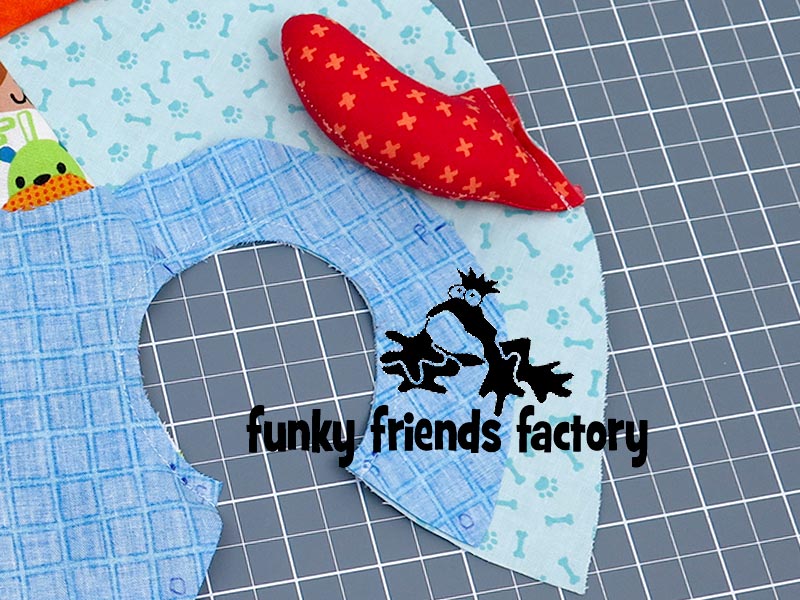
Pin the TAIL to one of the BACK PIECES matching point T and using the pattern markings to guide you with the placement so you get the TAIL right way up!
STEP 17d
Sew the TAIL in position with a 3mm(⅛inch) seam allowance to keep the pieces from slipping.
STEP 18
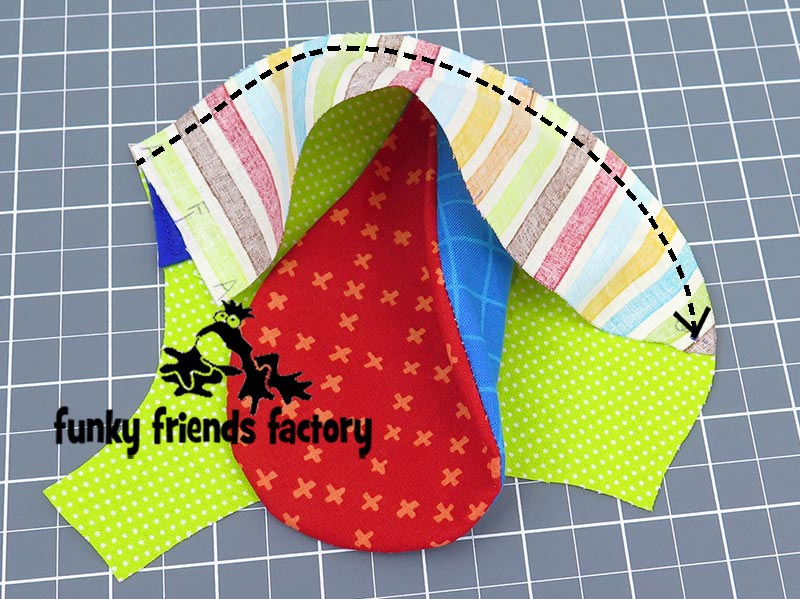
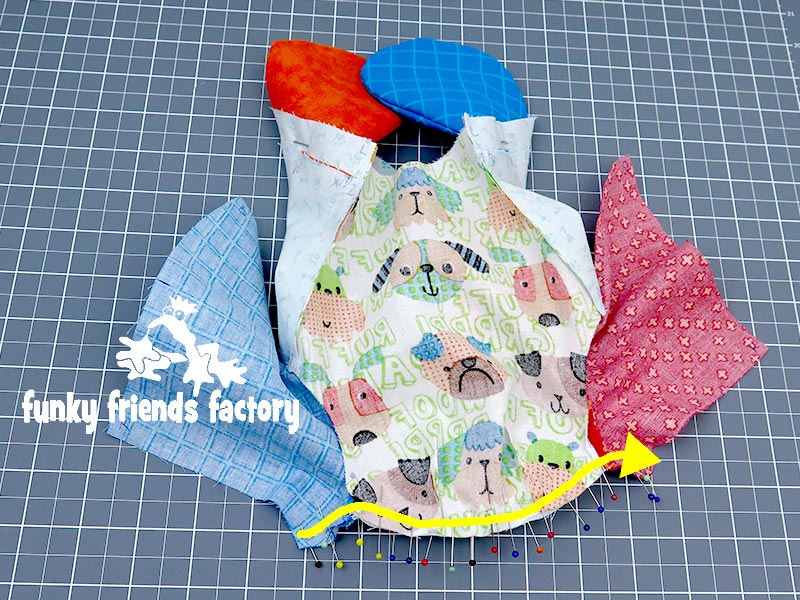
Sew the BACK PIECES together from U – N with the TAIL in between.
(The dotted line in the photo below, is to show you the position of the TAIL ‘inside’ the body.)
BASE SEAM:
STEP 19
Fold the TUMMY PIECE with the fabric right sides together and sew the tummy darts closed, as shown on the pattern markings. (2 darts).
STEP 20
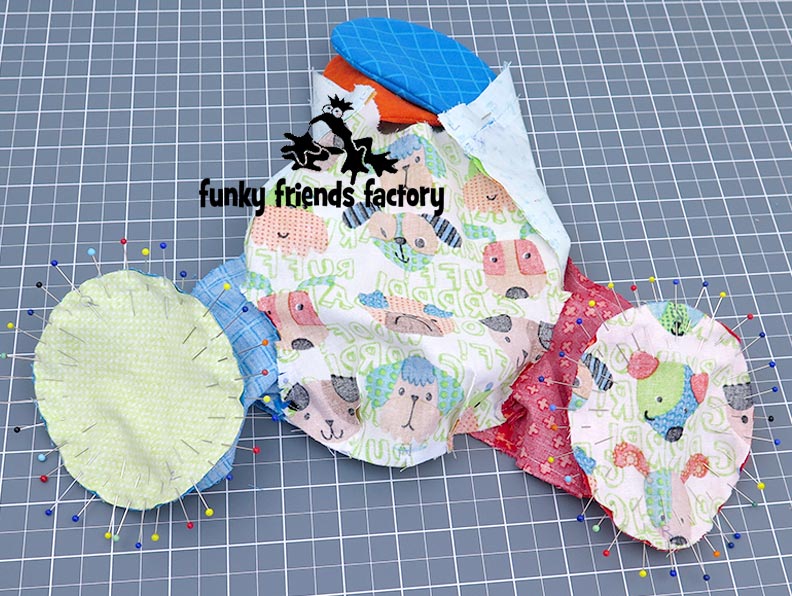
Pin the BACK, TUMMY and INNER LEG PIECES together along the base seam and sew them together from O – S – N – S – O on the other side.
STEP 21a
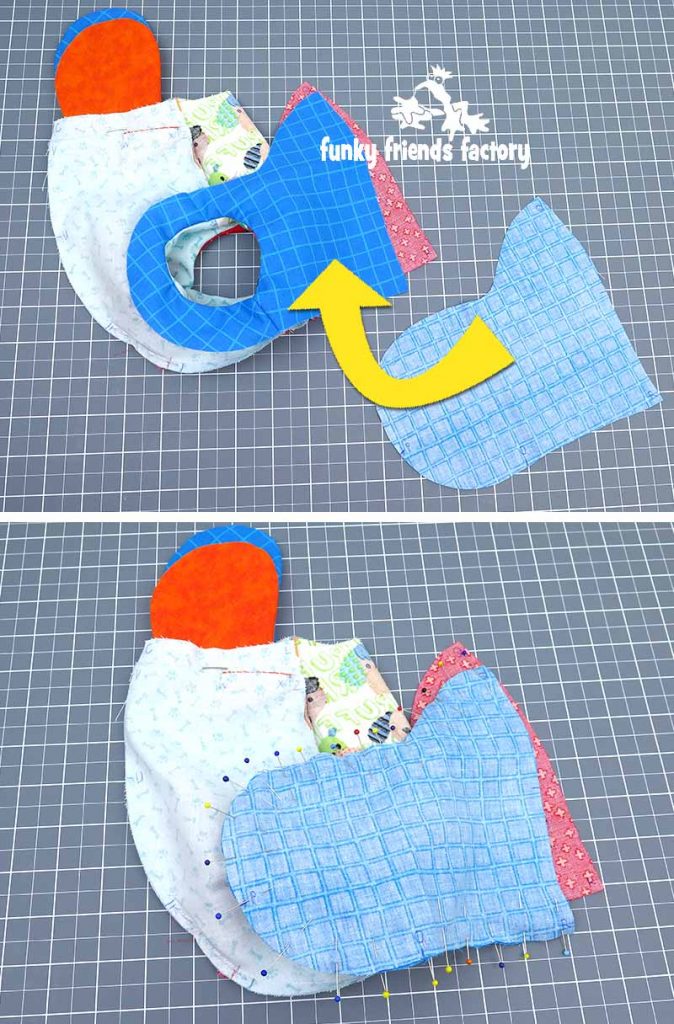
Clip the leg seams very well, especially where they are very curved. Pull the INNER LEGS through the ‘hole’ where they join to the body. (This is so that it’s easier to pin the INNER and OUTER LEG PIECES together.)
STEP 21b
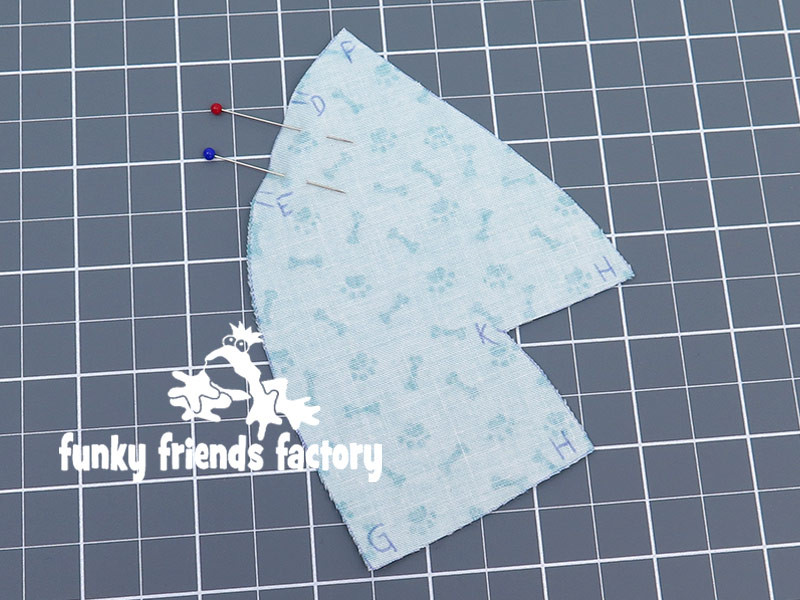
Pin the matching INNER and OUTER LEG PIECE together matching points Q and R at the front, point P at the back and point O at the bottom. Sew from Q around the back of the LEG to R, leaving them open at the front between Q and R (for the FOOT PAD).
STEP 21c
Repeat for the other INNER & OUTER LEG PIECES.
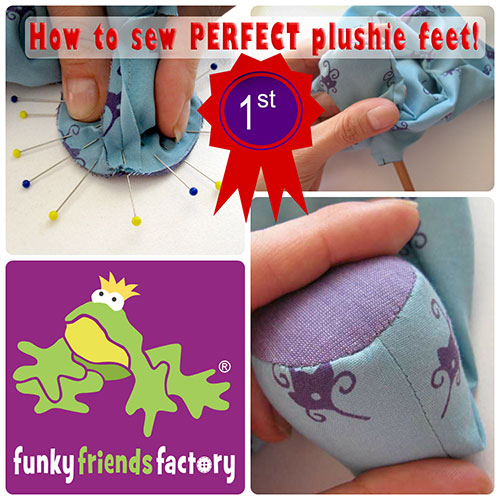
FOOT PADS:
STEP 22a
Pin and sew the FOOT PAD PIECES to the LEG PIECES, matching Q and R and the side markings.
TIP: I have a tutorial to show you how to sew the FOOT PADS in place. Click HERE to check it out!
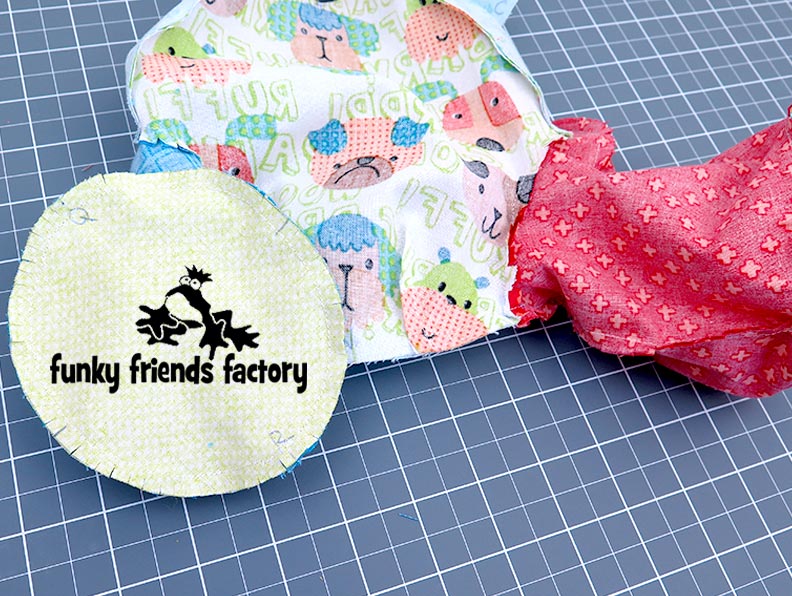
STEP 22b
Clip the seam allowance of the FOOT PADS very well. (This is really important if you are sewing with woven fabrics like quilting cottons or fabrics lined with interfacing.)
STEP 22c
Turn the LEGS right sides out, pushing them ‘inside’ the body.
JOIN THE HEAD TO THE BODY:
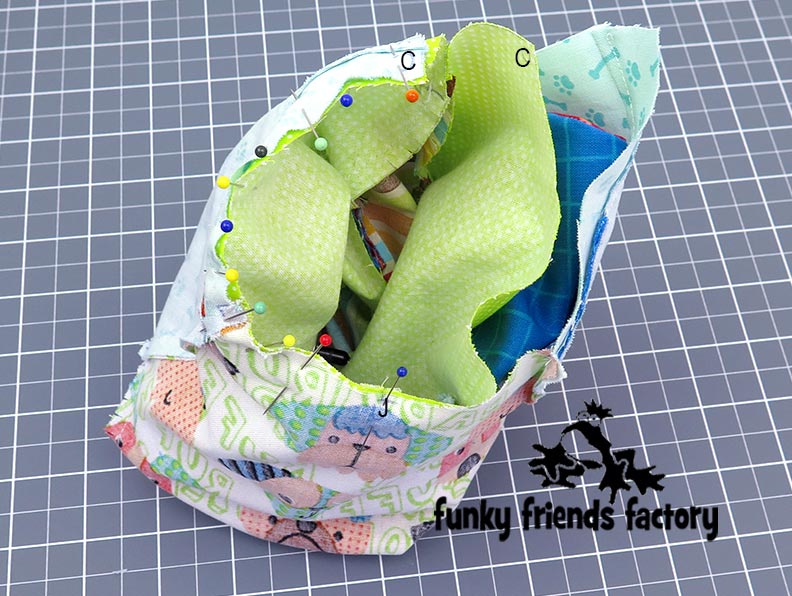
STEP 23a
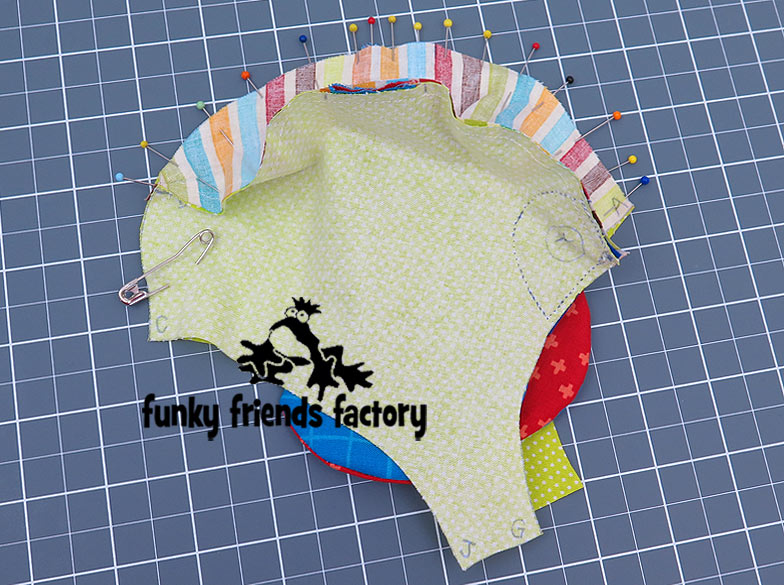
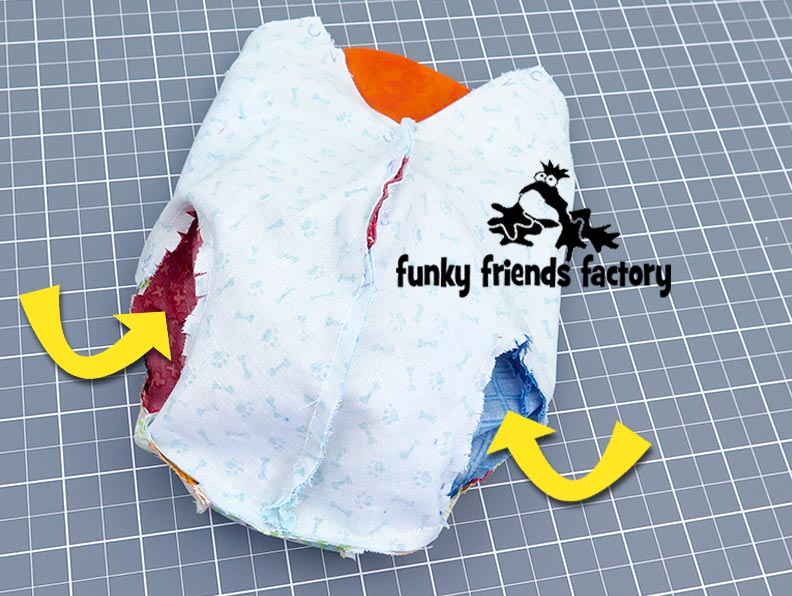
Turn the head right sides out and position it ‘inside the body’ so you can pin the pieces together at the neck seam, with the fabric right sides together.
STEP 23b
Pin the head to the body at the neck seam. Sew the FACE PIECES to the TUMMY & BACK PIECE (with the ARMS in between). Sew from C – J – C.
TIP: If you are a beginner it will be easier to sew one side at a time, i.e. pin and sew together from C – J, and then do the same for the other side.


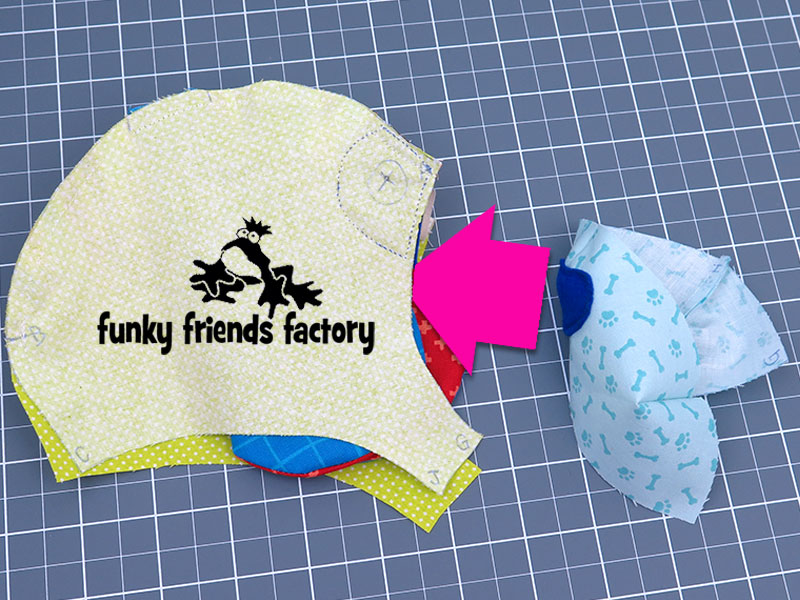
STEP 24
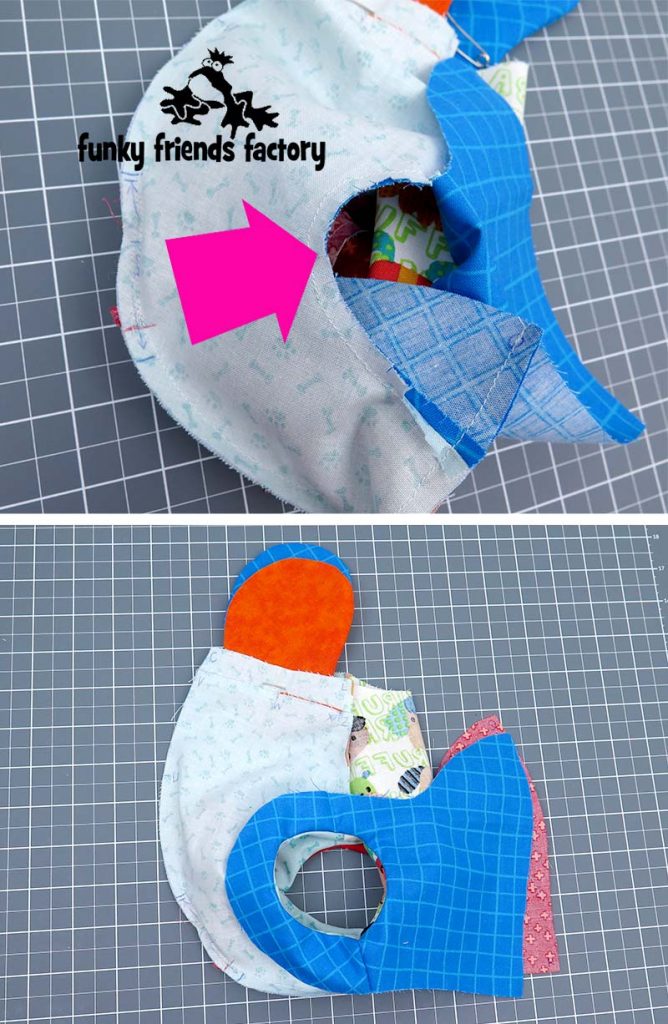
Pull the HEAD back out of the body so the PIECES are wrong sides out again. Pin and sew Kip closed at the back from B on the FACE PIECES to just below C on the SHOULDER PIECES.
TIP: Don’t sew too far past point C, or the stuffing gap (where the pink arrow is in the photo above) will be too small!

ASSEMBLY:
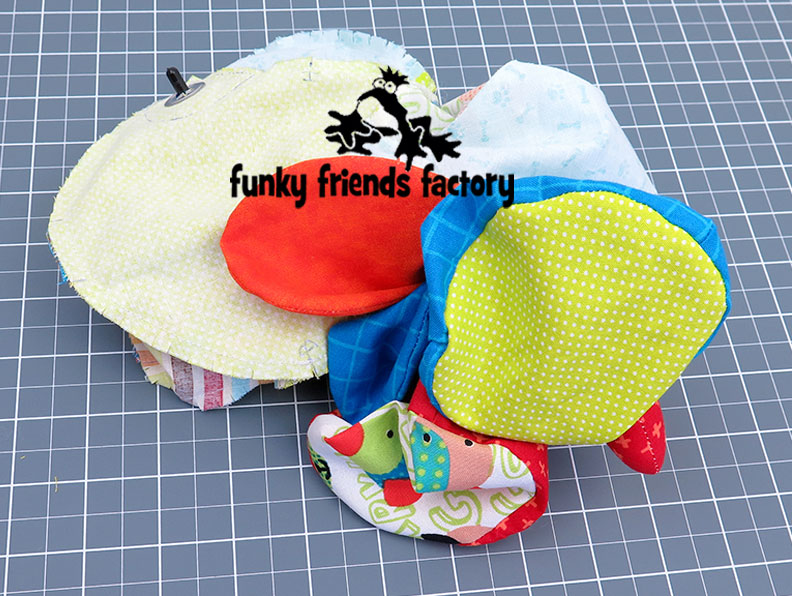
STEP 25
Turn Kip right sides out through the turning gap.
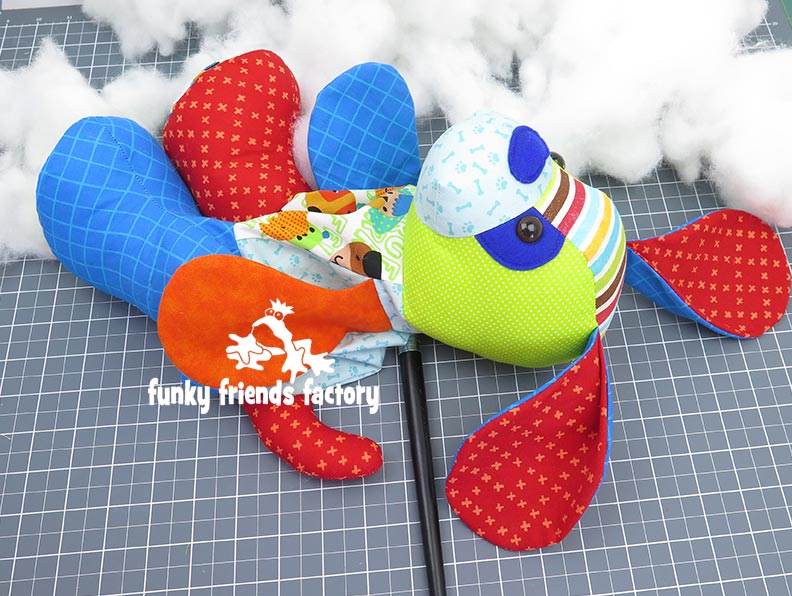
STEP 26
Stuff the LEGS really firmly first, then the SNOUT and the rest of the HEAD next. (Make sure the SNOUT area is nice and firmly stuffed so the face will have a cute look and it will also make it easy to sew the NOSE if you are hand sewing this on.) Stuff the BODY starting at the bottom, making sure, that he is firmly stuffed so he will be able to sit up nicely. Finish stuffing the BODY making sure the neck area is nice and firm so the head doesn’t flop. Stuff the ARMS last.
TIP: Don’t stuff the ARMS too much at the top, stop about 2½cm (1 inch) from the top as shown in the pattern markings. If you stuff the top of the arms TOO MUCH, they will be very fat and this will make your dog look like he is unhappily shrugging his shoulders ALL the time!
FACE & COLLAR:
STEP 27a
If you are hand-embroidering the eyes, sew them now. If you are hand sewing the NOSE PIECE, sew it in place now (with embroidery thread and a blanket stitch).
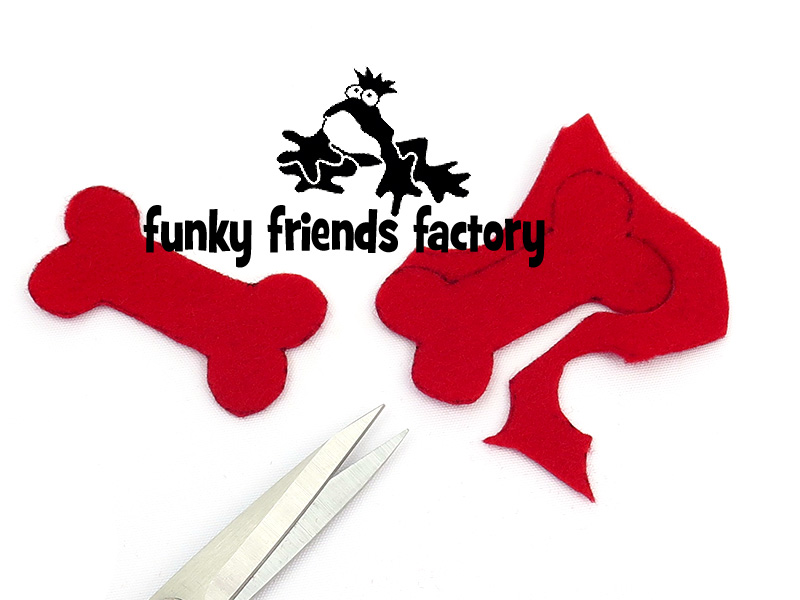
Cut 2 BONE PIECES from felt.
STEP 27b
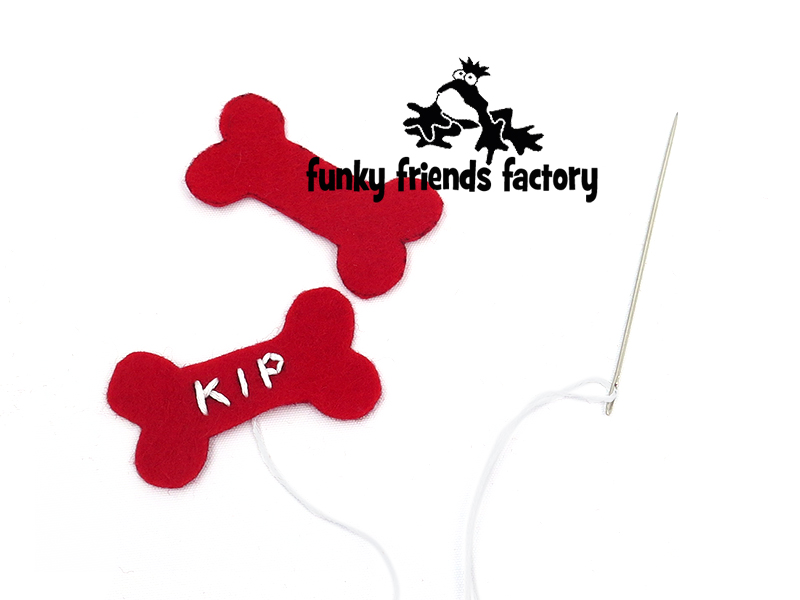
Embroider your dog’s name by hand or machine.
STEP 27c
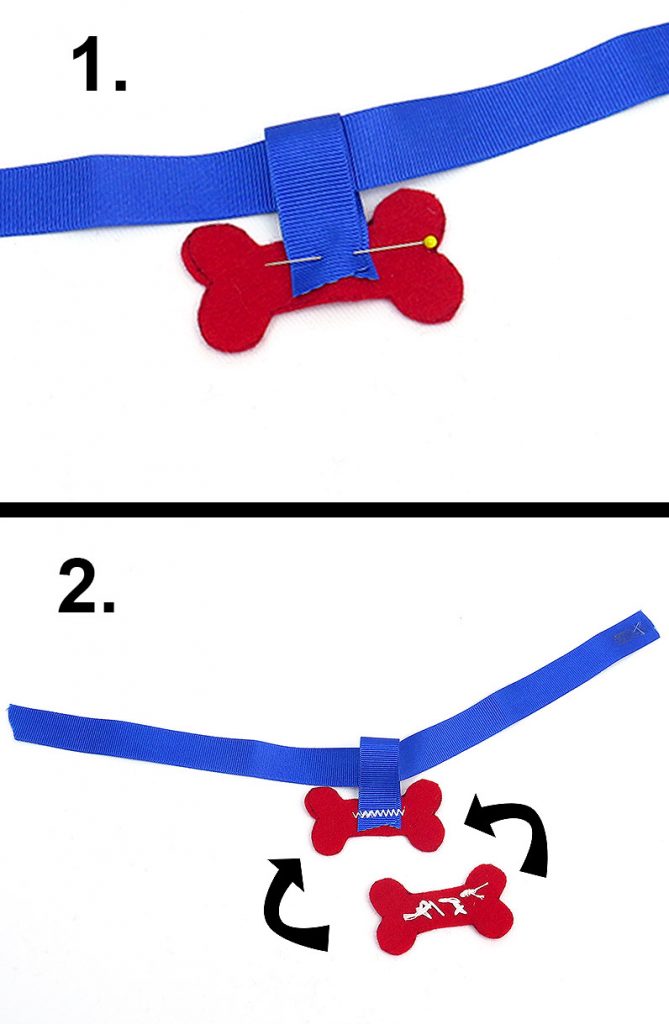
Cut the BONE ATTACHMENT PIECE from felt (or use a piece of ribbon the same length), fold it around the collar ribbon and secure the ends to one of the BONE PIECES.
STEP 27d
Sew (or glue) the BONE PIECES together.
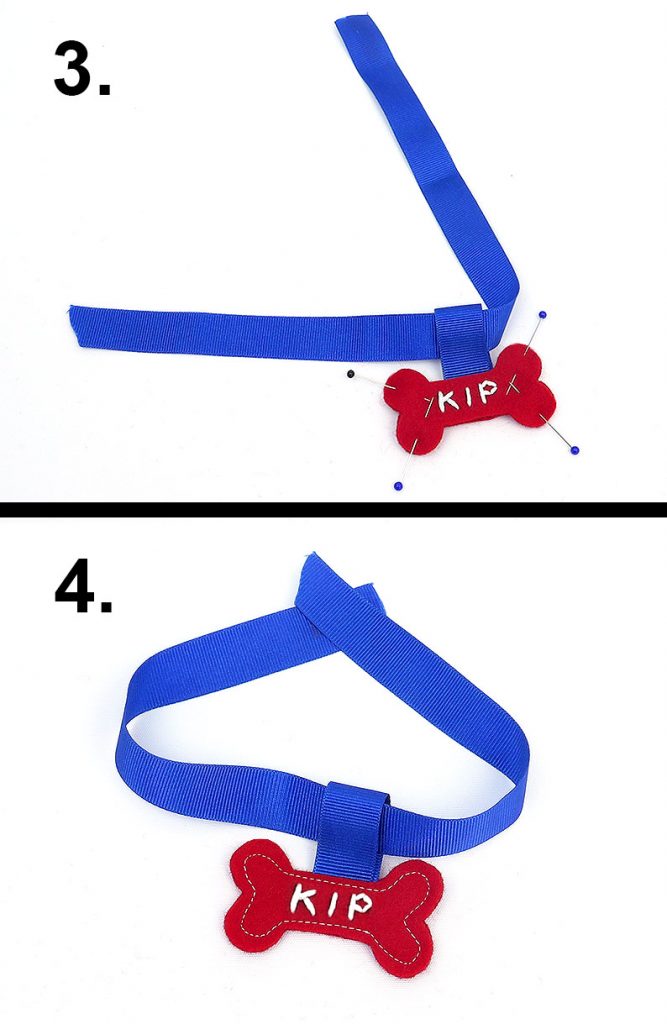
STEP 28
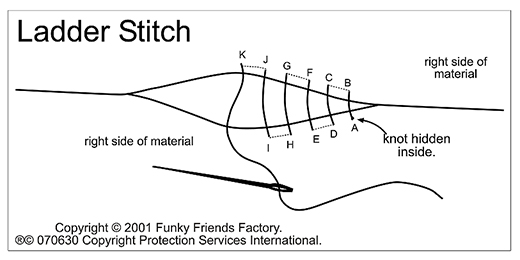
Place the collar ribbon around your dog’s neck and hand sew (or glue it) in place. Sew the stuffing gaps closed on the BACK and ARM PIECES with a ladder stitch.
Your Keepsake Dog is ready to LOVE!
Want to win a
FREE toy pattern?
It’s so EASY to enter our Pattern GIVEAWAY!
![]() ALL you need to do is post a photo of a FUNKY FRIENDS FACTORY toy that you have made on the Funky Friends Factory Facebook Page .
ALL you need to do is post a photo of a FUNKY FRIENDS FACTORY toy that you have made on the Funky Friends Factory Facebook Page .
At the end of each month I draw a winner and post the winner’s name on the Blog the following MONTH. I have an Album on Facebook for all the MAKEROFTHEMONTH winners. You can check it out HERE!
NOT on Facebook? ENTER by email! 😀
*** You can send me your photos by email too!
So come on! Share your photos ~>
The next winner could be YOU!!!
 .
.
Till next time,
Happy Sewing,
Pauline
xxx
![]()
