
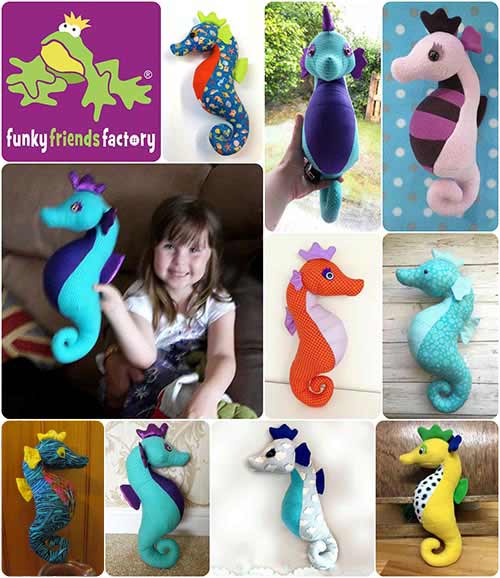
I made this photo tutorial so you can see how to sew my Seahorse Sewing Pattern ~> scroll down for step-by-step photos!
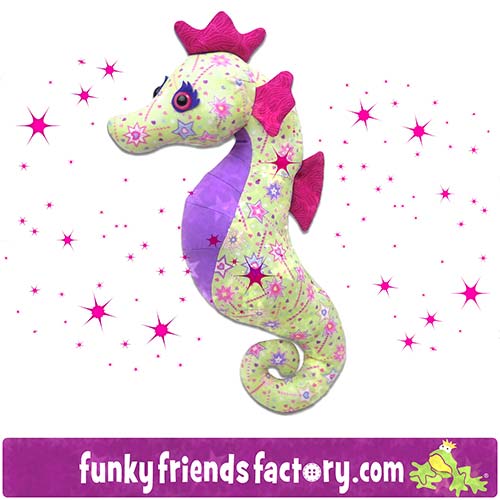
Sparkles is a shy little Seahorse who is spends the day playing hide & seek in the sea grass. She has lots of little bits so I wouldn’t recommend this pattern for beginners.
.
*** PLEASE NOTE – this is ONLY a PHOTO TUTORIAL ***
The FULL PATTERN IS NOT included here.It is NOT A FREE PATTERN!
I have made this photo tutorial so people who have purchased my Seahorse Sewing Pattern can SEE how to sew a Seahorse toy! (I wanted to explain this so you are not disappointed if you have found this page via a search engine and not from the link in my Sparkles Seahorse Sewing Pattern)
STEP 1
Choose some seahorse fabrics.
FINS:
STEP 2
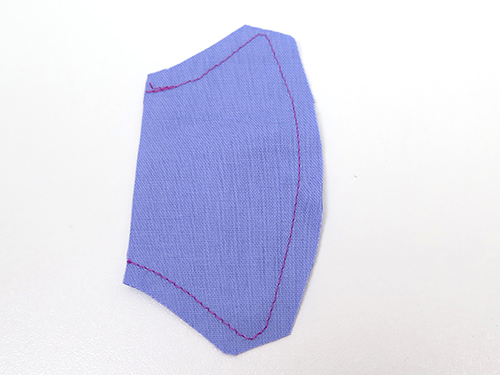
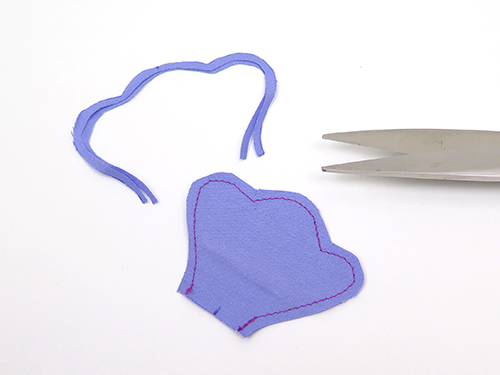
Sew the BACK FIN PIECES together leaving the straight edge open. Trim the seam allowance at the ‘corners’.
STEP 3
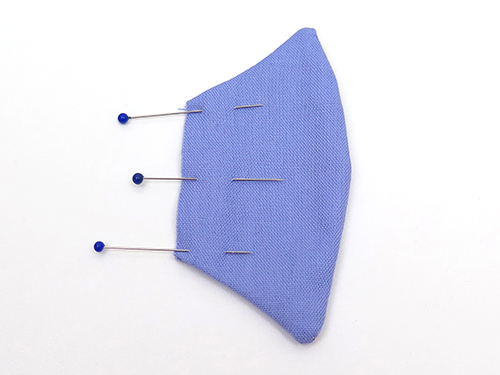
Turn the BACK FIN right sides out and pin the open edge closed.
STEP 4a
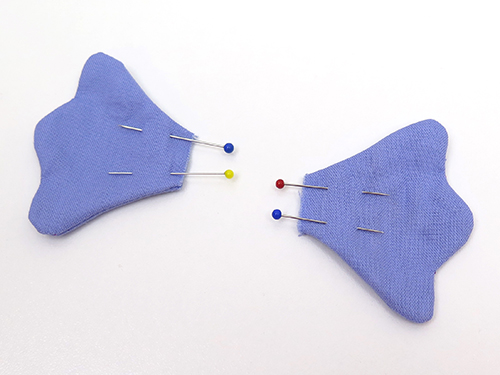
Sew the SIDE FIN PIECES together in pairs, leaving the straight edges open. Trim the seam allowance to 3mm (1/8 inch).
STEP 4b
Turn the SIDE FINS right sides out and pin the open edge closed.
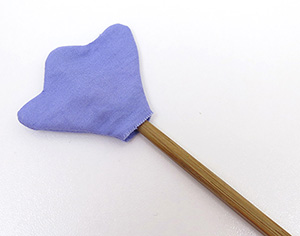
TIP: I like to use a chopstick to turn the seams well. Run the tip of the chopstick back and forth along your stitching line inside the fins.
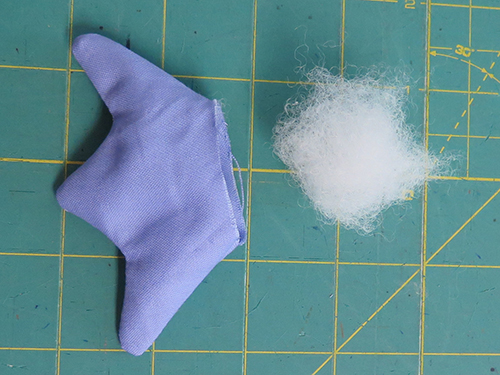
STEP 5
Repeat for the HEAD FIN but stuff the HEAD FIN with a little bit of toy stuffing before you pin it closed. (This will help the HEAD FIN to stand up straight so it looks like a crown.)
TUMMY:
STEP 6
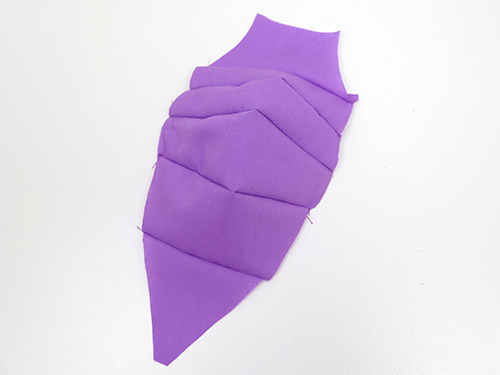
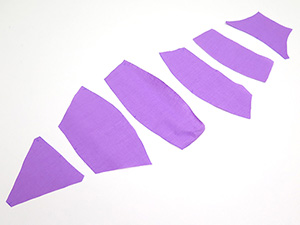
Sew the TUMMY PIECES together in order from 1 – 6, matching the dots of the pattern markings.
TIP: Lay the TUMMY PIECES out in order so you can make sure you get them right sides round. It’s easy to get them upside down!
STEP 7
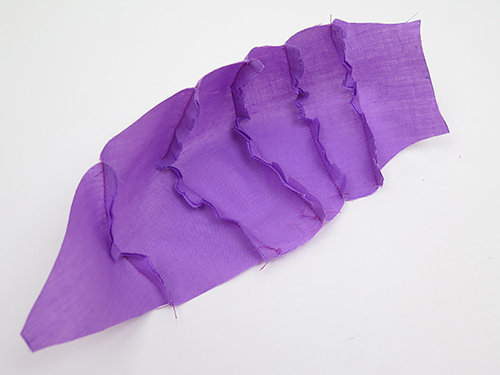
Clip the seams as you go along. This helps the TUMMY PIECES to fit together nicely. From now on the 6 TUMMY PIECES will just be called THE TUMMY.
HEAD:
STEP 8a
Fold the HEAD PIECES with the fabric right sides together and sew the chin darts in them.
STEP 8b
Finger pin the seam allowance of the dart to the front and pin it this way.
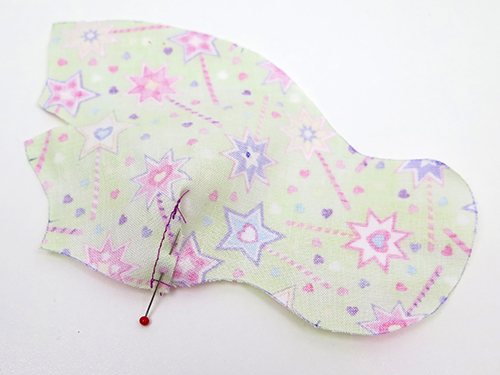
STEP 9
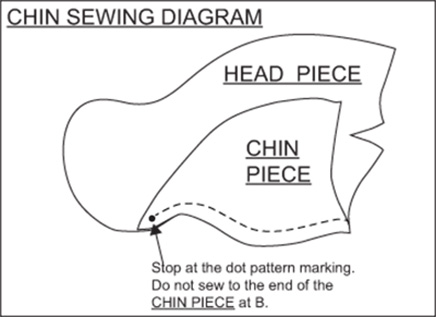
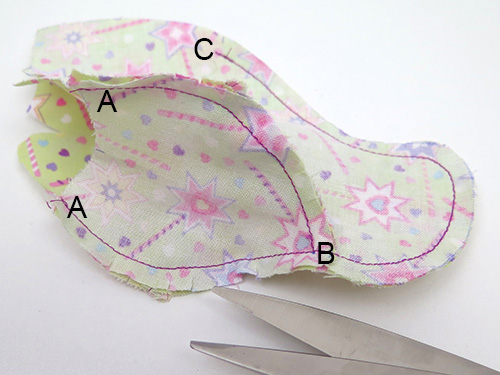
Sew the CHIN PIECE to one of the HEAD PIECES from A – B. Do not sew to the edge of the CHIN PIECE at B, stop at the dot pattern marking.
TIP: Use the CHIN SEWING DIAGRAM to guide you.
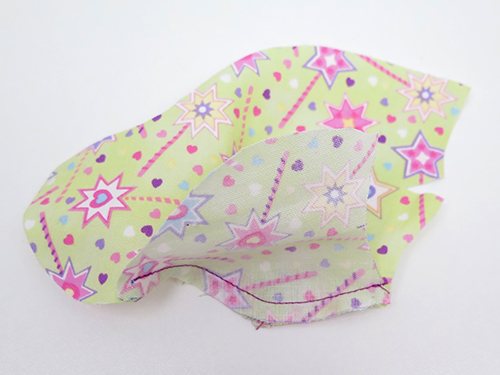
STEP 10a
Pin the other HEAD PIECE to the CHIN & HEAD PIECE and…
STEP 10b
…sew from A – B – C.
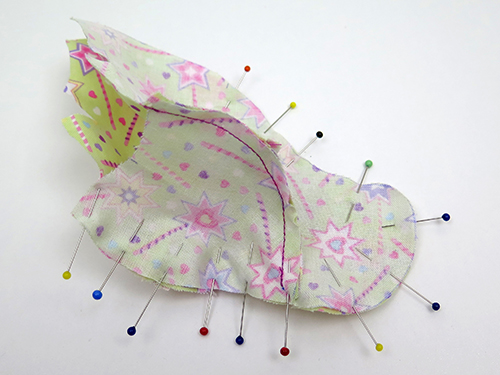
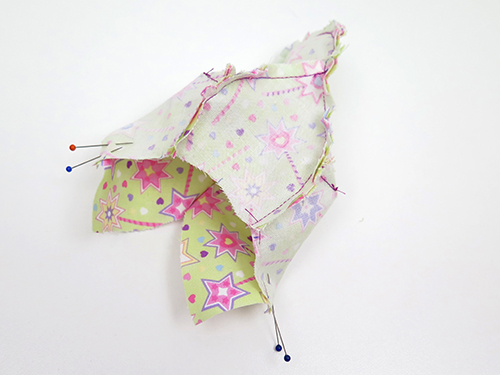
STEP 11
Fold and sew the side darts in the HEAD PIECES.
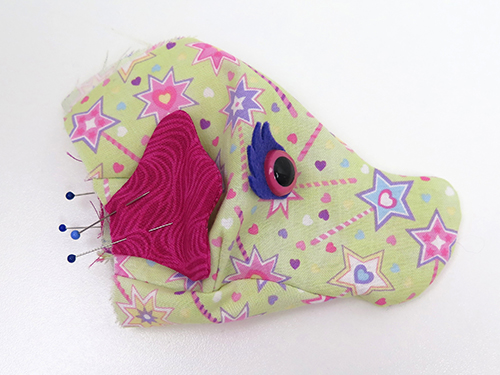
EYES:
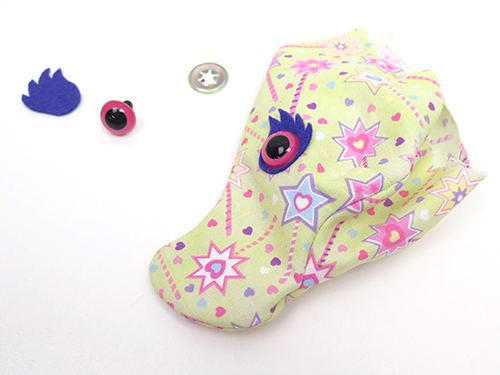
STEP 12
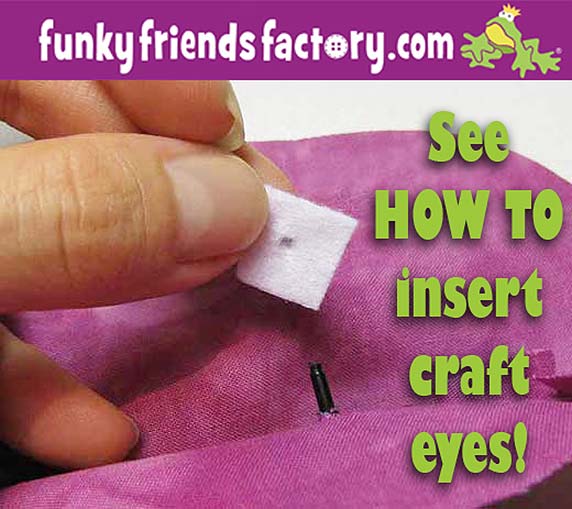
If you are using craft eyes insert them now. Cut the EYELASHES from felt and cut a cross in them so you can push the shaft of the craft eyes through the felt and the fabric.
* If you are embroidering the eyes, you will sew them after the toy is stuffed.
TIP: I have a photo tutorial for inserting craft eyes on my blog ~> https://www.funkyfriendsfactory.com/blog/safety-eyes-picture-tutorial-for-great-looking-peepers/
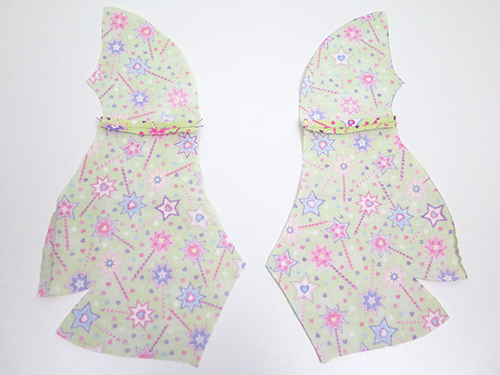
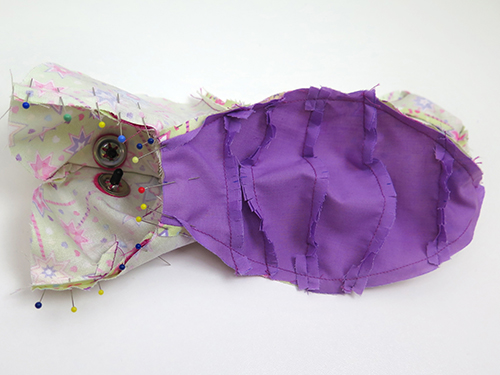
BODY:
STEP 13
Pin and sew the NECK PIECES to the BODY PIECES from D – E.
TIP: Check the pieces are sewn together correctly – it’s very easy to sew the NECK PIECES on backwards! If you have sewn them correctly they will look like the photo below.

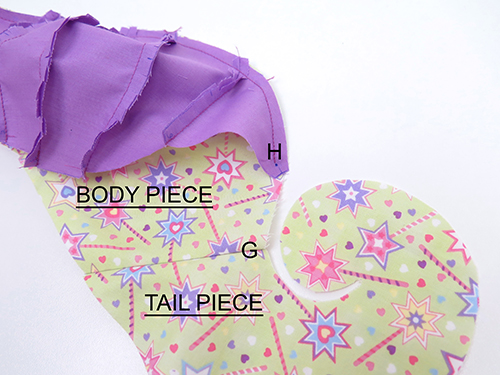
STEP 14
Sew the TAIL PIECES to the BODY PIECES from F – G.
STEP 15
Fold the fabric and sew the tummy dart in the BODY PIECES.
STEP 16a
Pin THE TUMMY to one NECK&BODY PIECE.
STEP 16b
Sew them together from A – H. Do not sew to the edge of the THE TUMMY, at H, stop at the dot pattern marking.

STEP 17
Sew the other NECK&BODY PIECE to the other side of THE TUMMY, sew from A – H.

STEP 18
Sew the BODY PIECES together from H – G.
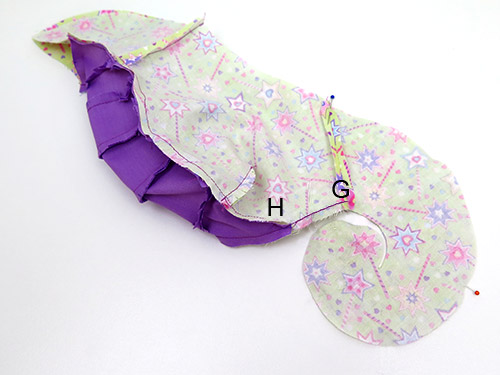
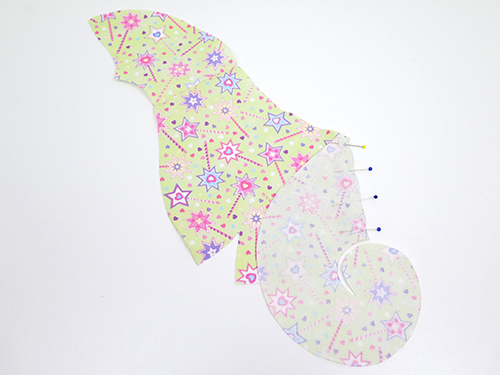
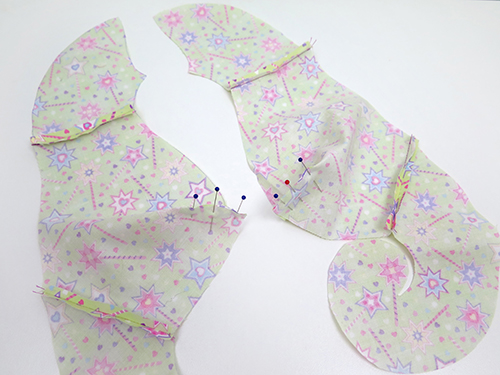
TAIL:
STEP 19
Sew the TAIL PIECES together. Sew from G around the ‘tip’ of the TAIL PIECES to F.
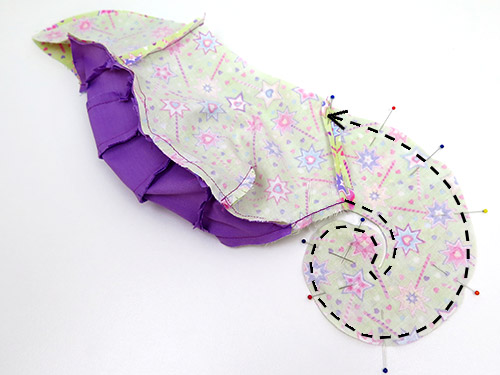
STEP 20
Clip the seams well especially around the sharp curves of the TAIL PIECES.
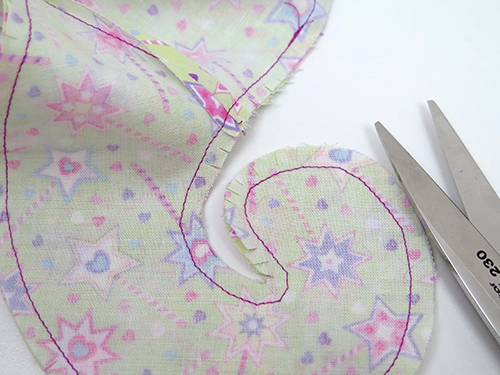
STEP 21
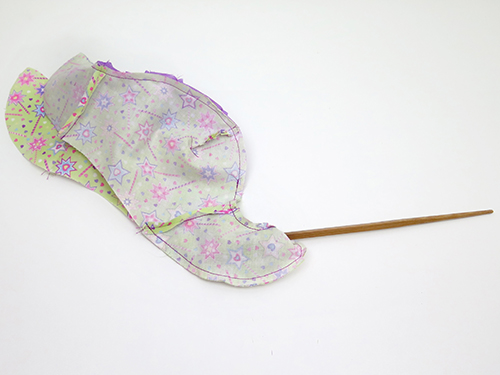
Turn the ‘tip’ of the TAIL right sides out by pushing it ‘inside’ the TAIL PIECES.
TIP: I like to stuff the ‘tip’ of the TAIL with toy stuffing now. This is because it is a lot easier to get the stuffing into the tip of the very curly tail NOW rather than trying to stuff it through the turning gap AFTER you have finished sewing the Seahorse!
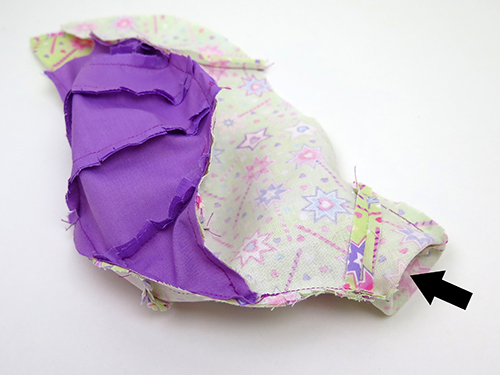
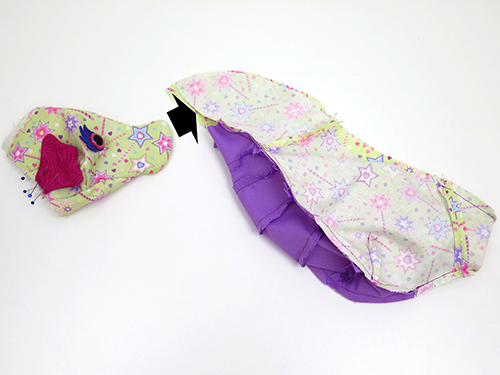
SEW HEAD TO BODY:
STEP 22
Pin the SIDE FINS in position on the HEAD PIECES using the pattern markings to guide you.
STEP 23
Sew the CHIN&HEAD PIECES to the TUMMY&NECK PIECES at the neck seam with the SIDE FINS sandwiched in between. Sew from J – A – I – A – J.
TIP: I find the easiest way to do this is to turn the head right sides out and place it, facing backwards, ‘inside’ the TUMMY&NECK PIECES.
STEP 24
Pin the HEAD FIN and BACK FIN in position, using the pattern markings to guide you.
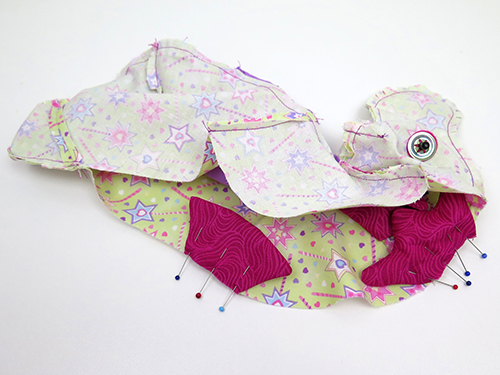
STEP 25
Sew the HEAD&NECK PIECES together at the back from C on the HEAD PIECES – K on the BODY PIECES with the HEAD FIN and BACK FIN sandwiched in between.
TIP: Don’t forget to leave the gap open for turning between K and F.
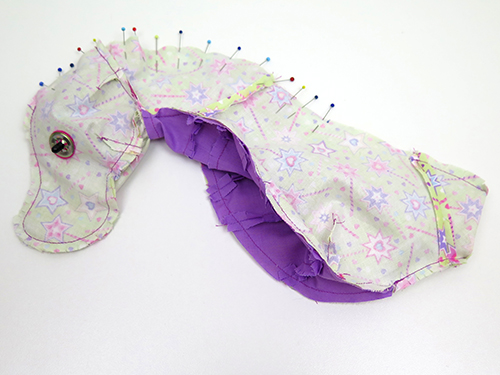
ASSEMBLY:
STEP 26
Turn the Sea Horse right sides out through the turning gap.
TIP: I use a chopstick to push the seams out nicely.
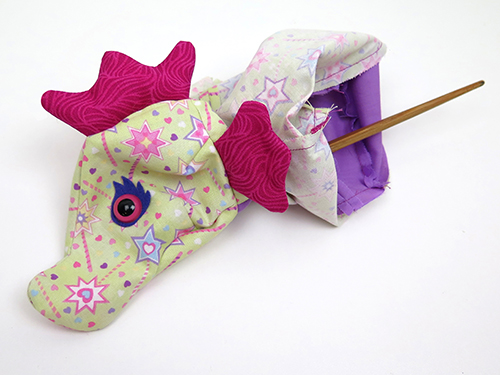
STEP 27
Stuff the HEAD area very firmly, especially the ‘nose’, then stuff the NECK. Stuff the rest of the TAIL and lastly stuff the BODY.
TIP: Stuff the HEAD and BODY firmly so your Sea Horse is nice and ‘curvy’! You may need to jiggle the toy stuffing to get the shape of your Sea Horse even on both sides.
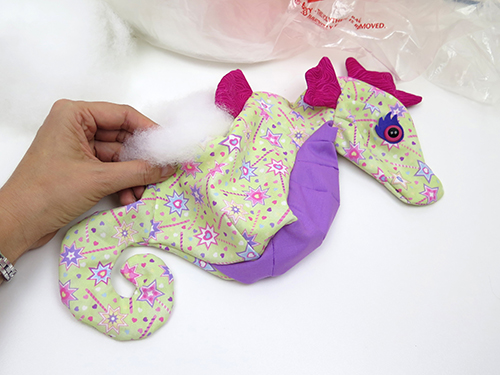
STEP 28
Sew the stuffing gap closed with a ladder stitch.

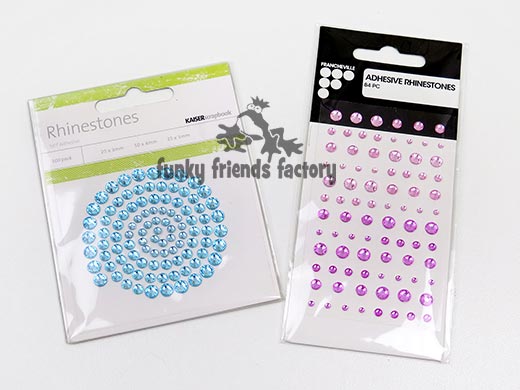
EMBELLISHMENT (Optional) :
STEP 29
When I think of Sea Horses I think of sparkly frilly fantasy creatures. Have fun adding extra details with lace, beads, ric rac, bobbles, sequins or rhinestones!
Your Sea Horse is ready to LOVE!
Come join the fun on Facebook!
![]()
I LOVE to see how your Funky Friends toys turn out!
When you’ve made your own stuffed toy Sea Horse you can come show it off ~>
Post a photo on my Funky Friends Factory Facebook page for me to see and YOU could win a FREE PATTERN!

Till next time,
Happy Sewing,
Pauline
