
I made this photo tutorial so you can see how to sew my Heather Sewing Pattern ~> scroll down for step-by-step photos!
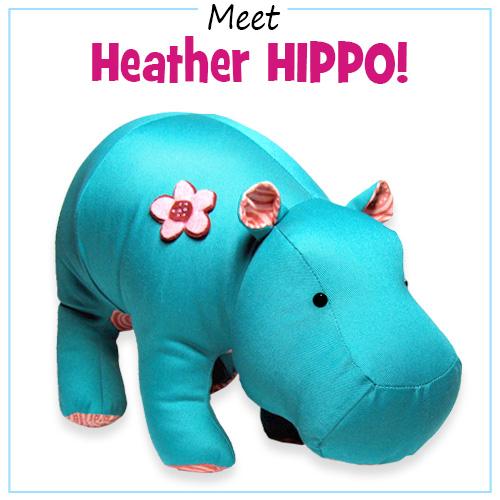
Heather Hippo is one of my most popular patterns – I think it’s because she looks AMAZING in ANY fabric, plus she’s super cuddly! 🙂
*** PLEASE NOTE – this in ONLY a PHOTO TUTORIAL ***
The FULL PATTERN IS NOTincluded here.
It is NOT A FREE PATTERN!
I have made this photo tutorial so people who have purchased my Hippo Sewing Pattern can SEE how to sew my hippo toy! (I wanted to explain this so you are not disappointed if you have found this page via a search engine and not from the link in my Heather HIPPO stuffed toy sewing pattern!)
OK, let’s get going with the TUTORIAL!
CUTTING OUT:
STEP 1
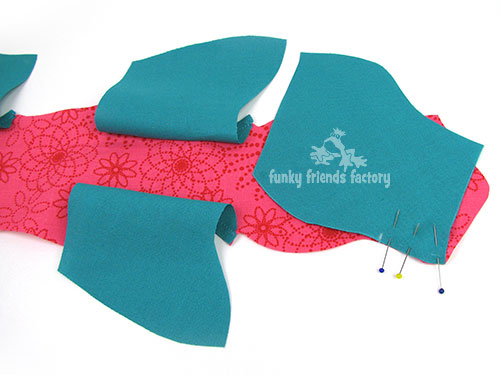
Choose fabrics for sewing your hippo toy pattern. For my hippo, I used a bright pink fabric for the TAIL, TUMMY FRONT, TUMMY BACK, FOOT PADS and 2 EAR PIECES. The rest of the pieces are cut from the main (turquoise-blue) fabric.

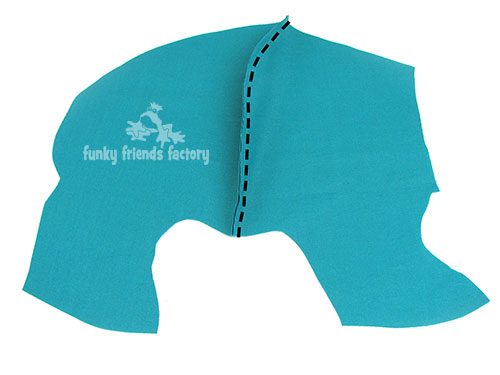
BODY:
STEP 2
Sew the FRONT and BACK BODY PIECES together from E-F.
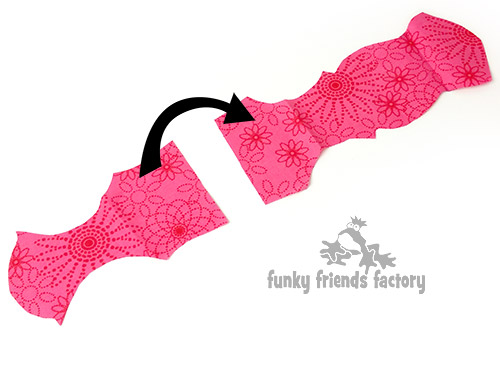
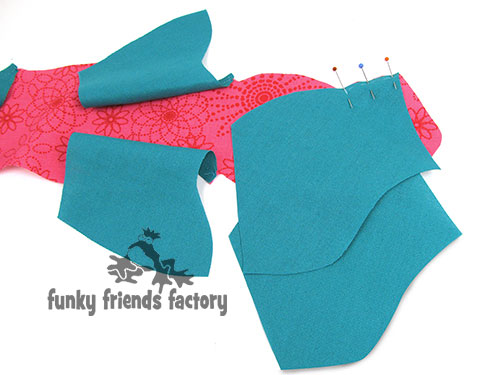
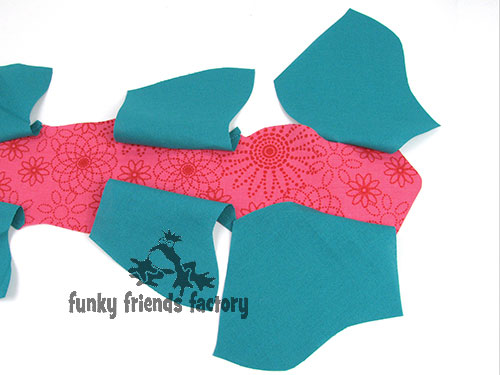
TUMMY, LEGS and TAIL:
STEP 3a
Pin the TUMMY FRONT and TUMMY BACK PIECE together, right sides facing.
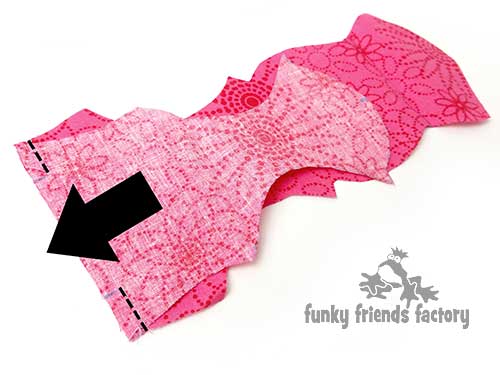
STEP 3b
Sew them together, leaving the gap open for turning and stuffing.
TIP: Finger press the seam open.

STEP 4a
Sew a FRONT LEG PIECE and a BACK LEG PIECE to the TUMMY PIECES from A-B and C-D (matching the dots of the patterns markings.)
STEP 4b
Repeat on the other side.

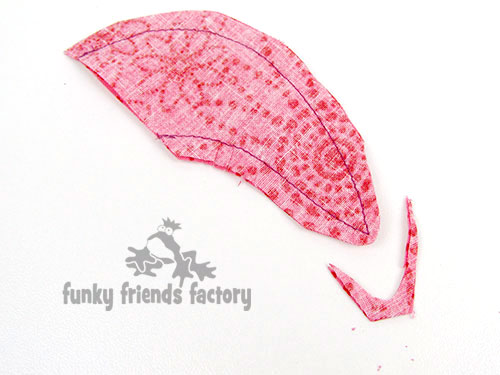
STEP 5a
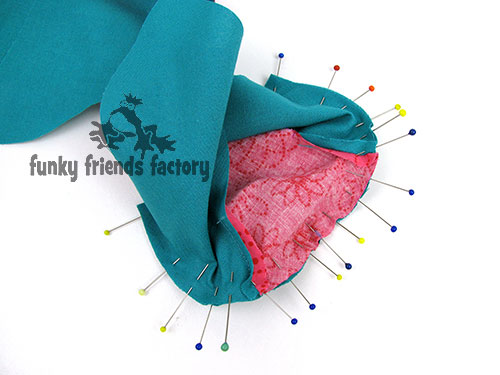
Sew the TAIL PIECES together .
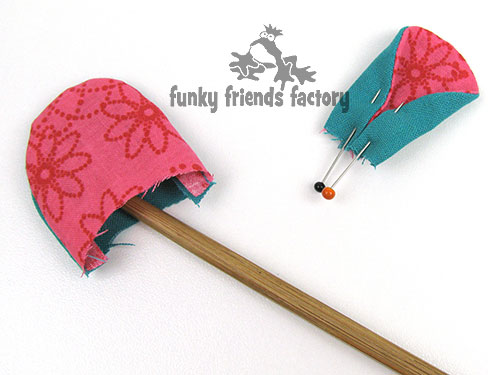
STEP 5b
Turn the TAIL right sides out. (I use a wooden chopstick for this!)
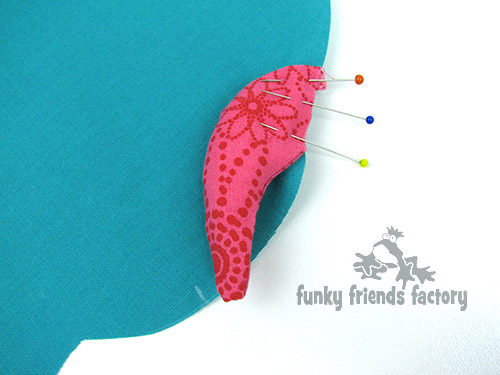
STEP 5c
Put a tiny bit of toy stuffing in the TAIL, (just so that it is not flat) and pin it in position on a BACK BODY PIECE. Baste in place.
STEP 6
Sew the BODY PIECES together from Q – N.
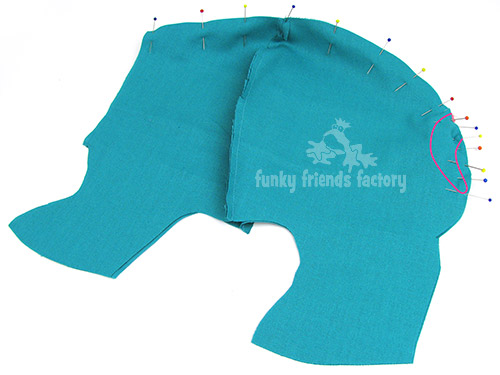
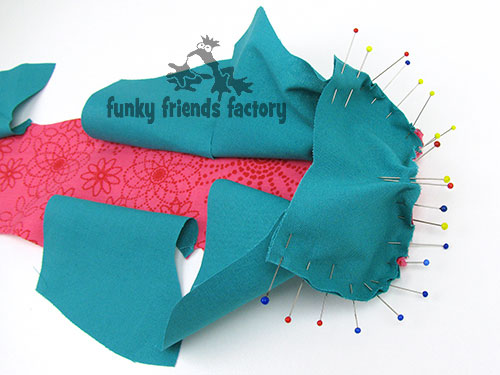
HEAD and SNOUT:
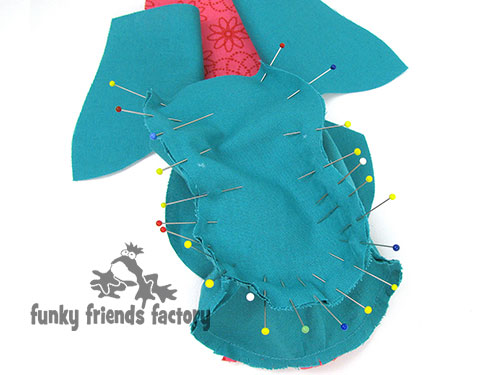
STEP 7a
Sew the SIDE HEAD PIECES to the TUMMY PIECE from G – H on one side first…
(NB*** Do NOT sew the whole seam!)
STEP 7b
… then the other side!
TIP: If you ‘open the pieces out it should look like this now-
STEP 8
Pin the SNOUT PIECE to the TUMMY & SIDE HEAD PIECES, matching point P. (It is important that this seam looks good as it is right at the front of your hippo’s snout! So take your time to pin this well.)
TIP: Turn the pieces over and sew with the SNOUT PIECE on the bottom so you can make sure the fabric doesn’t pucker as you sew.
STEP 9
Pin the HEAD GUSSET PIECE to the SNOUT & SIDE HEAD PIECES, matching point O.
TIP: Again, turn the pieces over. Sew with the HEAD GUSSET PIECE on the bottom so you can make sure the fabric doesn’t wrinkle as you sew.
STEP 10
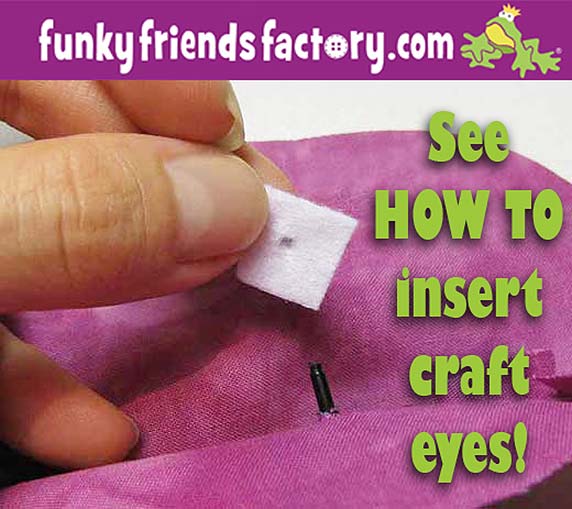
If you are using safety eyes insert these now. You’ll see from this photo tutorial that I only inserted the craft eyes once I had finished sewing my hippo BUT it is much harder… so do it now!!!!!
TIP: I have a tutorial to show you how to insert craft eyes on my blog. Click the picture below to check it out!
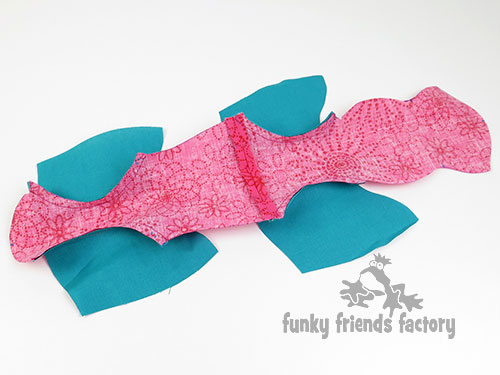
EARS:
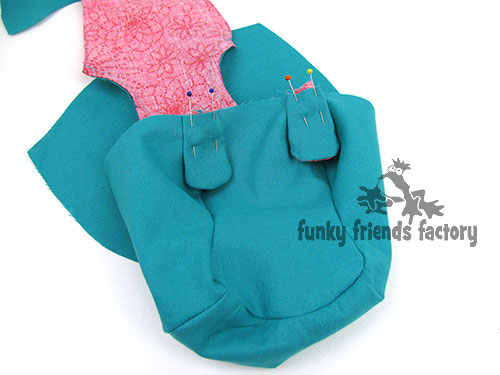
STEP 11a
Sew the EAR PIECES together and turn right sides out.
STEP 11b
Fold the open edge of the EARS into the centre and tack them in this position. This will stop them from slipping when you sew them in place.

STEP 12
Place the ears in position, the fold of the ear must line up with the seam joining the HEAD GUSSET and SIDE HEAD PIECE on each side. Baste/tack them in place.
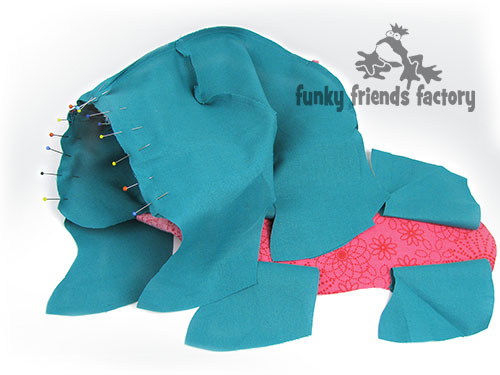
HEAD, BODY and TUMMY:
STEP 13
Sew the HEAD and HEAD GUSSET PIECE to the BODY PIECES at the neck seam, from R – Q – R.
TIP: I find the easiest way to do this is to turn the head right sides out and position it facing into the body.
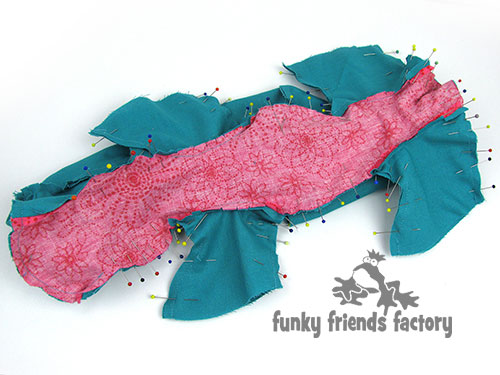
STEP 14
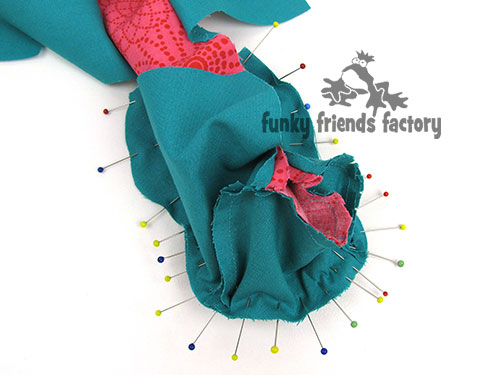
Pin the TUMMY PIECE in place, matching up the legs and point N at the tail end.
STEP 15a
Sew the back legs closed from M – N on one side first. (See the white arrow in the photo below)
STEP 15b
Then sew from M- N on the other side. (Again, see the white arrow in the photo below)
STEP 16
Sew the side seams from K – L . (See the white arrows in the photo below)
STEP 17
Sew up the front leg, along the side of the head to point G on both sides.
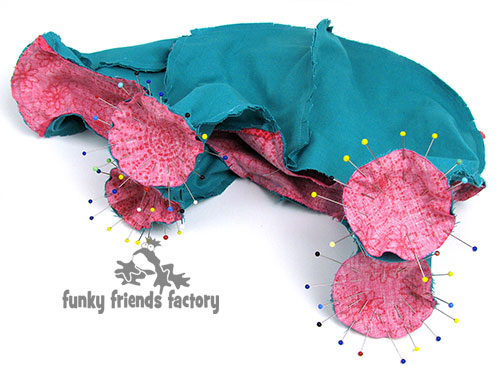
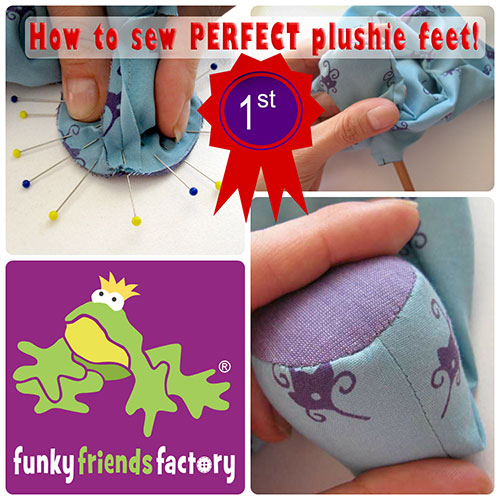
FOOT PADS:
STEP 18
Pin and sew a FOOT PAD to the bottom of each leg, matching the markings on the FOOT PAD with the front and back seams on the leg.
TIP: I have a tutorial to show you how to sew the footpads in place. Click the picture below to check it out!
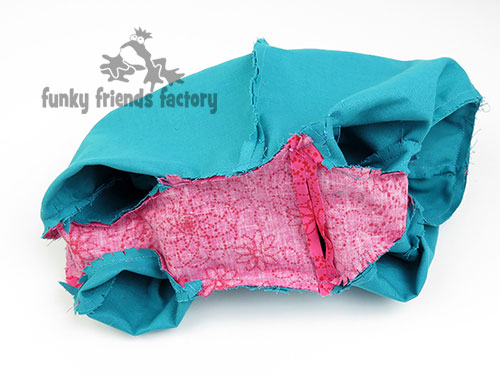
ASSEMBLY
STEP 19
Clip the rest of the seams before you turn your hippo right side out. Push the legs and head into the body cavity and then push them out through the stuffing gap.
STEP 19
like I said, I inserted the craft eyes now, but it is MUCH easier if you do it at STEP 10 – when you are sewing up the head!
I hope you did it then? 🙂
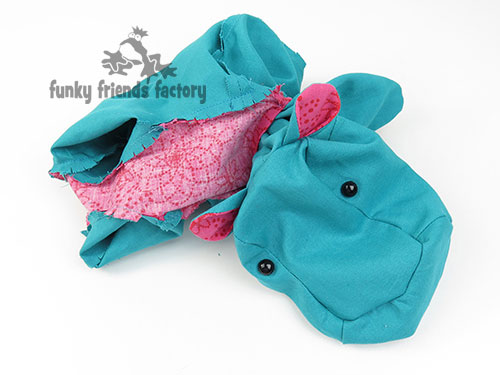
STEP 20
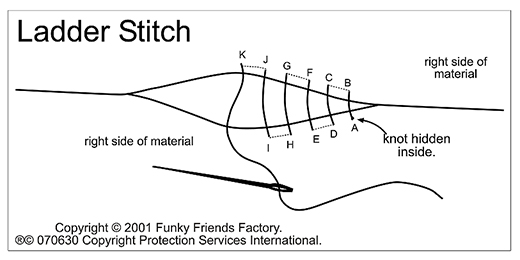
Stuff the head and legs quite firmly with toy stuffing. Fill the rest of the body until there are no puckers in the fabric. Sew up the gap on the tummy with a ladder stitch.
STEP 21
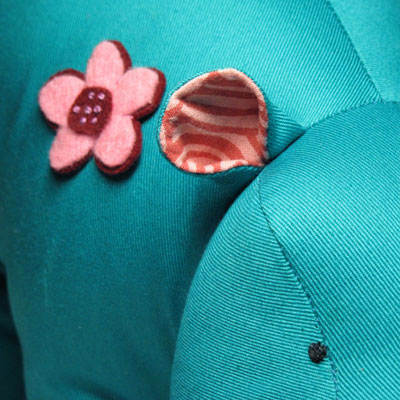
Cut out the flower parts from felt and sew these onto you hippo. If you are embroidering the eyes, sew the eyes on now with black embroidery thread.
STEP 22
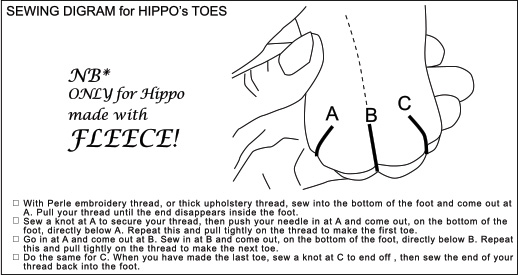
If you have made your Hippo from a stretchy fabric like fleece, you can also create some cute little toes with some embroidery thread – follow the sewing diagram instructions in your pattern (It’s clearer than this web-sized image!).
Your Hippo is ready to LOVE!
Come join the fun on Facebook!
![]()
I LOVE to see how your Funky Friends toys turn out!
When you’ve made your own stuffed toy Hippo ~>
Post a photo on my Funky Friends Factory Facebook page for me to see and YOU could win a FREE PATTERN!

Till next time,
Happy Sewing,
Pauline
